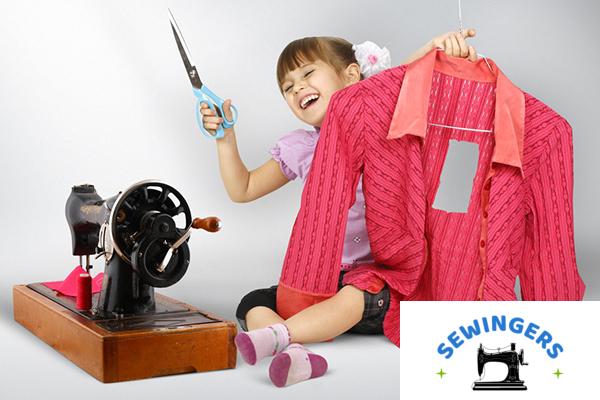
A funny thing happens when fabric scraps, colorful thread, and a child’s attention span land on the same kitchen table. The room gets quieter. Not perfectly quiet, obviously. Scissors still clatter. Someone still drops stuffing on the floor. But the frantic screen-switching slows down for a while, and that shift feels noticeable in a house full of notifications.
Sewing gives kids something rare now: visible progress. One stitch becomes ten. Flat fabric slowly turns into something useful. According to the American Academy of Pediatrics, hands-on creative activities support focus, emotional regulation, and problem-solving skills in children.[1] Sewing happens to combine all three without feeling like homework.
The budget side surprises many families too. Most beginner sewing projects for kids cost under $20 in supplies when shopping at stores like Joann, Michaels, or Hobby Lobby. Felt sheets cost roughly $0.50 to $1 each. Cotton fabric bundles often go on sale for under $10. Even beginner sewing kits stay affordable compared to many sports or gaming hobbies.
And honestly, sewing adapts well to real American family schedules. Rainy Saturdays. Summer camp afternoons. Homeschool enrichment blocks. Winter breaks when boredom starts showing up by day two.
The projects below work because they stay simple enough for beginners while still feeling “real.” Kids don’t want practice pieces forever. They want things they can actually use.
Contents
- 1 1. Felt Animal Plushies (No-Stress Starter Project)
- 2 2. DIY Pillowcase for Bedroom Makeovers
- 3 3. Simple Drawstring Backpack for School or Camp
- 4 4. Handmade Scrunchies (Fast and Trendy)
- 5 5. Holiday-Themed Fabric Bunting
- 6 6. Safety Tips for Sewing with Kids
- 7 7. Best Beginner Sewing Supplies for Kids (Under $50 Budget)
- 8 8. How Sewing Builds Life Skills in Children
- 9 9. Tips for Making Sewing Fun and Stress-Free
- 10 Conclusion
1. Felt Animal Plushies (No-Stress Starter Project)
Felt plushies tend to become the gateway project. Not because they’re trendy, although they definitely cycle through classrooms every few years, but because felt behaves nicely for beginners. It doesn’t fray. It stays soft. And slightly crooked stitching somehow makes stuffed animals look even more charming.
Cats, dogs, owls, dinosaurs, tiny farm animals — almost anything works.
What Kids Learn
Kids usually practice:
- Running stitch
- Basic knot tying
- Stuffing evenly
- Following simple shapes
- Hand-eye coordination
Blunt needles and embroidery floss keep things manageable for ages 6–10. In practice, younger kids often lose patience around minute twelve, especially during threading. Older kids usually start adding strange little details like felt sunglasses or superhero capes. That creativity spiral becomes part of the fun.
A common mistake shows up with overstuffing. Plushies can turn rock-hard surprisingly fast. Softer stuffing tends to create better shapes, even if the animal ends up slightly lopsided.
Supplies Needed
| Supply | Average Cost | Notes |
|---|---|---|
| Felt sheets | $5–$8 | Acrylic felt works fine for beginners |
| Embroidery floss | $3–$5 | Bright colors keep kids engaged |
| Blunt needles | $2–$4 | Easier and safer for small hands |
| Polyester stuffing | $4–$6 | One bag lasts multiple projects |
That low-pressure setup matters more than many adults expect. Kids often stop worrying about perfection when the material itself feels forgiving.
2. DIY Pillowcase for Bedroom Makeovers
Pillowcases hit a sweet spot between useful and exciting. Kids finish one and immediately want to put it on a bed, couch, or reading nook. There’s instant payoff there.
One yard of cotton fabric usually handles a standard pillowcase, and the fabric selection becomes half the entertainment. Space prints. Baseball themes. Retro cartoons. Fourth of July stars. Bright floral patterns that somehow clash with everything else in the room. All fair game.
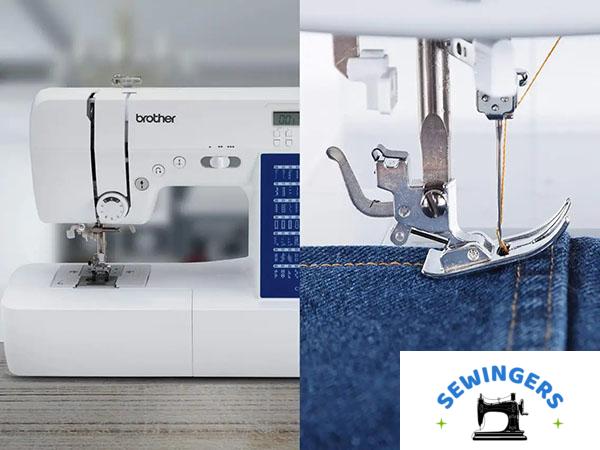
Now here’s the interesting part: sewing straight seams on a machine teaches patience in a very visible way. A beginner Singer or Brother machine tends to feel intimidating for about ten minutes. Then kids realize the machine isn’t magic. It’s rhythm.
Why Pillowcases Work So Well
You get:
- Straight-line sewing practice
- Familiar rectangular shapes
- Fast results
- A functional finished project
- Easy customization
Kids also start noticing details adults ignore. Matching seams suddenly matter. Pattern direction matters. One backward dinosaur print can become a surprisingly serious conversation.
Sleepovers and birthday gifts make pillowcases more meaningful too. Handmade projects feel different when they leave the house and get used somewhere else.
3. Simple Drawstring Backpack for School or Camp
Drawstring backpacks sit in that practical category kids appreciate more than expected. Unlike decorative crafts that disappear into closets, these bags actually get carried around.
Library books. Soccer cleats. Camp sunscreen. Random collections of tiny objects that children insist are important.
The construction stays beginner-friendly because the shape remains basic. Most versions only require straight seams and a casing for the cord. Even slightly uneven stitching still works structurally, which lowers frustration quite a bit.
Where These Bags Really Shine
A drawstring backpack works well for:
- Summer camps
- Dance practice
- Overnight visits
- School activity kits
- Pool days
Customization changes everything here. Iron-on patches, fabric markers, and decorative trim give kids ownership over the final result. One plain canvas bag suddenly becomes “the shark bag” or “the galaxy camp bag.”
That emotional attachment often keeps kids sewing longer.
Quick Comparison of the First Three Projects
| Project | Skill Level | Time Needed | Best Age Range | Personal Observation |
|---|---|---|---|---|
| Felt Plushies | Beginner | 30–60 minutes | 6–10 | Kids stay engaged because mistakes look cute |
| Pillowcase | Beginner-Mid | 45–90 minutes | 8–12 | Fabric choices become surprisingly emotional |
| Drawstring Backpack | Mid-Beginner | 60–120 minutes | 9–13 | Practical projects usually hold attention longer |
The backpack project does require a little more patience. String casings can frustrate beginners at first because fabric bunches unpredictably. Still, once the cord slides through correctly, kids tend to react like the project performed a magic trick.
4. Handmade Scrunchies (Fast and Trendy)
Scrunchies refuse to disappear completely. Trends fade. Then they circle back around again.
This project works especially well for tweens and teens because the turnaround is fast. Most scrunchies finish in under 30 minutes, and fabric scraps finally become useful instead of clutter.
Elastic threading introduces a new skill without overwhelming beginners. The project feels small enough to experiment with, which matters because experimentation often disappears when projects take too long.
Why Scrunchies Keep Winning
Several things make scrunchies beginner-friendly:
- Minimal fabric required
- Quick completion time
- Wearable results
- Endless fabric combinations
- Low material cost
School craft fairs also changed the popularity of this project. Handmade scrunchies regularly sell for $2–$5 each at local events, especially around holidays or spirit weeks.
And honestly, kids notice that immediately.
One slightly awkward reality shows up here though: turning the fabric tube right-side out frustrates almost everyone the first few attempts. Safety pins help. Patience helps more.
5. Holiday-Themed Fabric Bunting
Holiday bunting feels old-fashioned in the best possible way. Triangles sewn into a long strand somehow make every space feel more festive, even when the sewing itself stays pretty simple.
Halloween prints. Thanksgiving plaids. Fourth of July stars. Seasonal fabric sections at Michaels and Hobby Lobby practically exist for projects like this.
Kids learn measuring and cutting skills naturally during bunting projects because repetition builds confidence. One triangle becomes twelve. Then spacing starts to matter. Alignment starts to matter too, although perfection rarely survives family crafting sessions.
Best Uses for Fabric Bunting
Kids often create bunting for:
- Classroom decorations
- Birthday parties
- Front porches
- Holiday dinners
- Bedroom walls
The collaborative aspect changes the energy here. One child cuts triangles while another chooses patterns or pins pieces together. Families end up working assembly-line style without planning to.
That shared process matters more than flawless stitching.
6. Safety Tips for Sewing with Kids
Sewing safety tends to sound overly dramatic until someone steps on a pin barefoot. Then the magnetic pin holder suddenly becomes everyone’s favorite tool.
Child-safe scissors and blunt needles reduce most beginner risks. Sewing machines need closer supervision because fingers naturally drift too close to moving needles when excitement kicks in.
Safety Habits That Actually Stick
These habits usually work well:
- Store pins immediately after use
- Keep cords organized
- Use finger guards when possible
- Turn machines off between steps
- Create one designated sewing space
What tends to happen with beginners is simple: confidence rises faster than coordination. Kids start feeling skilled before muscle memory fully catches up. Slowing down helps, although slowing down rarely sounds exciting to energetic children.
7. Best Beginner Sewing Supplies for Kids (Under $50 Budget)
A starter sewing setup doesn’t need professional-grade equipment. In fact, expensive supplies sometimes create unnecessary pressure.
Most beginner projects work perfectly fine with basic materials.
Affordable Starter Kit
| Item | Average Price |
|---|---|
| Basic sewing kit | $10–$15 |
| Cotton fabric bundle | $8–$12 |
| Felt sheets | $5–$8 |
| Embroidery floss pack | $4–$6 |
| Beginner sewing machine | $35–$60 |
Total startup costs often land between $50–$75 depending on machine selection. Entry-level Singer and Brother models dominate beginner recommendations because replacement parts and tutorials stay easy to find.
Some families skip the machine entirely at first. Hand sewing still teaches coordination, patience, and construction skills effectively.
8. How Sewing Builds Life Skills in Children
Sewing looks simple from the outside. Fabric goes together. Something useful appears. But underneath that process, kids quietly practice skills connected to long-term development.
Research from the National Endowment for the Arts links hands-on creative activities with improved problem-solving and persistence in children.[2]
The interesting part is how naturally those lessons show up.
Skills Sewing Develops
Kids gradually improve:
- Fine motor control
- Spatial reasoning
- Measurement accuracy
- Pattern recognition
- Independent decision-making
Pattern reading also introduces practical STEM concepts. Measurements stop feeling abstract once incorrect cutting changes the final shape of a project. Fractions suddenly matter when seam allowances get ignored.
And then there’s confidence. Not motivational-poster confidence. Real confidence tied to finishing something tangible after struggling through parts of it.
That process can feel messy. Thread tangles. Needles unthread themselves at the worst possible moment. Fabric slips sideways unexpectedly. But those little frustrations teach adaptation in ways perfectly polished activities often don’t.
9. Tips for Making Sewing Fun and Stress-Free
The atmosphere around sewing matters almost as much as the project itself. Kids usually remember tension longer than technical details.
Short projects tend to work better at first. Long sessions can drift into frustration once energy drops. Even enthusiastic beginners eventually hit a point where every knot feels personal.
Small Adjustments That Help
A few things consistently improve the experience:
- Let kids choose fabrics independently
- Play music during sewing sessions
- Keep snacks nearby
- Display finished projects at home
- Accept uneven stitching early on
Fabric choice becomes surprisingly important. Kids connect more deeply with projects that reflect their own interests instead of adult-approved aesthetics.
Perfection also loses importance once projects become functional. A crooked scrunchie still works. A slightly uneven pillowcase still gets used. That realization usually arrives slowly.
And honestly, that’s probably part of why sewing sticks with families for years. It leaves room for imperfection while still producing something real.
Conclusion
Easy sewing projects for kids create more than crafts. They create little pockets of concentration inside busy households. Felt plushies teach patience. Pillowcases introduce machine sewing. Drawstring backpacks blend creativity with usefulness. Scrunchies deliver quick wins. Holiday bunting turns ordinary fabric into shared family decoration.
Most importantly, sewing gives kids visible proof that effort changes materials into something meaningful. That transformation still feels satisfying, even after uneven seams, tangled thread, and the occasional upside-down fabric panel.
The projects don’t need to look store-bought. Most of the memorable ones never do.
Sources
[1] American Academy of Pediatrics – Creative Play and Child Development[2] National Endowment for the Arts – Arts Participation and Cognitive Development