Kitchen tables tend to collect little signs of daily life. Coffee rings. Hot casserole dishes. Crumbs from rushed weekday breakfasts. A handmade placemat and coaster set changes the mood of that space faster than most people expect, even when the project itself stays simple and inexpensive.
Beginner sewing projects often look intimidating online because tutorials pile on quilting jargon and expensive tools. In practice, this one stays approachable. Straight seams, basic measuring, and a few careful passes under the needle usually get the job done. The finished set feels practical instead of decorative-only, which matters in homes where table linens actually get washed, folded, and reused instead of displayed untouched.
Across the United States, handmade table décor continues gaining traction alongside farmhouse style, minimalist interiors, and seasonal tablescapes inspired by retailers like Target and Magnolia. According to the Craft Industry Alliance, sewing and quilting remain among the most active DIY craft categories in North America [1]. That trend shows up clearly around holidays such as Thanksgiving and Christmas, when fabric placemats suddenly appear everywhere from Etsy shops to local craft fairs.
This project gives you usable home décor while building sewing confidence at the same time.
Contents
- 1 Why Sew Your Own Placemat and Coaster Set?
- 2 Tools and Materials You’ll Need
- 3 Choosing the Right Fabric for American Homes
- 4 Measuring and Cutting Your Fabric
- 5 Sewing the Placemat: Step-by-Step
- 6 Sewing the Coasters: Step-by-Step
- 7 Finishing Touches and Decorative Options
- 8 Care and Maintenance
- 9 Cost Breakdown (USD)
- 10 Scaling Up: Selling or Gifting Your Set
- 11 Conclusion
- 12 Sources
Why Sew Your Own Placemat and Coaster Set?
Store-bought table linen sets in the U.S. commonly range from $15 to $40 USD for mid-quality options. Handmade versions often cost less while offering better fabric choices and stronger stitching.
More importantly, custom sewing solves a problem mass-produced décor rarely handles well: coordination. Seasonal kitchens shift constantly. Neutral farmhouse tones dominate during winter, patriotic reds and blues appear in July, and warm plaid prints take over in autumn. Sewing your own set lets those changes happen without spending department-store prices every season.
A few practical advantages stand out quickly:
- Leftover quilting cotton finds a purpose instead of sitting in storage bins.
- Seasonal prints become easier to rotate throughout the year.
- Cotton placemats wash more reliably than many imported synthetic sets.
- Handmade coasters reduce disposable napkin and paper towel use.
- Gift sets feel more thoughtful because fabrics can match specific homes.
Interestingly, beginner sewists often underestimate how polished simple rectangles can look. Crisp corners and coordinated thread create that “boutique craft fair” appearance surprisingly fast. Slight imperfections even help sometimes. Handmade items with tiny variations usually feel warmer than factory-perfect versions.
For holiday entertaining, placemats also create visual structure on crowded tables. That detail matters during Thanksgiving dinners where serving dishes compete for space and everything starts looking chaotic by the second helping.
Tools and Materials You’ll Need
Most supplies appear in major U.S. craft chains such as JOANN, Hobby Lobby, Michaels, or Walmart.
Materials
- 100% cotton fabric
- Cotton batting or insulated batting
- Coordinating thread
- Pins or sewing clips
Fat quarters work especially well because they already come pre-cut for smaller sewing projects. A single bundle can produce several coaster sets without much waste.
Tools
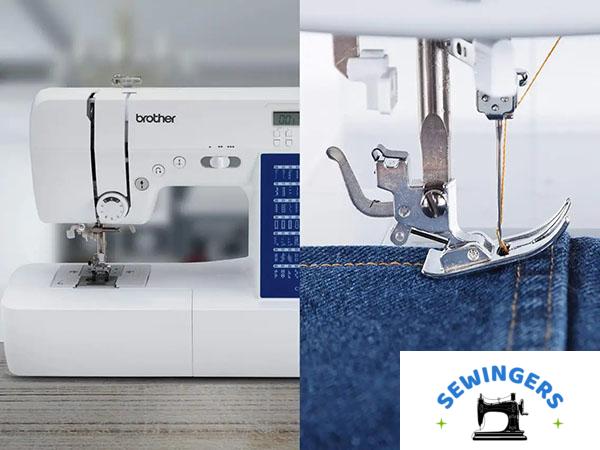
- Sewing machine such as a Singer Heavy Duty
- Fabric scissors such as Fiskars
- Rotary cutter
- Self-healing cutting mat
- Iron and ironing board
- Acrylic quilting ruler with inch markings
Rotary cutters tend to intimidate beginners at first. Then something clicks. Fabric suddenly cuts cleaner, straighter, and faster than scissors alone. The difference becomes obvious around long placemat edges where uneven cutting shows immediately after stitching.
Standard Measurements
| Item | Standard U.S. Size | Best Use |
|---|---|---|
| Placemat | 12” x 18” | Everyday dining tables |
| Coaster | 4” x 4” | Coffee mugs and glasses |
The 12” x 18” size remains common because it fits most American dinner plates comfortably without crowding centerpieces or serving bowls.
Choosing the Right Fabric for American Homes
Fabric choice changes both the appearance and lifespan of the finished set. Thin novelty fabric may look cute on the shelf, but repeated washing exposes weak printing and loose weave surprisingly fast.
Quilting cotton remains the easiest option for beginners because it presses neatly and feeds smoothly through standard sewing machines. Canvas creates more durability, although thicker layers occasionally shift during sewing if pins are spaced too far apart.
Popular choices in American homes include:
- Plaid flannel-inspired prints for fall
- Pumpkin and leaf motifs for Thanksgiving
- Red, white, and blue combinations for Fourth of July
- Neutral beige and cream farmhouse palettes
- Minimal black-and-white geometric patterns
Pre-washing fabric matters more than many beginners realize. Cotton shrinks. Sometimes noticeably. A placemat that starts perfectly rectangular can end up slightly warped after the first wash if the fabric wasn’t prepared beforehand.
That issue appears often with darker fabrics, especially deep reds and navy prints around holiday collections. Color bleeding happens occasionally too, and discovering that after sewing usually feels frustrating in a very specific way.
Measuring and Cutting Your Fabric
This stage looks boring until uneven pieces create mismatched corners later. Then precision suddenly becomes very interesting.
For each placemat, cut:
- 2 fabric pieces measuring 12” x 18”
- 1 batting piece measuring 12” x 18”
For each coaster, cut:
- 2 fabric pieces measuring 4” x 4”
- 1 batting piece measuring 4” x 4”
Acrylic quilting rulers help maintain straight edges because inch markings stay visible through the plastic. Combined with a rotary cutter, the process becomes much more accurate than freehand cutting with scissors.
Keep seam allowances around ½ inch, which aligns with many U.S. sewing patterns and beginner tutorials.
One small detail tends to improve results dramatically: pressing fabric before cutting. Wrinkled fabric shifts measurements slightly, and those tiny inconsistencies multiply across multiple pieces. Suddenly one placemat ends up wider than the others by nearly half an inch. Not catastrophic. Just annoying enough to notice forever afterward.
Sewing the Placemat: Step-by-Step
At this point, the project starts feeling like actual sewing instead of preparation.
Step 1: Layer the Fabric
Place the two fabric pieces right sides together. Lay batting on top.
This sandwich-style arrangement feels backward initially because the pretty sides disappear inside. Once turned later, the logic makes sense immediately.
Step 2: Secure the Layers
Use pins or sewing clips around all edges.
Clips work especially well with thicker canvas fabrics because they reduce shifting without distorting layers. Pins remain perfectly fine for quilting cotton though, particularly on beginner projects where slower pacing helps accuracy.
Step 3: Sew Around the Edges
Sew around the perimeter using a ½-inch seam allowance.
Leave a 3-inch opening along one side for turning. Most people forget this opening exactly once. After that mistake, it rarely happens again.
Straight stitching matters more than sewing speed here. Fast stitching often creates drifting seam allowances, especially around corners.
Step 4: Trim the Corners
Clip excess fabric near each corner without cutting through the stitches.
This reduces bulk after turning and creates sharper edges. Thick, rounded corners tend to make handmade placemats look unfinished even when the stitching itself looks solid.
Step 5: Turn and Press
Turn the placemat right side out through the opening.
Use a blunt tool, chopstick, or turning tool to gently push corners outward. Then press everything flat with an iron.
Pressing changes the entire appearance of the project. Wrinkled seams suddenly sharpen into clean lines, and the placemat starts resembling something professionally sewn instead of homemade in the chaotic sense of the word.
Step 6: Topstitch the Edge
Topstitch around the entire placemat close to the edge.
This closes the turning gap while reinforcing the shape. Topstitching also adds structure after repeated washing, which becomes important for everyday use.
Key sewing skills developed during this process include:
- Straight stitching
- Pivoting corners
- Managing seam allowances
- Basic topstitching
- Fabric pressing techniques
Sewing the Coasters: Step-by-Step
Coasters follow the same overall method, just scaled down.
That smaller size sounds easier initially. Oddly enough, tiny projects sometimes feel fussier because corners arrive faster and seam allowances leave less room for error.
Assemble the Layers
Stack fabric pieces right sides together with batting on top.
Pin or clip securely.
Sew Around the Edges
Sew using the same ½-inch seam allowance while leaving a small turning gap.
Because coasters are compact, sewing slowly around corners helps maintain symmetry.
Turn and Press
Turn each coaster right side out and press thoroughly.
A good press matters even more here because tiny wrinkles become visually obvious on smaller pieces.
Finish with Topstitching
Topstitch around the edge to close the opening.
For added durability, sew a large “X” across the center. This stabilizes batting layers during washing and prevents bunching over time.
That stitched “X” detail also creates a slightly rustic farmhouse look that pairs nicely with neutral cotton fabrics and seasonal tablescapes.
Finishing Touches and Decorative Options
Simple projects leave room for experimentation without much financial risk. That’s part of the appeal.
Several decorative upgrades work well:
- Contrasting topstitching
- Quilted grid lines
- Binding trim
- Embroidered initials
- Decorative edge stitching
Neutral thread colors usually sell better on platforms like Etsy because buyers prefer versatile décor. Seasonal fabrics with subtle stitching also tend to age better stylistically than overly themed prints.
Decorative Style Comparison
| Style Option | Visual Effect | Difficulty Level | Best Fit |
|---|---|---|---|
| Contrasting thread | Bold and modern | Easy | Minimalist kitchens |
| Quilted grid pattern | Textured and structured | Moderate | Farmhouse décor |
| Binding trim | Tailored appearance | Moderate | Gift sets |
| Embroidered initials | Personalized detail | Moderate | Weddings and holidays |
Binding trim often looks intimidating in tutorials, but the finished edge creates that “store-bought in a good way” appearance many sewists chase after a few projects.
Care and Maintenance
Cotton placemats hold up well under regular use when stitching stays reinforced around edges.
Machine wash cold and tumble dry low. Steam pressing afterward helps restore crispness, especially after storage between holiday seasons.
Insulated batting works well beneath hot dishes or coffee mugs because it adds light heat resistance. Regular cotton batting still performs fine for most daily meals, though heavier heat exposure gradually softens the structure.
One practical reality shows up after several months of use: lighter fabrics reveal stains faster than expected. Cream-colored farmhouse palettes look beautiful on dining tables but demand more frequent washing than darker prints.
Cost Breakdown (USD)
A standard four-person set remains relatively affordable compared to retail alternatives.
| Material | Estimated Cost |
|---|---|
| Fabric | $15–$25 USD |
| Batting | $8–$15 USD |
| Thread | $3–$5 USD |
Total Estimated Cost
Approximately $26–$45 USD for four placemats and four coasters.
Comparable handmade-style sets sold through boutiques and home décor retailers frequently exceed those prices, especially during holiday seasons.
According to Etsy marketplace trends, customized table linens continue performing strongly within farmhouse and minimalist home categories [2]. Seasonal collections often command higher prices due to limited-time demand.
Scaling Up: Selling or Gifting Your Set
This project adapts surprisingly well into small-scale production because construction stays repetitive and material costs remain manageable.
Popular bundle ideas include:
- Thanksgiving hostess gifts
- Wedding table sets
- Baby shower brunch collections
- Christmas kitchen décor bundles
Custom color requests also perform well in local craft markets because buyers often struggle finding exact shades in retail stores.
Pricing handmade linens becomes complicated quickly, though. Fabric costs are easy to calculate. Time is harder. Straight seams still require measuring, pressing, trimming, and packaging. Many beginner sellers discover that labor consumes far more time than expected once multiple sets enter production.
Farmhouse neutrals, muted seasonal palettes, and minimalist geometric prints currently dominate many American handmade marketplaces. Loud novelty fabrics still sell, just usually in shorter seasonal bursts rather than year-round.
Conclusion
A simple placemat and coaster set delivers more than beginner sewing practice. The project introduces measuring accuracy, seam consistency, pressing techniques, and finishing details in a format that feels useful immediately afterward.
That usefulness matters. Handmade projects tend to stick longer when they become part of everyday routines instead of decorative storage-bin experiments. A cotton placemat under a weeknight dinner probably won’t look perfect forever. Slight fading appears eventually. Corners soften after repeated washing. But those small signs of use often make handmade table linens feel more convincing, not less.
And honestly, a stack of neatly sewn placemats sitting beside the dining table changes the atmosphere of a kitchen in a very quiet way.
Sources
[1] Craft Industry Alliance – North American Craft Industry Trends[2] Etsy Marketplace Trends Report – Home and Living Category