Sewing usually starts with something embarrassingly small. A button hanging by a thread. A hem that’s given up halfway through the school week. Maybe a cushion cover that’s technically functional but looks like it lost an argument with the fabric. Then one repair becomes two, and before long you’re actually browsing the fabric aisle at Spotlight—on purpose, not by accident.
That shift is happening more across Australia. ABS data shows a steady uptick in home-based creative work and side businesses, particularly around textiles and handmade goods. Clothing costs keep climbing, sustainability is a real concern for a lot of people, and there’s something quieter underneath all that—a genuine desire to make things that actually fit, that last, that feel like yours.
Getting started, though, is messier than the YouTube tutorials make it look. The options multiply fast, the opinions conflict, and craft stores are genuinely not designed to help you spend less.
Contents
- 1 1. Basic Sewing Supplies: The Essential Starter Kit
- 2 2. Sewing Machine vs Hand Sewing: What Do You Really Need?
- 3 3. Thread: Choosing the Right Type for Australian Conditions
- 4 4. Fabric Basics: What to Buy First
- 5 5. Cutting Tools: Scissors, Rotary Cutters and Mats
- 6 6. Measuring and Marking Tools
- 7 7. Patterns: Commercial vs Digital
- 8 8. Sewing Notions You Will Eventually Need
- 9 9. Storage and Workspace Setup
- 10 10. Where to Buy Basic Sewing Supplies in Australia
- 11 11. Budget Planning: How Much Does It Cost to Start Sewing in Australia?
- 12 12. Common Beginner Mistakes to Avoid
- 13 Conclusion
1. Basic Sewing Supplies: The Essential Starter Kit
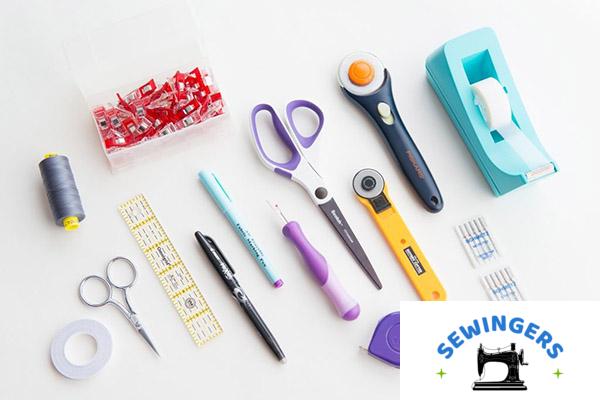
Here’s the thing most beginners don’t hear early enough: you only need around seven core tools to get going properly.
Craft stores don’t communicate that. They’re laid out in a way that makes everything feel essential—tools with specific names and vague purposes that end up sitting in a drawer. What actually gets used, week after week, is a much shorter list:
- Sewing needles (hand and machine)
- Thread in a few versatile colours
- Fabric scissors
- Pins or clips
- Tape measure
- Seam ripper
- Fabric chalk or a washable marking pen
Starter kits from Spotlight or Lincraft bundle most of this together, usually in the $40–$80 AUD range. That price gap isn’t arbitrary—cheaper kits tend to include scissors that dull fast, sometimes within a month of regular use.
In coastal climates like Sydney or Brisbane, there’s a subtler problem too. Humidity slowly works on metal tools. Cheap scissors develop small rust spots you barely notice until cutting stops feeling clean—fabric starts to drag instead of slide. It shows up earlier than you’d expect, and it’s frustrating in a way that’s hard to trace back to the tool.
Better scissors don’t feel exciting at the register. A few months in, the gap becomes obvious.
2. Sewing Machine vs Hand Sewing: What Do You Really Need?
Hand sewing works. That’s worth saying clearly. Repairs, small adjustments, simple projects—none of it requires a machine. But time changes the equation considerably.
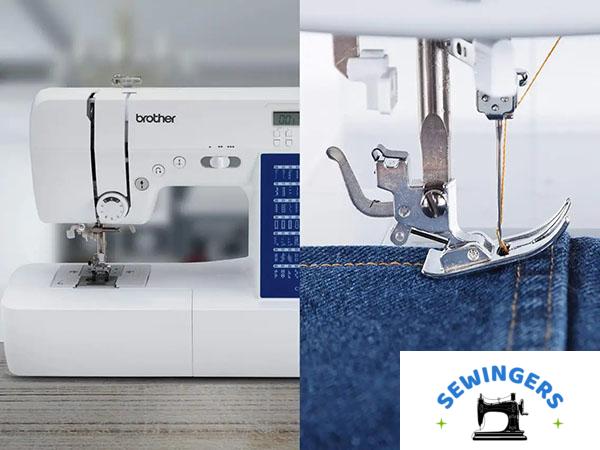
A sewing machine generally speeds up projects by roughly three to five times compared to hand sewing, and most beginners in Australia make the move fairly quickly—usually after the second or third project. It’s not about skill level. It’s that sewing straight seams by hand is meditative once, then quietly tedious after that.
Entry-Level Sewing Machines in Australia
| Brand | Price Range (AUD) | Strengths | Limitations |
|---|---|---|---|
| Brother | $200–$350 | Easy setup, beginner-friendly | Lightweight, can shift on table |
| Janome | $250–$450 | Durable, stable stitching | Slightly higher cost |
| Singer | $220–$400 | Widely available, good variety | Inconsistent model quality |
Brother machines tend to feel intuitive from day one. Janome feels sturdier once you’ve used it for a while—more planted. Singer sits somewhere in between, though the specific model matters more than brand loyalty does.
One thing that gets overlooked: Australian warranty support. Machines bought from overseas retailers sometimes don’t have local servicing available. Tension issues are common with beginner use, and when they show up, repairs can get complicated quickly.
For most starting projects—school uniforms, tote bags, cushion covers—a basic mechanical machine with dial controls handles everything without needing to overcomplicate the setup.
3. Thread: Choosing the Right Type for Australian Conditions
Thread feels like a minor decision until it starts breaking mid-seam. Then it becomes the whole problem.
Cheap thread frays, tangles, and sheds lint into the bobbin case. That lint accumulates slowly, and over time it affects stitch quality in ways that are hard to diagnose. A lot of beginners assume the machine is faulty. Usually it’s the thread.
Polyester thread tends to hold up best across mixed fabrics and variable climates. Reliable options available in Australia:
- Gutermann – widely stocked, consistently good quality
- Coats – slightly more affordable, still dependable
For colour, starting with black, white, and navy covers roughly 70% of beginner projects without needing to think about it.
In warmer regions like Queensland, humidity is worth considering. Cotton thread weakens slightly over time if stored loosely. Sealed containers—even basic plastic boxes—make a real difference. It’s one of those things that seems unnecessary until it isn’t.
4. Fabric Basics: What to Buy First
Fabric choice has a bigger effect on outcomes than most beginners anticipate. Stable fabrics like quilting cotton reduce beginner error rates by more than 50%, which shows up consistently in sewing classes and workshops. [2]
Slippery fabrics—silk, satin, chiffon—shift while you’re cutting and shift again while you’re sewing. Even experienced sewists treat them carefully. Starting with them is asking for extra frustration.
Better starting points:
- Quilting cotton
- Calico
- Cotton drill
- Linen blends
These fabrics hold their shape and behave predictably. Remnant bins at Spotlight or independent fabric shops often carry pieces in the $5–$15 AUD per metre range—that’s where most beginners experiment without the pressure of wasting expensive fabric.
Sustainable options are growing in Australia too. Recycled fabric sellers and Australian-made textiles are becoming easier to find, especially in cities. Quality tends to be higher, though pricing varies.
5. Cutting Tools: Scissors, Rotary Cutters and Mats
Sharp fabric scissors improve cutting accuracy by up to 40%, and that improvement shows up directly in seam alignment. Pieces match better. Edges stay clean instead of fraying before you’ve even started sewing.
The core cutting tools:
- Fabric shears – your primary tool
- Thread snips – for quick trimming while you work
- Rotary cutter – optional, but useful later
Rotary cutters tend to become popular around market seasons—Christmas, Easter—when batch cutting projects like table runners or gift items makes straight-line cutting repetitive. Before that point, fabric shears handle most things.
| Tool Type | Cost (AUD) | Best Use Case | Long-Term Value |
|---|---|---|---|
| Fabric shears | $25–$70 | General sewing | Essential, long lifespan |
| Thread snips | $10–$25 | Quick trimming | Convenient, optional early |
| Rotary cutter | $20–$50 | Quilting, straight edges | Useful with volume work |
Kitchen scissors seem reasonable at first. Then fabric edges start fraying oddly and cuts feel uneven. That’s usually when the reason becomes clear.
6. Measuring and Marking Tools
Accurate measuring reduces fabric waste by at least 20%, which matters more than it sounds when miscut pieces often can’t be recovered—especially with directional prints.
The basics:
- Flexible tape measure
- Tailor’s chalk or a washable pen
- Clear ruler (optional but useful for pattern work)
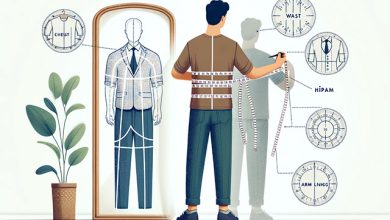
Australian sizing creates genuine confusion. A size 12 in one brand won’t match another. Measuring actual body dimensions instead of relying on label sizes avoids that mismatch entirely.
Marking tools behave differently depending on fabric. Chalk brushes off easily. Washable pens sometimes linger longer than expected on synthetic blends. Testing on a scrap piece first becomes a quiet habit—one of those small adjustments that saves a finished project.
7. Patterns: Commercial vs Digital
Patterns provide structure, but clarity varies a lot between brands and formats.
Printed patterns from Simplicity and McCall’s are widely available in Australia. The instructions can feel dense—sometimes written more for people who already know the language than for someone encountering it the first time.
Digital PDF patterns from Etsy sellers or independent designers often feel more approachable. Step-by-step photos reduce confusion significantly, especially in the early stages.
Things worth checking before buying:
- Seam allowance included (not all patterns include it)
- Metric measurements in centimetres
- Layered printing options for size selection
What tends to happen with first patterns: they feel overwhelming regardless of format. Not because the process is complicated, but because the vocabulary is unfamiliar. Terms like “notch,” “grainline,” and “baste” start making sense only after you’ve encountered them a few times. That learning curve is normal and doesn’t take as long as it feels like it will.
8. Sewing Notions You Will Eventually Need
Notions expand what you can make, but they’re not required upfront. Most beginners overbuy here—drawers fill quickly with zippers and elastic that don’t match any specific project.
Common notions you’ll reach for eventually:
- Elastic
- Zippers
- Buttons
- Bias tape
- Interfacing
In Australia, prices vary more than expected due to import costs. Spotlight runs frequent sales worth timing purchases around. Independent haberdasheries sometimes stock higher-quality versions of the same items.
Buying per project keeps spending controlled. Stockpiling feels productive—it rarely is.
9. Storage and Workspace Setup
A functional sewing setup genuinely doesn’t require much space—under two square metres works for most people starting out. Not everyone has a dedicated craft room, and it’s not necessary to have one.
What the setup actually needs:
- A sturdy table that doesn’t wobble under the machine’s vibration
- Good lighting—natural or LED
- Clear storage boxes for tools and notions
Lighting gets underestimated. Winter afternoons in southern states get dim early, and poor lighting causes eye strain faster than you’d think—especially when you’re focused on small details.
Stackable clear storage from Kmart or IKEA works well in practice. Being able to see what’s inside without opening every box saves more time than it sounds like it would.
10. Where to Buy Basic Sewing Supplies in Australia
Spotlight and Lincraft cover most of what beginners need—accessible, frequently on sale, and stocked consistently.
Other options:
- Amazon Australia – fast delivery, though quality varies and there’s no way to feel fabric before buying
- Etsy – good for unique patterns and handmade tools
- Independent fabric stores – higher quality, niche fabrics, and staff who actually know what they’re talking about
| Retailer | Strengths | Weaknesses |
|---|---|---|
| Spotlight | Frequent discounts, wide range | Inconsistent staff expertise |
| Lincraft | Good basics, smaller crowds | Limited advanced selection |
| Independent stores | Unique fabrics, expert advice | Higher prices |
| Online marketplaces | Convenience, variety | No physical inspection |
Local independent stores tend to cost more, which becomes noticeable when buying fabric in larger quantities. The quality difference is usually worth it for fabric, less so for basics like thread or pins.
11. Budget Planning: How Much Does It Cost to Start Sewing in Australia?
A realistic beginner setup lands somewhere between $360 and $510 AUD.
| Item | Cost (AUD) |
|---|---|
| Sewing machine | $250–$400 |
| Basic tools | $60 |
| Fabric (first project) | $30 |
| Notions | $20 |
| Total | $360–$510 |
That number drops meaningfully if you can access a second-hand machine or borrow equipment from family. A lot of beginners start that way, especially through community groups or people who’ve moved on from the hobby.
Unexpected costs show up later—extra thread colours, replacement needles, additional fabric after cutting mistakes. That pattern is normal and worth factoring in loosely from the start.
12. Common Beginner Mistakes to Avoid
Most beginners repeat the same handful of mistakes, and they tend to appear in roughly the same order.
- Buying too much fabric before knowing what you actually want to make
- Choosing complex patterns for early projects
- Skipping ironing—pressing seams changes how finished work looks more than almost anything else
- Using dull scissors and blaming the fabric
- Ignoring machine maintenance until stitches start skipping
Skipping ironing is the one that surprises people most. The difference between pressed and unpressed seams is obvious when you put two finished pieces side by side. It’s the kind of thing that’s hard to unsee once you’ve noticed it.
Machine maintenance tends to get ignored until something goes wrong. Cleaning lint from the bobbin case and changing needles every few projects prevents most of those problems before they start.
Progress in sewing isn’t linear—some projects come together easily, others feel like constant correction. That inconsistency is part of the process, not a sign that something’s wrong.
Conclusion
Getting the basics right in Australian sewing comes down to a focused set of tools, a controlled budget, and sensible fabric choices from the start.
The early stage feels cluttered—too many options, conflicting advice, and not much clarity on what actually matters versus what craft stores want you to think matters. Over time, patterns settle in. Certain tools get used constantly; others stay in the drawer indefinitely.
A small, reliable setup tends to outperform a large, unused collection. That difference doesn’t show up in the first week. It shows up a few months in, when projects start finishing instead of stalling halfway through—when sewing stops feeling like a task you’re getting through and starts feeling like something worth coming back to.
Sources
[1] Australian Bureau of Statistics – Household Economic Trends (2024)[2] Craft Industry Alliance – Beginner Sewing Behaviour Study (2023)