A loose hem before Thanksgiving dinner, a Halloween costume that rips at 7 p.m., or a favorite pair of jeans giving way at the knee can make sewing feel less like a hobby and more like household survival. Hand and machine stitches both matter because they solve different sewing problems: hand stitches give control, while machine stitches give speed, strength, and consistency.
Modern sewing blends old needlework basics with newer sewing tools from Singer Corporation, Brother Industries, Janome, Bernina, and home aisles at Joann. In U.S. DIY culture, stitching supports fashion, home repairs, garment durability, and creative reuse. That mix keeps sewing relevant, even in a world full of Fast Fashion and same-day Amazon deliveries.
Contents
- 1 What Are Hand Stitches?
- 2 What Are Machine Stitches?
- 3 Key Differences Between Hand and Machine Stitches
- 4 Why Hand Stitches Are Still Important
- 5 Why Machine Stitches Matter in Today’s World
- 6 Common Types of Hand and Machine Stitches
- 7 Choosing the Right Stitch for Your Project
- 8 The Future of Stitching in the U.S.
- 9 Conclusion
What Are Hand Stitches?
Hand stitches are stitches formed manually with a needle, thread, and controlled hand movement. They show up in repairs, embroidery, quilting, hems, buttons, appliqué, and tiny fabric fixes where a machine feels too blunt.
Basic hand stitches include the Running Stitch, Backstitch, and Whip Stitch. DMC embroidery floss and Coats & Clark thread remain common choices because thread quality affects tension, stitch spacing, and fabric handling.
Hand sewing feels slow at first. Then the rhythm starts to make sense.
Common hand sewing stitches include:
- Running Stitch for basting, gathering, and simple seams.
- Backstitch for stronger seams and small repairs.
- Whip Stitch for edges, patches, and closing openings.
- Slip Stitch for nearly invisible hems and linings.
- Chain Stitch for decorative needlework and embroidery.
Seasoned sewing-room note: hand stitching exposes every little habit. A tight needle grip makes puckers. Loose thread tension leaves loops. Uneven stitch spacing looks charming on crafts but messy on hems.
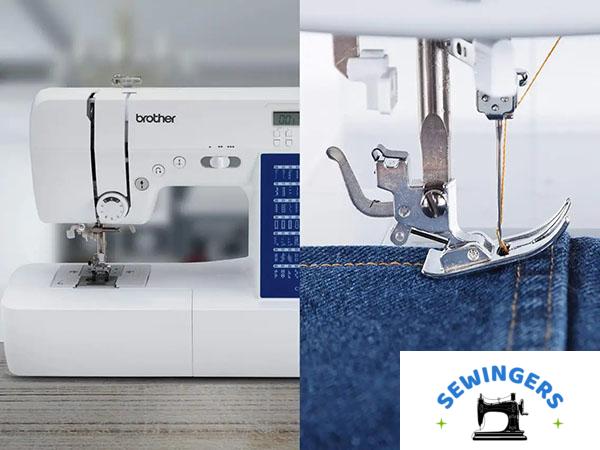
What Are Machine Stitches?
Machine stitches are stitches formed by a sewing machine using needle movement, bobbin thread, presser foot pressure, and stitch settings. They are faster, more uniform, and more practical for long seams.
Machine stitches explained simply: the needle thread and bobbin thread lock together, creating a secure seam. The most familiar example is the Lockstitch. Zigzag Stitch supports stretch and seam finishing. Overlock Stitch trims and finishes raw edges, especially in garment manufacturing.
Brands such as Janome, Bernina, Brother Industries, and Singer Corporation shaped home sewing because they made automated stitching accessible outside factories. In apparel production, machines support scale. A T-shirt seam that takes several minutes by hand can take seconds by machine.
Machine sewing depends on small settings that matter more than beginners expect:
- Stitch length setting changes seam strength and appearance.
- Presser foot control affects fabric feeding.
- Bobbin thread quality influences skipped stitches.
- Machine calibration keeps stitches balanced.
- Needle size protects delicate or heavy fabrics.
The machine looks powerful, but bad threading can humble anyone.
Key Differences Between Hand and Machine Stitches
Hand vs machine stitches comes down to control, speed, consistency, cost, and project purpose. Hand sewing suits precision and portability. Machine sewing suits production, durability, and repeatable seams.
| Factor | Hand Stitches | Machine Stitches | Practical Commentary |
|---|---|---|---|
| Speed | Slow | Fast | Machine stitching wins on curtains, pants, bags, and long seams. |
| Control | High | Medium | Hand stitches handle tiny corners, heirloom work, and awkward repairs better. |
| Cost | Low startup cost | Higher startup cost | Walmart and Amazon sell hand sewing kits for roughly $5 to $20; entry sewing machines often cost far more. |
| Durability | Strong when done well | Usually stronger and more consistent | Backstitch can hold beautifully, but Lockstitch handles daily wear with less effort. |
| Skill level | Beginner-friendly but slow | Faster after setup learning | Threading, bobbins, and tension settings create the early machine-learning wall. |
| Production scale | Small scale | Large scale | Fast Fashion depends on machine stitching, while Sustainable Fashion often uses both repair and construction skills. |
DIY Culture has made both methods useful again. A person fixing one sleeve needs patience. A person sewing 12 Etsy tote bags needs efficiency.
Why Hand Stitches Are Still Important
Hand stitches remain important because they handle repairs, personalization, textile artistry, and delicate finishing that machines don’t always manage gracefully. That matters in modern American life, especially around seasonal sewing.
A Halloween costume repair often happens under pressure. A machine may be packed away, but a needle and black thread can fix a seam before the doorbell starts ringing. Christmas stockings, embroidered gifts, and small Etsy items often rely on decorative stitching because handwork carries visible character.
Quilting keeps this tradition alive, too. The American Quilter’s Society has helped preserve quilting as both craft and competition, proving that hand sewing still has cultural weight in the U.S. [1]
Hand stitching works especially well for:
- Emergency repair stitching on hems, buttons, pockets, and seams.
- Embroidery with DMC floss on denim jackets, napkins, and hoops.
- Heirloom crafts such as quilts, stockings, and keepsake textiles.
- Customization on bags, patches, aprons, and children’s clothing.
- Invisible finishing on linings, facings, and formalwear.
The slower pace is the trade-off. Hand sewing rewards patience, not rushing. A careful Slip Stitch on a hem can look cleaner than a hurried machine seam, especially on a soft cotton dress or lined jacket.
Why Machine Stitches Matter in Today’s World
Machine stitches matter because modern clothing, small-batch products, home tailoring, and garment manufacturing depend on speed and uniform stitching. Machine sewing turns fabric construction into repeatable work.
Levi Strauss & Co., Nike, and other apparel brands rely on industrial stitching methods because large-scale clothing production needs consistency. The U.S. Small Business Administration also highlights small businesses as a major part of the American economy, and sewing-based shops fit that pattern through tailoring, Etsy selling, alterations, and custom goods [2].
For home use, machine sewing changes the math. A dining chair cover, set of curtains, or denim repair becomes less intimidating when a machine can produce straight seams quickly.
Machine stitching supports:
- Production efficiency for small shops and garment manufacturing.
- Uniform stitching across multiple items.
- Scalability for Etsy sellers and home-based tailoring.
- Strong seams for bags, denim, uniforms, and kids’ clothing.
- Cleaner seam finishing with Zigzag Stitch or Overlock Stitch.
There is a downside. Machines create speed, and speed can hide poor choices. The wrong needle on polyester can snag fabric. The wrong tension can make a seam look fine on top and messy underneath.
Common Types of Hand and Machine Stitches
Common sewing stitch types fall into 3 practical groups: construction stitches, finishing stitches, and decorative stitches. That grouping makes stitch selection easier than memorizing a long sewing stitch list.
Construction Stitches
Construction stitches hold fabric pieces together. Running Stitch, Backstitch, Lockstitch, and Stretch Stitch all fit here, depending on fabric and strength needs.
Backstitch is excellent for hand repairs. Lockstitch is the machine standard for woven fabrics. Stretch Stitch works better for knits because the seam needs elasticity support.
Finishing Stitches
Finishing stitches control raw edges, hems, and seam allowances. Whip Stitch, Blind Hem Stitch, Zigzag Stitch, and Overlock Stitch all help fabric resist fraying.
Blind Hem Stitch is especially useful for pants, skirts, curtains, and home décor. The stitch hides in the fold, which feels almost sneaky in a satisfying way.
Decorative Stitches
Decorative stitches add visible style. Chain Stitch, Satin Stitch, embroidery stitches, and machine decorative patterns turn plain fabric into something personal.
Satin Stitch fills small shapes with dense thread. Chain Stitch creates a textured line. These stitches don’t just decorate fabric; they change the mood of the piece.
Choosing the Right Stitch for Your Project
The best stitch depends on fabric weight, stretch, durability requirements, and how visible the seam will be. In practice, stitch selection is less about rules and more about matching pressure points to thread behavior.
Denim needs strength. A Backstitch works for a small hand repair, but a machine Lockstitch with heavier thread usually handles jeans better. Cotton behaves kindly and accepts most basic stitches. Polyester varies, especially when slippery or stretchy.
For Halloween costumes, speed often matters more than heirloom quality. A Zigzag Stitch handles stretchy costume fabric better than a straight seam. For Thanksgiving table runners or home décor projects, clean hems and consistent topstitching matter more because the fabric lies flat and every wobble shows.
A simple stitch selection guide:
- Denim repair: use Backstitch by hand or Lockstitch by machine.
- Cotton apron: use Lockstitch for seams and Blind Hem Stitch for hems.
- Polyester costume: use Zigzag Stitch or Stretch Stitch where fabric pulls.
- Quilt binding: use hand Slip Stitch or machine topstitching.
- Home Sewing Projects: use longer machine seams with careful pressing.
The tiny unglamorous step is testing. A scrap of fabric tells the truth before the real project gets punctured.
The Future of Stitching in the U.S.
The future of sewing in the U.S. combines smart sewing machines, sustainable fashion, digital sewing patterns, and renewed interest in DIY clothing repair. The shift is already visible in home studios, school programs, maker spaces, and online sewing communities.
Brother Industries and Singer Corporation continue developing machines with digital stitch menus, automatic needle threading, and computerized controls. Smart Technology reduces setup friction, although skill still matters. A screen can suggest a stitch, but fabric still puckers when tension is wrong.
Sustainable Fashion also changes the conversation. Textile waste has become a major environmental issue; the U.S. Environmental Protection Agency estimated 11.3 million tons of textiles entered municipal solid waste landfills in 2018 [3]. That number gives repair stitching a practical role, not just a nostalgic one.
Future sewing trends USA include:
- Automation trends in home and industrial machines.
- Eco-friendly textiles and repair-first habits.
- Digital sewing patterns for faster project planning.
- Consumer behavior shifting toward customization.
- Sewing innovation for small businesses and home creators.
The DIY Movement gained energy after pandemic-era home crafting, and that energy has not disappeared completely. People now treat sewing as a mix of thrift, creativity, repair, and identity.
Conclusion
Hand and machine stitches remain important because modern sewing needs both precision and efficiency. Hand stitches offer control, portability, artistry, and quiet problem-solving. Machine stitches offer speed, strength, repeatability, and production power.
The strongest sewing practice uses both. A machine can build the garment. A hand stitch can finish the hem, secure the lining, repair the pocket, or add embroidery that makes the piece feel less factory-made.
That balance is the real sewing basics USA story: not old versus new, not manual versus automated, but the right stitch meeting the right fabric at the right moment.
Sources: [1] American Quilter’s Society. [2] U.S. Small Business Administration. [3] U.S. Environmental Protection Agency, 2018 textile waste data.