You know that moment when you cut into a $45-a-yard silk from Mood and immediately regret not testing your seam first? I’ve been there. Your scissors glide through it beautifully, and then—two seams later—the edges start fraying like crazy. Specialty fabrics look glamorous on the bolt. Under a presser foot, they can humble you fast.
Sewing special materials isn’t like sewing quilting cotton or a sturdy denim from JOANN. Leather keeps every needle hole. Vinyl grips your presser foot like it’s holding a grudge. Silk shifts if you so much as breathe wrong. And when you’re paying $20–$80 per yard in the U.S. market, mistakes feel expensive. Because they are.
What I’ve learned (sometimes the hard way) is this: your seam choice matters as much as your fabric choice. Let’s break it down in a way that actually works at your sewing table.
Contents
- 1 Key Takeaways
- 2 1. Understand Fabric Behavior Before Sewing
- 3 2. Choose the Right Needle and Thread
- 4 3. Seams for Leather and Faux Leather
- 5 4. Seams for Stretch and Knit Fabrics
- 6 5. Seams for Sheer and Delicate Fabrics
- 7 6. Seams for Heavy-Duty and Outdoor Materials
- 8 7. Seams for Vinyl and Plastic-Based Materials
- 9 8. Reinforcing Stress Points
- 10 9. Testing and Troubleshooting Before Final Assembly
- 11 10. Care and Maintenance of Specialty Seams
- 12 Conclusion
Key Takeaways
Before you thread your machine, here’s what tends to matter most:
-
Choose seam types based on how your fabric behaves—stretch, thickness, and fray level change everything.
-
Match your needle and thread to the material, not just the project.
-
Adjust stitch length and tension before sewing your final seam.
-
Test on scrap from the same bolt. Not a random leftover.
-
Reinforce stress points, especially if your garment will face U.S. humidity swings or cold winters.
Now let’s slow down and look at why those points actually matter.
1. Understand Fabric Behavior Before Sewing
Most sewing frustration starts before you even stitch. You assume fabric will behave like the last one you used. It won’t.
Every special material reacts differently to:
-
Stretch vs. non-stretch structure
-
Thickness and density
-
Fraying tendency
-
Heat sensitivity
-
Surface friction
Take faux leather sold in the U.S.—many are PVC- or polyurethane-based. High heat can warp or melt them. I’ve seen shiny spots appear just from an overzealous iron. And silk charmeuse? It frays so quickly that if you wait too long to finish the seam, you lose width without noticing.
Here’s something people skip: prewashing. If you plan to machine wash your finished garment, wash and dry the fabric the same way first. U.S. dryers run hot. I once lost nearly 1 inch in length on a stretch knit because I assumed “pre-shrunk” meant invincible. It didn’t.
Study the fabric. Tug it gently. Press a scrap. Scratch it lightly with your fingernail. You’re gathering data before you commit.
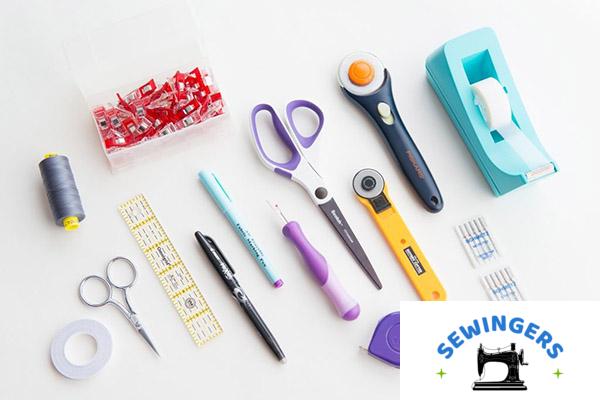
2. Choose the Right Needle and Thread
The wrong needle doesn’t just make messy stitches—it can permanently damage the material.
Recommended Needle Types
-
Leather needle – cuts through real or faux leather cleanly
-
Ballpoint needle – slides between knit fibers without snagging
-
Microtex (sharp) – pierces silk and delicate fabrics precisely
-
Denim needle – handles thick or layered materials
If you’ve ever heard a loud “pop” while sewing vinyl, that’s usually your needle protesting.
Thread matters just as much. I see a lot of beginners default to whatever spool is already loaded.
Thread Selection
-
Polyester thread – strong, versatile, moisture-resistant
-
Nylon thread – flexible for stretch-heavy seams
-
Heavy-duty thread – ideal for upholstery or outdoor projects
-
Cotton thread – blends well with natural fibers
Brands like Coats & Clark offer reliable specialty threads that perform well on standard Brother or Singer machines. I keep at least three weights on hand. It saves time and frustration later.
3. Seams for Leather and Faux Leather
Leather doesn’t self-heal. Every stitch hole stays visible. So when you unpick a seam, you’re not erasing it—you’re adding more holes.
Best seam options:
-
Plain seam with topstitch reinforcement
-
Lapped seam
-
Double-stitched seam
Increase your stitch length to about 3.5–4 mm. Short stitches perforate leather like a tear-off coupon strip. I learned that while making a holiday market tote one December—beautiful bag, split seam.
A few things that make life easier:
-
Use clips instead of pins
-
Use a Teflon presser foot for vinyl
-
Avoid excessive backstitching
This setup works beautifully for jackets, handbags, and structured holiday gifts.
4. Seams for Stretch and Knit Fabrics
Stretch fabrics demand flexibility. If your seam doesn’t stretch, it will snap. Usually when you least want it to.
Best seam types:
-
Zigzag stitch
-
Built-in stretch stitch
-
Overlock seam (serger)
Brother and Singer machines typically include stretch settings, but tension still needs tweaking. What tends to happen is the seam tunnels or ripples if the tension’s off by even a little.
A few practical notes:
-
Don’t pull the fabric while sewing
-
Use a walking foot for even feeding
-
Test stretch recovery after stitching
Leggings and holiday pajamas (especially around Black Friday sewing sprees) need seams that move with the body. Otherwise, you’ll hear that tiny popping sound after the first wear.
5. Seams for Sheer and Delicate Fabrics
Sheer fabrics reveal everything—raw edges, thread bulk, uneven stitching.
Best seam types:
-
French seam
-
Rolled hem
-
Narrow seam with bias binding
Lower your stitch length slightly to 2–2.5 mm. Thick thread can show through lightweight silk or chiffon, so keep it fine.
When you sew prom dresses or wedding guest outfits, the inside matters as much as the outside. French seams enclose raw edges beautifully, but they require precision. Your first seam has to be narrow. Really narrow.
I used to rush that step. It showed.
6. Seams for Heavy-Duty and Outdoor Materials
Outdoor fabrics resist water and UV exposure, but they’re dense and sometimes stiff.
Best seam types:
-
Flat-felled seam
-
Bound seam
-
Reinforced straight seam
For patio cushions or camping gear—very common in U.S. backyard setups—heavy-duty polyester thread works best. Seam sealing tape adds waterproof protection if needed.
Here’s a quick comparison from projects I’ve made:
| Material Type | Ideal Seam Type | Stitch Length | Thread Type | What You’ll Notice |
|---|---|---|---|---|
| Marine vinyl | Reinforced straight | 3.5–4 mm | Heavy polyester | Thick layers feed slowly |
| Canvas (outdoor) | Flat-felled | 3–3.5 mm | Polyester | Bulk builds fast at intersections |
| Upholstery fabric | Bound seam | 3 mm | Heavy-duty | Needs strong tension control |
What stands out to me is how bulk becomes your biggest challenge. Not strength. Corners and seam intersections require patience, and sometimes a hand crank to move the needle through.
7. Seams for Vinyl and Plastic-Based Materials
Vinyl sticks. That’s the simplest way to say it.
To reduce friction:
-
Place tissue paper underneath
-
Lengthen stitch
-
Avoid backstitching; tie threads manually
I once tried sewing a vinyl table cover for an outdoor Fourth of July party without tissue support. The seam looked jittery because the fabric hesitated under the foot. The tissue trick solved it instantly.
Small adjustments. Big difference.
8. Reinforcing Stress Points
Seams usually fail at stress points, not along the straight run.
Common reinforcement techniques:
-
Bar tacks
-
Double stitching
-
Seam tape
-
Understitching
Backpacks, workwear, sports uniforms—these see real movement. Reinforce shoulders, waistbands, pocket corners.
In humid states, thread tension can shift slightly over time. In cold climates, fabrics stiffen. That combination can stress seams more than you expect, especially if the garment gets frequent wear.
9. Testing and Troubleshooting Before Final Assembly
Testing feels tedious. I still sometimes want to skip it.
But fabric varies by batch and brand. Even two bolts labeled the same can behave differently.
Before committing:
-
Check stitch tension
-
Confirm seam strength
-
Stretch the seam and observe recovery
-
Inspect for puckering
-
Hold it under light to see inconsistencies
Use scrap from the exact same bolt. Not leftovers from last year’s project. That difference matters more than people think.
10. Care and Maintenance of Specialty Seams
Different materials respond differently to washing and storage.
-
Leather: spot clean only
-
Silk: dry clean recommended
-
Outdoor fabric: mild detergent, air dry
-
Stretch fabric: wash cold, low heat
Heat is often the hidden enemy. It weakens synthetic fibers and can distort seams over time. If you’ve ever pulled a knit shirt from a hot dryer and noticed wavy seams, that’s not random.
It’s accumulated stress.
Conclusion
When you sew special materials, you’re managing tension, friction, and structure more than just stitching pieces together. The seam is the engineering behind the design. Ignore it, and the garment fails quietly—or dramatically.
What I’ve found, after years of trial and error, is that slowing down at the beginning saves you from frustration later. Study the fabric. Adjust your tools. Test your seam. Reinforce where it counts.
Because when you’re working with $60 silk or thick marine vinyl, you’re not just sewing—you’re making decisions that show up every time you wear or use the piece. And once you start thinking about seams that way, your projects feel sturdier. More intentional. And honestly, a lot more satisfying to finish.