Let me tell you—after two decades of sewing everything from vintage-inspired dresses to modern menswear, nothing derails a good project faster than inaccurate body measurements. You might have the perfect sewing pattern, beautiful fabric, even your favorite thread on the machine—but if your bust size or hip measurement is off by even an inch? That’s when fitting issues sneak in, and suddenly you’re unpicking seams you shouldn’t have had to touch.
Taking the time to measure your body correctly isn’t just about precision—it’s about saving your sanity, your fabric stash, and your wallet. You’ll learn which tools matter (hint: your tape measure is your best friend), what details to never skip, and how to avoid the most common measuring mistakes.
Now, let’s walk through how to measure your body for sewing—properly.
Contents
Tools You Need Before Measuring
Before you start wrapping a tape measure around yourself, let’s get real—you can’t take accurate body measurements with whatever’s lying around the house. (No, the metal one from your toolbox doesn’t count. I’ve tried—it’s like measuring with a stubborn snake.) You need the right sewing measurement tools if you want your clothes to fit like they were made for you—which, well, they are.
Here’s what you’ll want nearby:
- Tailor’s measuring tape – Flexible, soft, and marked in inches and centimetres. It hugs curves properly, unlike a hardware-store tape.
- Full-length mirror – Trust me, you’ll thank yourself later. It helps you check if your tape’s level across the bust or hips.
- Notepad and pencil (or your phone) – Jot down numbers immediately. I’ve lost count of how many “I’ll remember that” moments turned into guessing games.
- Chalk marker or sticky notes – Handy if you’re comparing different clothing fits.
- A friend’s help – Optional, but if you can, have someone assist—especially for tricky spots like your back or shoulder width.
You see, it’s not just about the numbers—it’s about setting yourself up to measure with confidence and consistency. Now, let’s talk about how to measure yourself the right way.
General Tips Before Taking Measurements
Here’s what I’ve learned after years of sewing for real people (with real bodies, thank you very much): how you prepare before measuring matters just as much as the tape itself. If you’re not setting the scene right, your numbers will be off—and even a half-inch can throw off a whole pattern, especially around the bust or waist.
A few go-to tips I always share:
- Wear snug, lightweight clothing or your usual undergarments – Baggy layers distort the tape, especially around your waistline. Sports bras? Not the best idea for this.
- Stand tall, but don’t suck in – I know it’s tempting. But sewing measurements need honesty, not wishful thinking.
- Use a full-length mirror – It’ll help you check alignment. I like to pop mine against the door and back up just enough to spot tilts in the tape.
- Mark your natural waistline with elastic or ribbon – It sounds fussy, but it helps tons, especially if your waist isn’t super defined.
- Choose an even surface – Carpeted floors can throw off posture. I’ve made that mistake—my hip measurement shifted almost an inch.
- Ask for help if possible – Some areas (like back width or shoulder to bust) are just awkward alone. A second set of eyes always helps.
What I’ve found is that taking five minutes to get your environment and body “measurement-ready” makes a huge difference in accuracy—and saves a lot of fabric heartache down the line.

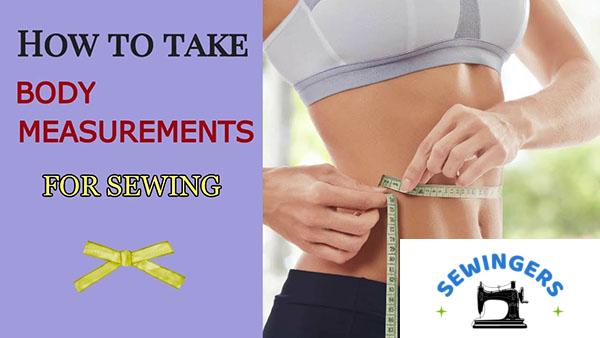
How to Measure the Bust, Waist, and Hips
If there’s one thing that’ll make or break your pattern fit, it’s these three: bust, waist, hips. I’ve seen gorgeous garments ruined simply because someone measured their jeans waist instead of their natural waist. (Yep—I’ve done it too. Once. Never again.)
Here’s how to measure these areas accurately:
- Bust measurement – Wrap your measuring tape around the fullest part of your bust, usually across the nipples and around your shoulder blades. Keep the tape level and snug—not tight. In my experience, wearing a bra you’d typically wear with the garment gives you the most realistic fit.
- Waist measurement – This one’s trickier than it looks. Your natural waist is higher than most people think—right where your body creases when you bend side to side. Don’t measure at your jeans. Use a waistline marker if you need to (I use a bit of elastic).
- Hip measurement – Measure around the widest part, which is often lower than expected—yes, it includes your butt. You might want to check both your high hip (around the pelvic bone) and low hip (the fullest area) for certain patterns.
What I’ve found over the years? A little patience here saves a lot of unpicking later. Accurate bust, waist, and hip measurements are the foundation of any garment that actually fits like it should.

Taking Vertical Measurements (Height, Torso, Inseam)
Now, here’s the thing most folks don’t realise until a dress rides up or a pair of pants pulls weird at the knee—vertical body measurements matter just as much as bust, waist, and hips. Maybe more, depending on your project. I’ve had to redo full-length garments because a client’s torso was two inches longer than the pattern assumed. (That one still stings.)
Here’s how I recommend measuring verticals accurately:
- Height – Stand barefoot, back straight, against a wall. Don’t strain your posture, just stand how you normally would.
(Tip: Mark the top of your head with chalk or tape, then measure from the floor.) - Torso (shoulder to waist) – Start at the high point of your shoulder (where a strap would sit), down over the bust, to your natural waistline.
(In my experience, sitting helps you find your waist—it’s where you fold naturally.) - Inseam – Measure from your crotch down to your ankle bone. If you’re making pants for yourself, you really want someone else to help with this—getting it wrong leads to droopy or high-water legs.
(I’ve definitely learned the hard way: pants that fit in the hips but not in length? Not a good time.)
What I’ve found is that these verticals—inseam length, torso height, and full body height—are what give your pattern the flow it needs to move with your body. Always double-check them before cutting anything. Your fabric (and your sanity) will thank you.
Special Measurements for Different Garments (Tops, Bottoms, Dresses)
You’ll find each garment type asks for its own little measurements—miss one and the fit’s off. Here’s what to check, and why it matters (from someone who’s unpicked more hems than I care to admit).
- Tops — sleeve length, shoulder width, back neck to waist, upper bust
Measure sleeve from shoulder point to wrist; check arm circumference if sleeves are slim. What I’ve found: slight shoulder width errors throw sleeve set off, so double-check that shoulder seam point. - Bottoms — rise measurement, crotch depth, thigh and calf, inseam
Rise is crucial (front to back) — pants that fit hips but pinch in the crotch are usually a rise issue. I always measure crotch depth seated; it changes posture-wise. - Dresses — shoulder-to-hem, dress length, hemline level, waist/hip placement
Measure shoulder to desired hem with shoes you’ll wear; dresses ride different on different bodies. Pro tip: mark your natural waist and measure from shoulder to that mark for accurate bodice fit.
What I recommend: record all these per garment type, and keep a small “fit file” (I use an index card) — it saves you from repeating the same mistakes.