Tissue sewing patterns feel fragile the moment they come out of the envelope. One fold too sharp, one pin in the wrong place, and suddenly there’s a tear right through a cutting line. That moment tends to shift how you approach pattern handling entirely.
Most sewists reach a point where the original tissue stops feeling usable. It wrinkles, ink fades, and multi-size lines blur together after a few projects. What actually makes the difference over time is transferring that pattern to something sturdier—something that survives repeated handling without turning into a puzzle.
This guide walks through exactly how to transfer sewing patterns to sturdier paper using tools easily found across the United States. Expect practical materials, realistic pricing, and a process that becomes faster after the first attempt—even if the first try feels oddly slow and meticulous.
Contents
- 1 1. Why You Should Transfer Sewing Patterns to Sturdier Paper
- 2 2. Choose the Right Sturdier Paper (Best Options in the US)
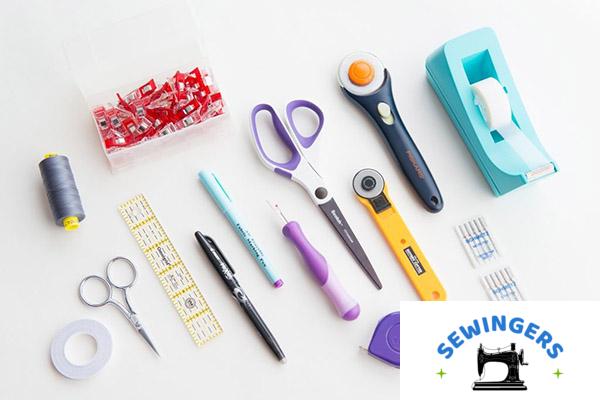
- 3 3. Tools You Need Before You Start
- 4 4. Prepare Your Original Pattern
- 5 5. Step-by-Step: How To Transfer Sewing Patterns To Sturdier Paper
- 6 6. Reinforce and Finish Your Pattern
- 7 7. Store Your Transferred Patterns the Right Way
- 8 8. Common Mistakes to Avoid
- 9 9. When to Use Digital Alternatives
- 10 10. Final Thoughts
1. Why You Should Transfer Sewing Patterns to Sturdier Paper
Transferring sewing patterns to sturdier paper prevents damage and improves long-term usability.
At first, tracing a pattern can feel like unnecessary extra work. After all, commercial patterns from brands like Simplicity or McCall’s often cost as little as $1.99 during Joann sales. Replacing them seems easier than preserving them.
But that assumption doesn’t hold up after a few projects.
What tends to happen is this: repeated folding weakens tissue along the grainline, notches get distorted, and seam allowances become harder to read. Eventually, accuracy suffers—and that shows up in the final garment.
Key Benefits
- Prevent tearing during repeated use – Tissue fails quickly under pinning and folding pressure.
- Preserve multi-size patterns – Tracing allows you to keep all sizes intact instead of cutting one.
- Make grading easier – Clean lines simplify blending between sizes.
- Improve cutting accuracy – Sturdier paper holds shape better on fabric.
- Increase pattern longevity – A traced pattern can last for years instead of months.
US Context
Commercial patterns from Simplicity, McCall’s, and Butterick are printed on lightweight tissue to reduce manufacturing costs. That thinness becomes a limitation during real use.
Patterns purchased during Joann Fabrics sales often sit in a stash for years. Without transferring, many become unusable long before they are sewn more than once.
2. Choose the Right Sturdier Paper (Best Options in the US)
The best paper depends on durability, transparency, and cost, with four common options available in the US market.
Not all “sturdy” paper behaves the same way. Some options lean toward flexibility, others toward rigidity. That difference becomes obvious during tracing—and even more obvious during storage.
Comparison Table: Best Pattern Transfer Papers
| Paper Type | Transparency | Durability | Price Range (USD) | Best For | Limitation Observed |
|---|---|---|---|---|---|
| Swedish Tracing Paper | High | Medium | $15–$25/roll | Garment fitting, alterations | Slightly expensive for large projects |
| Medical Exam Paper | Medium | Medium | $10–$20/roll | Large patterns, budget-friendly tracing | Tears under heavy handling |
| Freezer Paper | Low-Medium | High | $5–$8/roll | Structured pieces, repeated cutting | Less transparent for detailed tracing |
| Kraft Paper / Poster Board | None | Very High | $10–$30 total | Bags, coats, heavy-use patterns | Requires initial tracing step |
That table looks clean, but in practice, the choice rarely feels that neat.
A. Swedish Tracing Paper
Swedish tracing paper balances durability and transparency, making it ideal for garment adjustments.
You can see through it easily, which reduces eye strain during long tracing sessions. It also behaves like fabric in some cases—you can even sew it to test fit adjustments.
- Cost: around $15–$25 per roll
- Availability: Amazon, specialty sewing shops
What tends to stand out is how forgiving it feels. Lines don’t smudge easily, and folding doesn’t destroy it.
B. Medical Exam Paper
Medical exam table paper offers a low-cost, semi-transparent option for large projects.
This option shows up everywhere—Amazon, medical supply stores, even some warehouse retailers.
- Cost: around $10–$20 per roll
- Width: often 18” to 24”
It’s popular for a reason. But it does tear more easily than expected, especially around notches.
C. Freezer Paper
Freezer paper provides structure with a dual-surface design (matte and waxed sides).
Found in grocery stores across the US, this paper feels surprisingly durable.
- Cost: around $5–$8 per roll
- Best use: pieces that require repeated handling
The trade-off is visibility. Tracing through freezer paper takes more effort.
D. Poster Board or Kraft Paper
Kraft paper and poster board deliver maximum durability for high-use patterns.
Available at Michaels and Hobby Lobby, these materials work best for patterns used repeatedly—like jeans, coats, or bags.
- Cost: varies from $10–$30 total depending on volume
- Strength: significantly higher than other options
However, these require an intermediate tracing step since they’re not transparent.
3. Tools You Need Before You Start
Basic drafting tools ensure accurate and clean pattern transfer.
A complicated setup isn’t necessary. In fact, simpler setups often lead to better results because fewer tools mean fewer distractions.
Essential Supplies
- Mechanical pencil (consistent line thickness)
- Fine-tip Sharpie (for final outlines)
- Pattern weights (fabric scraps, metal weights, or even canned goods)
- Clear ruler (at least 18 inches)
- French curve (for shaping armholes and hips)
Optional but Helpful
- Tracing wheel
- Dressmaker’s carbon paper
- Masking tape
US Brands to Consider
- Dritz (pattern tools, tracing wheels)
- Fiskars (cutting tools)
- Westcott (rulers)
- Clover (precision sewing tools)
- Scotch (tape)
What tends to happen with tools is overbuying early on. A pencil and ruler handle most of the work.
4. Prepare Your Original Pattern
Proper preparation ensures accurate tracing and prevents distortion.
Skipping this step often leads to small inaccuracies that only show up during sewing—misaligned seams, uneven hems, or darts that don’t meet correctly.
Steps
- Press the tissue using low heat (no steam).
- Identify your correct size using the pattern sizing chart.
- Highlight your chosen size line.
- Secure the pattern using weights or tape.
Patterns with multiple sizes benefit the most from tracing. Cutting directly into tissue removes flexibility permanently.
Relevant elements to double-check:
- Grainline arrows
- Notches
- Fold lines
- Cutting lines
That prep stage feels slow, but it eliminates guesswork later.
5. Step-by-Step: How To Transfer Sewing Patterns To Sturdier Paper
Accurate tracing requires careful alignment, complete marking, and clear labeling.
This process looks straightforward on paper. In practice, the first attempt often takes longer than expected—mostly because attention shifts constantly between lines, symbols, and positioning.
Step 1: Lay Pattern Over Tracing Paper
Place the original tissue on top of your sturdier paper.
Smooth everything out. Wrinkles distort lines more than expected, especially along curves.
Step 2: Trace All Essential Markings
Focus on accuracy over speed.
Include:
- Cutting lines
- Grainlines
- Notches
- Dart legs
- Fold lines
Missing even one notch can affect how pieces align later. That mistake tends to show up during assembly, not during cutting.
Step 3: Label Everything Clearly
Write all identifying details directly on the pattern piece.
Example format:
- Pattern name
- Size
- Piece number
- Seam allowance
- Date
Example:
“Butterick B6865 – Size 10 – Front Bodice – 5/8” SA – 05/2026”
That level of detail feels excessive at first. It doesn’t feel excessive after patterns start stacking up.
Step 4: Add Seam Allowance (If Needed)
Most US commercial patterns include a 5/8-inch seam allowance.
Indie patterns sometimes don’t. Always check instructions before assuming.
6. Reinforce and Finish Your Pattern
Finalizing the pattern improves durability and usability during cutting.
After tracing, the pattern still feels incomplete.
Finishing Steps
- Trace over lines with a darker pen
- Cut using paper scissors (not fabric shears)
- Punch holes at notches if preferred
- Reinforce corners with masking tape
For heavy-use garments like coats or jeans, transferring again onto kraft paper creates a near-permanent version.
7. Store Your Transferred Patterns the Right Way
Organized storage prevents damage and saves time during future projects.
Storage systems evolve over time. Early setups tend to be messy—folded patterns stuffed into original envelopes. That system rarely lasts.
Storage Options
- Large manila envelopes
- Clear zip pouches
- Plastic bins
- Hanging file systems
Many US sewists use bankers boxes for bulk storage. They stack easily and handle large pattern collections.
Labeling matters more than the container itself.
- Pattern name
- Garment type
- Size range
A simple label maker speeds this up significantly.
8. Common Mistakes to Avoid
Small tracing errors lead to noticeable fitting and assembly problems.
These mistakes appear minor during tracing but create frustration later.
Frequent Errors
- Forgetting grainline arrows
- Skipping notches
- Using paper that is too opaque
- Not labeling seam allowance
- Cutting the original pattern accidentally
The most common issue is incomplete marking. Missing one dart or notch shifts alignment enough to affect the final garment.
9. When to Use Digital Alternatives
Digital sewing patterns provide flexible printing and scaling options.
PDF patterns have become standard across many US sewing communities.
Common Options
- Home printing (8.5” x 11” paper)
- Projector sewing setups
- Copy shop printing (A0 sheets at Staples, $3–$10 per sheet)
Even with digital patterns, transferring to sturdier paper still applies. Printer paper doesn’t hold up to repeated use.
10. Final Thoughts
Transferring sewing patterns to sturdier paper improves durability, accuracy, and long-term usability.
The process feels slow at first. There’s no real shortcut around that early stage where every line demands attention. Over time, speed increases naturally, and the workflow becomes almost automatic.
Swedish tracing paper, medical exam paper, and kraft paper each serve different purposes. The choice depends less on rules and more on how often a pattern gets reused.
Start with one frequently used pattern. That single decision tends to shift how the entire pattern collection is handled moving forward—even if the first traced piece takes longer than expected.