A sewing machine used to feel like a piece of furniture that stayed untouched in a spare room. Then fabric prices climbed, tailoring costs jumped in most U.S. cities, and fast fashion started wearing out after a handful of washes. Suddenly, sewing looked less like an old hobby and more like a practical life skill.
The average clothing alteration in the United States now costs anywhere from $15 to $45 depending on the repair and location [1]. Hemming one pair of jeans can cost nearly as much as a basic Singer Start 1304 payment plan. That math changes how people look at sewing.
And honestly, the appeal goes beyond saving money.
You gain control over fit. You stop tossing out clothes because of one ripped seam. A dorm pillowcase becomes a quick evening project instead of another Target purchase. Even small projects create a strange kind of confidence. Not dramatic confidence. More like the quiet feeling that household problems suddenly seem fixable.
Most beginners assume sewing machines are fragile or overly technical. In practice, modern machines from Brother, Singer, and Janome are designed for regular people sitting at kitchen tables with coffee nearby and fabric scraps everywhere.
This beginner sewing guide walks through:
- How sewing machines actually form stitches
- Setting up a sewing machine at home
- Threading and bobbin basics
- Everyday stitches
- Easy American-friendly projects
- Common mistakes and repairs
- Basic maintenance
- Ways to keep improving without spending a fortune
Safety matters too. Loose sleeves, tangled power cords, and distracted stitching create more problems than the machine itself. Most sewing accidents happen because people rush.
And sewing punishes rushing almost immediately.
Contents
- 1 Understanding How a Sewing Machine Works
- 2 Setting Up Your Sewing Machine at Home
- 3 Threading the Machine and Winding the Bobbin
- 4 Learning Basic Stitches for Everyday Projects
- 5 Practicing with Simple American-Friendly Projects
- 6 Avoiding Common Beginner Mistakes
- 7 Maintaining Your Sewing Machine for Long-Term Use
- 8 Growing Your Sewing Skills Beyond the Basics
- 9 FAQs
- 10 Conclusion
Understanding How a Sewing Machine Works
At first glance, sewing machines look complicated because every visible part seems important. Then something clicks. Most machines really perform one repeating action: one thread loops around another thread to lock fabric together.
That’s the whole system.
Basic Sewing Machine Anatomy
A sewing machine for beginners usually includes these core parts:
| Part | What It Does | Common Beginner Confusion |
|---|---|---|
| Presser foot | Holds fabric in place | Fabric shifts if the presser foot stays raised |
| Bobbin | Supplies lower thread | Incorrect insertion causes thread nests |
| Needle plate | Supports fabric under needle | Needle hits plate if inserted wrong |
| Feed dogs | Pull fabric forward | Beginners try pushing fabric manually |
| Tension dial | Controls thread tightness | Tight stitches often come from incorrect threading |
| Handwheel | Manually raises needle | Turning backward jams some machines |
| Stitch selector | Chooses stitch type | Wrong setting changes stitch behavior |
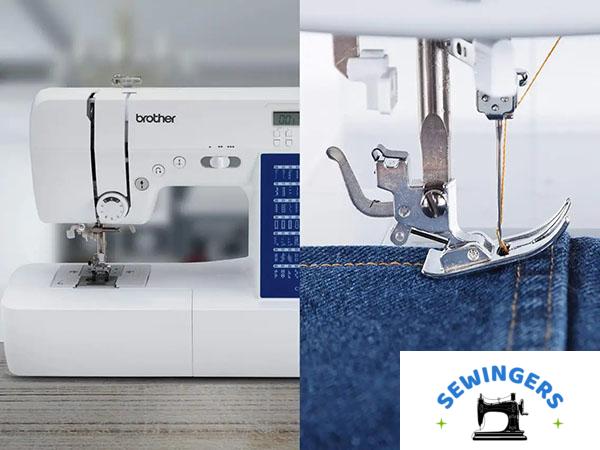
Machines like the Singer Heavy Duty 4411 lean mechanical and straightforward. The Brother CS6000i uses computerized controls with preset stitch settings. The Janome 2212 sits somewhere comfortably in between.
Mechanical models often feel easier during the first month because every adjustment is visible. Computerized machines reduce setup mistakes later on. That trade-off surprises a lot of people.
How Stitch Formation Works
Here’s what actually happens beneath the fabric.
The upper thread travels down through the needle. The lower thread waits inside the bobbin case. As the needle drops, the two threads loop together underneath the needle plate. The feed dogs then move the fabric forward by a tiny amount.
That cycle repeats hundreds of times per minute.
Most threading problems come from skipping one thread guide or threading with the presser foot down position engaged. The tension discs stay closed when the presser foot is lowered, so thread can’t seat correctly. The result usually looks messy underneath first.
And yes, almost everybody blames the bobbin first.
Setting Up Your Sewing Machine at Home
The first setup tends to feel oddly intimidating. Boxes everywhere. Plastic packaging stuck around the power cord. A user manual that looks longer than expected.
Then the machine sits on a table and starts looking manageable.
Choosing a Workspace
A stable surface matters more than beginners expect. Lightweight folding tables shake during stitching, especially with denim fabric or thicker cotton fabric.
Common American home setups include:
- Kitchen tables
- Craft room desks
- Dining room corners
- Folding workstations near windows
Natural light helps, although many machines now include an LED work light. Machines like the Janome Arctic Crystal and Singer Start 1304 are compact enough for apartment living or dorm rooms.
Unboxing and Safety Checks
Before plugging anything in, check for:
- Foot pedal
- Power cord
- Bobbins
- Extra needles
- Presser feet
- User manual
- Seam ripper
Most Brother USA machines also include starter accessories inside hidden compartments. That detail gets overlooked constantly.
Pay attention to the voltage rating printed near the machine base. Standard U.S. outlets support most domestic sewing machines, but extension cord quality still matters. Cheap cords heat up faster than people realize.
Reading the Manual Without Getting Overwhelmed
Nobody reads sewing manuals cover to cover. Realistically, most people flip straight to threading diagrams.
That approach works better than expected.
Focus on these sections first:
- Threading path
- Bobbin winding
- Stitch selector settings
- Needle installation
- Cleaning instructions
Everything else tends to make more sense after actual use.
Threading the Machine and Winding the Bobbin
Threading looks simple until the stitches start looping underneath the fabric like spaghetti.
Then frustration arrives fast.
Upper Threading Basics
The upper threading path usually follows this order:
- Spool pin
- Thread guide
- Tension spring
- Take-up lever
- Needle clamp area
- Needle eye
Cotton thread behaves differently from polyester thread. Polyester stretches slightly and often works better for beginners because it resists snapping during tension mistakes.
A universal needle handles most beginner fabrics reasonably well. Size matters though. Thin fabric paired with oversized needles leaves visible holes.
Bobbin Winding and Insertion
Learning how to wind a bobbin feels tedious at first, but uneven bobbins create terrible stitching later.
For most machines:
- Place thread on spool pin
- Guide thread through bobbin winder
- Insert empty bobbin
- Engage winding mode
- Press foot pedal slowly
Drop-in bobbin systems usually feel easier for beginners because visibility improves troubleshooting. Front-load bobbin systems hide the mechanism more but often create slightly steadier tension.
That difference sparks endless debates online. Most beginners adapt to whichever machine sits in front of them.
Common Tension Problems
Loose stitches underneath usually mean upper threading mistakes.
Tight puckered fabric often points toward thread tension imbalance or incorrect bobbin seating.
A few things tend to help immediately:
- Raise the presser foot before threading
- Leave a 4-inch thread tail
- Rethread completely instead of adjusting randomly
- Check needle orientation
Skipping steps almost always takes longer later.
Learning Basic Stitches for Everyday Projects
Most beginners imagine decorative stitching first. In reality, straight stitches handle roughly 80% of household sewing.
Boring maybe. Useful absolutely.
Straight Stitch
The straight stitch works for:
- Hemming jeans
- Pillowcases
- Curtains
- School uniform repairs
Longer stitch length works better for thick denim fabric. Shorter stitches suit lightweight cotton fabric.
Machines sometimes sound different on thick layers too. That deeper punching noise catches beginners off guard the first few times.
Zigzag Stitch
A zigzag stitch prevents raw edge fraying and adds flexibility.
This stitch appears constantly on:
- Stretch fabrics
- Towel edges
- Kids’ clothing
- Decorative crafts
Wider stitch width creates stronger edge coverage but also uses more thread. Tiny adjustments make surprisingly visible differences.
Backstitch
The reverse lever secures seam beginnings and endings.
Without backstitching, seams slowly open after washing. Many beginners discover this after completing an entire project successfully… until laundry day ruins the illusion.
Practicing with Simple American-Friendly Projects
Skill improves faster through practical projects than endless scrap testing.
Perfection rarely happens early on anyway.
Beginner Projects That Actually Teach Useful Skills
| Project | Skills Learned | Why It Works for Beginners |
|---|---|---|
| Pillowcases | Straight seams, seam allowance | Fast results keep motivation high |
| Grocery bags | Reinforced handles, durability | Useful for Walmart or Target trips |
| Holiday crafts | Precision cutting, decorative stitching | Seasonal projects feel less repetitive |
| Simple hemming | Measuring, stitch control | Everyday clothing becomes repairable |
Dorm-room pillowcases remain one of the smartest beginner projects around. Large straight seams leave room for mistakes without ruining expensive fabric yardage.
Reusable grocery bags also teach practical reinforcement techniques. Handle placement matters more than beginners expect. Crooked handles look harmless until a gallon of milk stretches everything sideways.
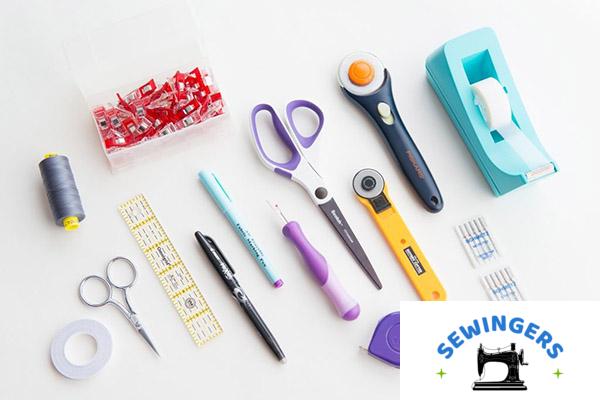
Helpful Beginner Supplies
A few tools genuinely improve the learning process:
- Fabric scissors dedicated only to fabric
- Measuring tape
- Seam guide
- Rotary cutter
- Cutting mat
- Pattern template paper
Cheap scissors destroy sewing momentum faster than people admit.
Avoiding Common Beginner Mistakes
The internet makes sewing look smoother than reality. Actual beginner sewing includes tangled thread, backward fabric pieces, and occasional muttering at the machine.
That part feels pretty universal.
Skipped Stitches
Skipped stitches often come from:
- Bent needles
- Incorrect needle size
- Improper threading
- Low-quality thread
A sewing needle size 80/12 works well for many beginner fabrics. Cotton blend fabric usually cooperates with that range.
Thread Bunching Under Fabric
Bird nests underneath fabric almost always involve threading issues rather than machine failure.
Common causes include:
- Presser foot raised during sewing
- Thread missing tension discs
- Loose bobbin housing
- Incorrect feed alignment
Beginners often tighten the tension dial aggressively at this stage. Usually the problem sits elsewhere.
Broken Needles
Broken needles sound dramatic. Most situations involve simple alignment mistakes.
Needles break more often when:
- Fabric gets pulled manually
- Thick seams get forced too quickly
- Needle orientation faces wrong direction
- Presser foot pressure mismatches fabric thickness
And speed matters. Sewing too fast hides problems until something snaps.
Maintaining Your Sewing Machine for Long-Term Use
Sewing machines collect lint constantly. Fabric fibers drift into the bobbin race after almost every project.
Then performance slowly declines in ways that seem random.
Cleaning Basics
After each project:
- Remove lint with a lint brush
- Check feed dogs
- Wipe needle plate area
- Empty visible thread scraps
Compressed air sounds helpful but often pushes lint deeper inside machines. Most authorized service center technicians discourage it.
Oiling and Needle Replacement
Some modern Brother and Janome machines require very little oiling. Older Singer mechanical models often need sewing machine oil at specific maintenance intervals listed in the service manual.
Needles generally need replacement after:
- 6 to 8 hours of sewing
- Hitting pins accidentally
- Sewing thick denim repeatedly
Dull needles create rough sounds before visible stitch problems appear.
Finding Repair Help in the U.S.
Joann stores sometimes maintain local repair referrals. Independent quilt shops also know reputable technicians nearby.
Warranty coverage varies significantly between brands. Brother typically emphasizes electronics support while Singer replacement parts remain widely available in the United States.
Growing Your Sewing Skills Beyond the Basics
Something interesting happens after a few months of sewing. Store-bought items start looking reverse-engineered. Seams become visible. Fabric grain becomes noticeable. Construction shortcuts suddenly stand out inside clothing racks.
That shift sneaks up quietly.
Learning Commercial Patterns
Simplicity Patterns and McCall’s Patterns remain beginner-friendly because instructions include visual diagrams and seam allowance markings.
Pattern envelopes confuse almost everybody initially.
The sizing differs from retail clothing sizes, and fabric recommendations matter more than expected. Lightweight fabric drapes differently than beginners imagine from package photos.
Online Learning Resources
YouTube changed sewing education dramatically.
Free tutorials now cover:
- Zipper installation
- Sleeve construction
- Quilt piecing
- DIY clothing projects
- Machine troubleshooting
Craftsy courses provide more structured lessons, although many beginners learn perfectly well through free content mixed with trial and error.
Community Classes and Budgeting
Joann classes still help beginners who prefer hands-on learning. Some 4-H programs also teach sewing basics USA families grew up around decades ago.
Fabric budgeting becomes its own skill eventually.
A rough beginner setup often includes:
| Item | Average U.S. Cost |
|---|---|
| Entry-level machine | $120–$300 |
| Fabric scissors | $15–$40 |
| Cotton fabric | $6–$15 per yard |
| Polyester thread | $3–$6 |
| Rotary cutter set | $20–$50 |
Fabric shopping can spiral quickly. That part catches people off guard more than the sewing itself.
FAQs
How long does it take to learn how to use a sewing machine?
Most beginners complete simple projects within 1 to 2 weeks of regular practice. Straight stitching usually feels comfortable first. Curves and precise corners take longer.
Which sewing machine works best for beginners?
The Brother CS6000i, Singer Start 1304, and Janome 2212 consistently rank among beginner-friendly machines because setup stays relatively straightforward and replacement parts remain accessible in the U.S.
Why is the thread bunching underneath the fabric?
Thread bunching usually happens because the upper thread missed the tension system during threading. Rethreading the entire machine often solves the issue faster than adjusting the tension dial repeatedly.
Is sewing cheaper than buying clothes?
Simple repairs and home projects save significant money over time. Complex garment sewing sometimes costs more initially because quality fabric and supplies add up quickly.
What fabric works best for beginner sewing projects?
Cotton fabric works best for most beginners because it stays stable while sewing and presses easily with an iron. Stretch fabrics shift more and tend to frustrate new sewists.
Conclusion
Learning how to use a sewing machine rarely looks polished at the beginning. Thread jams happen. Seams drift sideways. Bobbins somehow empty faster than expected.
Then one project comes together correctly, and the machine starts feeling less mechanical and more familiar.
That’s usually the turning point.
A basic sewing machine sitting on a kitchen table can repair jeans, create holiday gifts, alter curtains, and quietly reduce household costs over time. More importantly, sewing changes how everyday objects get viewed. Clothing stops looking disposable. Fabric starts looking useful.
And eventually, the sound of steady stitching becomes recognizable in the same way familiar kitchen noises are. Not perfect. Just part of normal life now.
Sources
[1] HomeAdvisor U.S. Tailoring and Alteration Cost Data[2] Craft Industry Alliance Sewing Market Reports