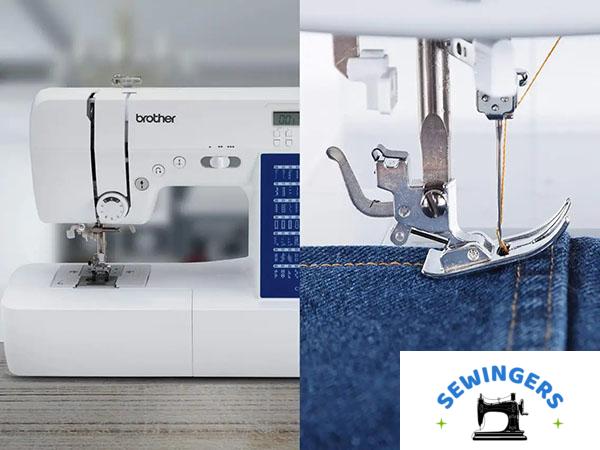
A sewing machine looks simple enough — thread goes in, fabric slides under the foot, and stitches come out. Then something jams, loops start forming underneath the fabric, or your seam drifts sideways for no obvious reason. Suddenly, the whole thing feels strangely opaque.
Here’s what usually happens: the confusion isn’t about skill. It’s about not knowing which part is doing what — and why it sometimes stops cooperating.
This guide walks through sewing machine parts and functions based on how they actually behave in real projects, whether you’re hemming denim, piecing together a quilt, or rushing through holiday gifts at 11 p.m. with fabric everywhere.
Contents
- 1 Key Takeaways
- 2 1. Needle and Needle Clamp
- 3 2. Presser Foot
- 4 3. Bobbin and Bobbin Case
- 5 4. Feed Dogs
- 6 5. Tension Control System
- 7 6. Spool Pin and Thread Guide
- 8 7. Handwheel
- 9 8. Needle Plate or Throat Plate
- 10 9. Stitch Selector and Control Panel
- 11 10. Motor and Foot Pedal
- 12 Mechanical vs. Computerized Sewing Machines
- 13 Basic Sewing Machine Maintenance
- 14 Why Understanding Sewing Machine Parts Matters
Key Takeaways
- Five parts do most of the work on any machine: the needle, bobbin, presser foot, feed dogs, and tension system.
- Stitch quality reflects how those parts interact, not just how fast you sew.
- Mechanical and computerized machines share the same core structure, even at very different price points.
- Changing the needle every 8 to 10 hours of sewing and cleaning out lint regularly can significantly extend the machine’s lifespan.
- Knowing what each part does makes it easier to choose a machine that suits the projects you actually sew.
1. Needle and Needle Clamp
At first glance, the needle seems almost too basic to matter much. That assumption tends to disappear after the first round of skipped stitches.
What It Does
The needle pierces the fabric and carries the upper thread downward to meet the bobbin thread, forming a stitch. It moves vertically through the needle bar in rapid cycles, typically producing between 600 and 1,000 stitches per minute on a home sewing machine.
Key Functions
- Creates consistent holes through fabric layers.
- Delivers the upper thread to the bobbin system.
- Directly affects stitch precision and how the fabric responds under pressure.
Real-World Behavior
One common mistake, especially among beginners, is using the same needle for too long. A dull needle doesn’t always fail dramatically. Instead, it starts producing uneven stitches, or you may hear a faint popping sound as it enters the fabric. That’s usually the warning.
Common Needle Sizes
- 80/12 needles: A standard option for quilting cotton and many everyday fabrics.
- 90/14 needles: Better suited to medium-weight fabrics such as canvas.
- 100/16 needles: Commonly used for denim, upholstery, and other heavy materials.
Using the wrong needle size doesn’t always cause an immediate failure. It often makes the machine’s performance gradually worse.
2. Presser Foot
This is where fabric control actually starts. Even if the tension settings are perfectly adjusted, the wrong presser foot or incorrect pressure can undermine the entire seam.
What It Does
The presser foot holds the fabric against the feed dogs, keeping it stable as stitches form. Without enough pressure, the fabric layers may shift. With too much pressure, delicate fabrics can pucker.
Common Presser Foot Types
- All-purpose foot: Included with most sewing machines and suitable for general sewing.
- Zipper foot: Allows stitching close to zippers, piping, and fabric edges.
- Buttonhole foot: Helps create evenly sized buttonholes, often automatically on computerized machines.
- Walking foot: Popular among quilters because it moves multiple fabric layers more evenly.
Why It Matters
Fabric doesn’t move through the machine on its own — it has to be guided. Many mid-range machines include adjustable presser-foot pressure, which becomes especially useful when working with fabrics that stretch, slip, or resist feeding evenly.
What Shows Up in Practice
Quilters often switch to a walking foot when sewing layered projects. Without it, the upper fabric layer can slowly creep forward. The movement may be barely noticeable at first, but the misalignment becomes obvious by the end of a long seam.
3. Bobbin and Bobbin Case
A lot of sewing frustration begins here. The upper thread gets most of the attention, but the bobbin system controls half of what the finished stitch looks like.
What It Does
The bobbin holds the lower thread, while the bobbin case regulates its tension. Together, they determine whether the stitch locks properly in the center of the fabric or starts looping on one side.
Two Main Bobbin Systems
| System Type | Description | Common Use |
|---|---|---|
| Drop-in | Loads from the top and is usually visible through a clear cover plate. | Common on beginner-friendly and modern household sewing machines. |
| Front-loading | Inserted from the front using a separate removable bobbin case. | Often found on older machines and industrial-style models. |
Real-World Observation
Drop-in bobbins are easier to load, but that convenience can encourage users to insert them quickly without checking the thread direction. This small mistake often causes loose stitching or loops on the underside of the fabric.
A Small Detail That Matters
Even slight unevenness in bobbin winding can affect stitch balance. If the thread is wound too loosely or sits unevenly on one side, the finished stitches may look inconsistent.
4. Feed Dogs
Feed dogs are the small serrated metal teeth located beneath the needle plate. Most people don’t think about them until the fabric starts feeding unevenly.
What They Do
Feed dogs move the fabric forward in controlled increments with every stitch. The distance they move corresponds to the selected stitch length.
Why They Matter
- Help keep seams straight without constant manual guidance.
- Prevent fabric from bunching near the needle.
- Maintain consistent stitch spacing across long seams.
Practical Use Case
Feed dogs can usually be lowered for free-motion quilting. In this mode, the sewist can move the fabric freely in any direction instead of following the machine’s normal forward feed.
What Actually Happens
When feed dogs become worn or clogged with lint, the fabric may stop moving evenly. The machine still runs, but it no longer responds predictably to the user’s guidance.
5. Tension Control System
Think of the tension system as the negotiator between the upper and lower threads. When the tension is balanced, stitches look clean on both sides. When it’s incorrect, problems appear quickly.
What It Does
The tension system controls how tightly the upper thread is pulled as it loops around the bobbin thread to form each stitch.
Signs of Incorrect Tension
- Loops forming on the underside of the fabric.
- Thread snapping unexpectedly in the middle of a seam.
- Stitches that look wavy, loose, or uneven from above.
Balanced Tension
A properly balanced stitch locks the upper and lower threads in the middle of the fabric layers. The point where the threads meet should not be clearly visible from either side.
Real-Life Pattern
Many apparent tension problems are actually caused by threading mistakes or lint trapped inside the tension discs. Adjusting the tension dial may temporarily hide the issue, but the problem often returns a few seams later.
6. Spool Pin and Thread Guide
The thread path looks simple until the thread tangles in the middle of an important seam.
What They Do
- Keep the thread spool seated and stable while the machine runs.
- Guide the thread through the tension system in the correct sequence.
Modern Design Insight
Horizontal spool pins often reduce twisting and tangling compared with vertical pins. It’s a small design difference that can have a noticeable effect during longer sewing sessions.
What Tends to Happen
Skipping even one thread guide can throw the tension completely out of balance. The machine may continue stitching, but the results can become inconsistent and difficult to diagnose.
7. Handwheel
The handwheel acts as the machine’s manual override, and it matters more than it initially appears.
What It Does
The handwheel manually raises or lowers the needle independently of the motor and foot pedal.
When It Comes Into Play
- Starting a seam at an exact point.
- Positioning the needle before pivoting at a corner.
- Working through a thread jam without forcing the motor.
- Guiding the needle through a thick seam slowly and carefully.
Direction Rule
On most household sewing machines, the handwheel should be turned toward you. Turning it in the opposite direction can cause the thread to tangle around the bobbin area.
Real-World Use
Relying entirely on the foot pedal may feel faster, but manually positioning the needle often improves precision, especially when approaching corners or thick fabric intersections.
8. Needle Plate or Throat Plate
The needle plate looks like a simple flat metal surface beneath the needle, but it performs several important functions.
What It Does
The needle plate supports the fabric from underneath and covers the feed dogs, creating a stable surface for the material to move across.
Why It Matters
- Provides seam allowance guides.
- Stabilizes the fabric at the exact point where stitches form.
- Protects the feed dog mechanism underneath.
Standard Seam Allowance Detail
Many sewing machine needle plates include a ⅝-inch seam allowance marking, which matches the standard seam allowance used in many commercial sewing patterns.
What Shows Up in Practice
A scratched or damaged needle plate can snag delicate fabric. The problem may begin subtly, with threads catching or the fabric dragging slightly as it moves through the machine.
9. Stitch Selector and Control Panel
This is where the machine’s stitch range becomes visible — and where many users realize they’re only using a small portion of the available options.
What It Does
The stitch selector or control panel allows you to choose different stitch types, including:
- Straight stitch: The primary stitch used for most construction seams.
- Zigzag stitch: Useful for finishing raw edges and sewing stretch fabrics.
- Decorative stitches: Used for embellishment, quilting, and detailed finishing.
- Buttonhole modes: Designed to create consistent buttonholes in one or multiple steps.
Mechanical vs. Digital Controls
Mechanical machines use physical knobs and dials. Computerized models typically include LCD screens, programmable stitch settings, speed controls, stitch memory, and needle-stop positioning.
Real Usage Pattern
Most everyday projects only require two or three stitch types. Decorative options usually become more useful after the sewist has mastered basic construction, quilting, embroidery, or finishing techniques.
10. Motor and Foot Pedal
Speed control affects sewing quality more than many beginners expect.
What They Do
- The motor drives the needle and operates the machine’s mechanical cycle.
- The foot pedal controls the sewing speed dynamically.
- More pressure on the pedal produces faster stitching.
Speed Control Insight
Light pressure creates slow, controlled stitching. Heavier pressure increases the speed for long, straight seams where less detailed control is required.
What Happens Over Time
Many beginners sew too quickly when they first start. Slowing down at corners, curves, fabric joins, and thick seams often improves accuracy more than changing any machine setting.
Mechanical vs. Computerized Sewing Machines
Mechanical and computerized sewing machines share the same core components. The most noticeable differences appear in the controls, available automation, and overall workflow.
| Feature | Mechanical | Computerized |
|---|---|---|
| Stitch Selection | Manual knobs or dials | Digital interface or LCD screen |
| Typical Price Range | $100–$400 | $300–$2,000+ |
| Ease of Use | Straightforward controls with fewer variables | More features and automation, but more settings to learn |
| Best For | Beginners and basic garment sewing | Quilters, advanced sewists, and high-volume users |
Premium brands such as Bernina are common at the higher end of the computerized-machine market, particularly among sewists working on technically complex or high-volume projects.
Real-World Trade-Off
Mechanical machines feel predictable and are often easier to troubleshoot when something goes wrong. Computerized machines offer more precision and automation, but they can require additional diagnostic work when an electronic setting or sensor behaves unexpectedly.
Basic Sewing Machine Maintenance
Maintenance rarely feels urgent until the machine’s performance gradually declines and it becomes difficult to identify the cause.
Core Maintenance Practices
- Clean lint from beneath the needle plate after every few projects, or more frequently when sewing fabrics that shed heavily.
- Oil the machine only if the instruction manual specifically recommends it, as many modern machines don’t require user-applied oil.
- Replace the needle after approximately 8 to 10 hours of active sewing.
- Remove tangled thread from the bobbin area as soon as it appears.
- Store the machine in a dry, clean, and dust-free location.
- Use a cover when the machine isn’t being used.
Expected Lifespan
A properly maintained sewing machine can last between 10 and 25 years, depending on the model, build quality, workload, and frequency of maintenance.
What Actually Happens
Skipping maintenance rarely causes immediate failure. Instead, the decline happens gradually. The machine becomes louder, stitches begin to look slightly uneven, and small amounts of resistance appear where the fabric previously moved smoothly.
These changes are easy to overlook until they start interfering with complete projects.
Why Understanding Sewing Machine Parts Matters
At some point, sewing shifts from simply following instructions to understanding how the machine behaves. That change often happens after a few genuinely frustrating experiences, such as a thread nest, an uneven seam, or a needle that breaks for no obvious reason.
Knowing what each part does changes how you approach common problems:
- Stitch issues can be traced to threading mistakes, needle condition, bobbin loading, or tension balance instead of being dismissed as a vague machine malfunction.
- Fabric movement problems point toward the feed dogs, presser foot, or presser-foot pressure.
- Skipped stitches can be linked to an incorrect, bent, or dull needle.
- Thread nests often indicate improper upper threading rather than a damaged bobbin.
- Machine selection becomes easier when you understand which features support the projects you actually sew.
Quilting a Fourth of July table runner involves different requirements from hemming jeans or producing handmade products for an Etsy shop. The machine doesn’t change, but your understanding of what it can do does.
That’s where sewing becomes more interesting. The machine stops feeling like a rigid tool and starts behaving more like a connected system — one where each part quietly affects the others, sometimes in ways that aren’t obvious until you’ve spent time working with it.