There’s a moment every sewist knows — the moment a seam puckers for no obvious reason, or the thread breaks for the fourth time in a row, and you’re ready to push the machine off the table. It’s frustrating. And more often than not, the fix is something small.
Sewing machines are genuinely powerful tools, but they reward the people who understand them. Whether you’re just starting out on a Brother or you’ve been working with a Janome for years, the fundamentals stay the same. Better stitch quality, fewer mistakes, and a machine that lasts longer — it all comes down to a handful of habits.
These tips aren’t complicated. They’re the kind of things that experienced sewists pick up over time and wish someone had told them on day one.
Contents
- 1 Sewing Machine Tip #1: Choose the Right Needle for Every Fabric
- 2 Sewing Machine Tip #2: Master Thread Tension Settings
- 3 Sewing Machine Tip #3: Clean and Oil Your Machine Regularly
- 4 Sewing Machine Tip #4: Use the Correct Presser Foot
- 5 Sewing Machine Tip #5: Practice Sewing at a Consistent Speed
- 6 Common Sewing Machine Mistakes to Avoid
- 7 Essential Sewing Machine Accessories Worth Buying
- 8 Frequently Asked Questions About Sewing Machines
- 9 Final Thoughts
Sewing Machine Tip #1: Choose the Right Needle for Every Fabric
This is the one sewing machine tip that fixes more problems than people expect. Wrong needle, and you’ll get skipped stitches, fabric snags, and thread breaks — and none of those feel like a needle problem when they’re happening.
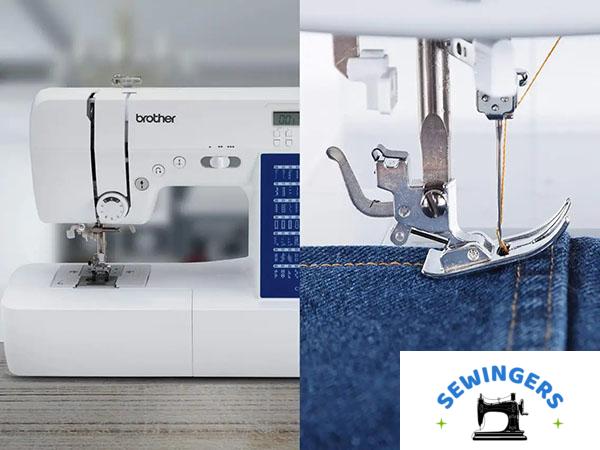
The basics: universal needles work on most woven fabrics, but they’re not great for everything. Denim fabric needs a heavier needle with a sharp point — typically a 90/14 or 100/16 — because the weave is so tight. Knit fabrics need a ballpoint needle, which slides between the fibers instead of piercing them. Cotton fabric is forgiving with a universal needle, but polyester fabric can sometimes benefit from a sharp needle for cleaner penetration.
Schmetz and Singer both make reliable needles across all types, and the difference in results between a fresh needle and a dull one is more noticeable than most beginners realize.
Replace the needle every 8-10 hours of sewing, or at the start of every major project. A worn needle doesn’t always look bent — sometimes it’s just microscopically blunted, and that’s enough to throw off your entire stitch quality.
Signs the needle needs to go: a popping or clicking sound as it enters the fabric, skipped stitches on an otherwise well-threaded machine, or a slightly rough feeling when you run your finger along the needle shaft.
Sewing Machine Tip #2: Master Thread Tension Settings
Thread tension is one of those things that sounds technical but is actually pretty intuitive once you see it in action. The goal is balance — the upper thread and the bobbin thread should meet in the middle of the fabric, creating a clean, flat stitch on both sides.
When the tension is off, you’ll notice loops on the underside (usually means the upper tension is too loose) or visible bobbin thread pulling to the top (upper tension too tight). On most Brother and Janome machines, the tension dial sits between 3 and 5 for standard sewing. That’s a decent starting point, but every fabric is a little different.
Always test tension on a scrap piece of the actual fabric you’re using, not just any leftover material. Polyester thread and cotton thread behave differently under the same tension setting, and thick fabric needs different adjustments than lightweight material.
The bobbin case is worth checking too. Thread nesting underneath the fabric — that tangled mess of thread — often comes from the bobbin being threaded incorrectly rather than from a tension dial problem. Re-thread the bobbin completely before adjusting anything else.
One thing that catches people off guard: the presser foot needs to be down before you thread the machine. When it’s up, the tension discs are open and the thread won’t seat correctly, which means your tension will be off even if the dial is set right.
Sewing Machine Tip #3: Clean and Oil Your Machine Regularly
Lint is sneaky. It builds up in the bobbin area, under the needle plate, around the feed mechanism — and it does it quietly, over weeks of sewing, until performance starts to degrade. Skipped stitches, uneven tension, a machine that sounds rougher than it used to — lint accumulation is behind a surprising number of these issues.
For most machines, a quick clean after every 3-4 projects is a reasonable routine. Remove the bobbin, use a small lint brush to clear out the bobbin area, and run the brush along the feed dogs. Don’t use compressed air inside the machine — it can push lint deeper into areas you can’t reach.
Bernina and Juki machines both have fairly accessible bobbin compartments, which makes this easier. Some machines have a top-drop bobbin, some have a front-load — the process is slightly different, but the principle is the same.
Oiling is trickier because not every machine needs it. Some modern machines are self-lubricating. If yours does need sewing machine oil, the manual will say so and will tell you exactly where to apply it — usually just a drop or two on specific moving components. Over-oiling is a real problem; it can get onto the fabric and leave stains.
If you haven’t cleaned your machine in a while, that’s where to start. The improvement in how the machine feels and sounds is usually immediate.
Sewing Machine Tip #4: Use the Correct Presser Foot
Most sewists start with the standard presser foot and never look back. That’s fine for basic projects, but the right specialty foot genuinely changes what you can do — and how easily you can do it.
Here’s a quick breakdown of the most useful ones:
| Presser Foot | Best For | What It Does |
|---|---|---|
| Walking Foot | Quilting, thick layers, slippery fabric | Feeds fabric evenly from the top and bottom, preventing shifting |
| Zipper Foot | Zippers, piping, cording | Lets the needle sew close to a raised edge without hitting it |
| Buttonhole Foot | Buttonholes (obviously) | Measures and creates consistent, automatic buttonholes |
| Quilting Foot | Free-motion quilting | Allows fabric to move in any direction for freehand designs |
The walking foot is the one most people reach for and then wonder why they didn’t start using it sooner. On Brother machines especially, it’s almost magical for quilting cotton or any project with multiple layers. Fabric feeding becomes even and consistent — no more shifting or distortion in the middle of a long seam.
Seam precision improves noticeably with the right foot. It’s not just convenience — it’s the difference between a seam that lies flat and one that’s slightly wavy after washing.
Attachment systems vary by brand, so double-check compatibility before buying specialty feet. Most are manufacturer-specific, though there are universal versions that work across machines.
Sewing Machine Tip #5: Practice Sewing at a Consistent Speed
Speed is something beginners almost always get wrong — usually by going too fast. It feels like progress. It isn’t.
Rushing through a seam creates uneven stitching, drift from the seam guide, and fabric handling problems that require a seam ripper later. Stitch consistency comes from controlling the foot pedal, not from muscle memory alone.
On a Singer with a standard foot pedal, try this: practice on quilting cotton scraps at half-speed, keeping the seam allowance exactly 1/4 inch from the edge. Do that until it feels boring. That boredom is the goal — it means the motion is becoming automatic.
A sewing table helps enormously here. If the fabric is hanging off the edge and pulling, it creates drag that throws off your control. Support the full weight of the fabric and let the feed dogs do their job.
Seam accuracy comes from slowing down at curves, pivoting correctly at corners, and building confidence through repetition — not through speed. Most experienced sewists actually sew slower than beginners expect.
Common Sewing Machine Mistakes to Avoid
A lot of sewing problems that feel like machine defects are actually user errors. That’s not a criticism — it’s genuinely good news, because it means they’re fixable.
Incorrect threading causes more issues than almost anything else. If the thread isn’t seated properly through every guide, the stitch formation will be off. Re-thread completely, with the presser foot up, before troubleshooting anything else.
Pulling fabric while sewing is a reflex a lot of people have — tugging the fabric to help it feed. The feed dogs are designed to move the fabric; pulling creates uneven seams and can bend the needle or damage the needle plate.
Skipping maintenance lets lint build up until it causes machine jams or affects bobbin tension in ways that are annoying to diagnose.
Wrong needle for the fabric creates fabric distortion and skipped stitches that get blamed on the thread spool or tension dial.
And one that trips up beginners: not checking the thread path after changing the bobbin. It takes ten seconds and prevents a lot of frustration.
Essential Sewing Machine Accessories Worth Buying
You don’t need a lot. But a few tools make a real difference.
A rotary cutter and cutting mat (roughly $25-$40 together) transform how accurately you cut fabric. Straight cuts lead to straight seams. A quilting ruler pairs with these for precise measurements.
A seam ripper is non-negotiable — even experienced sewists use them constantly. Get a sharp one with a comfortable grip; the cheap ones slip.
A storage case for feet and accessories keeps everything in one place and saves time when switching between projects. Fabric marking tools — chalk pencils or water-soluble markers — help with seam allowance guides and pattern placement.
None of this needs to cost much. Cutting accuracy and project organization improve the quality of finished work more than most people expect.
Frequently Asked Questions About Sewing Machines
How Often Should I Change My Sewing Machine Needle?
Change the needle every 8-10 hours of active sewing, or at the start of each new project. Needles dull faster than they appear to, and a slightly worn needle is often the cause of skipped stitches, fabric snags, and thread breaks.
Why Does My Thread Keep Breaking?
Thread breakage usually comes from one of a few places: incorrect upper threading, a needle that’s inserted wrong or worn out, thread tension set too high, or a knot or tangle on the thread spool. Re-thread the machine completely, check the needle, and lower the tension slightly before testing again.
What Is the Best Sewing Machine for Beginners?
The Brother CS6000i and Singer Heavy Duty 4452 are consistently recommended for beginners — both are affordable, reliable, and come with enough features to grow with. Janome machines are also well-regarded for build quality. For someone serious about sewing long-term, a Bernina or Juki is worth the investment, though the price point is higher.
How Often Should I Clean My Machine?
Clean the bobbin area and lint out every 3-4 projects, or roughly every 8 hours of sewing. A full clean — including checking the feed mechanism and needle plate area — is worth doing monthly if you sew regularly. Follow the manufacturer’s recommendations for oiling, since not all machines require it.
Final Thoughts
Getting better at sewing doesn’t always mean buying a new machine or learning a complex technique. Most of the time, it means taking care of the machine you have, understanding how tension and needle choice actually work, and building the kind of slow, consistent habits that experienced sewists have quietly developed over years.
Start with the needle. Then check the tension. Then clean the bobbin area. Those three things alone will fix most of what frustrates people about sewing machines — and the results show up immediately in the quality of your seams.