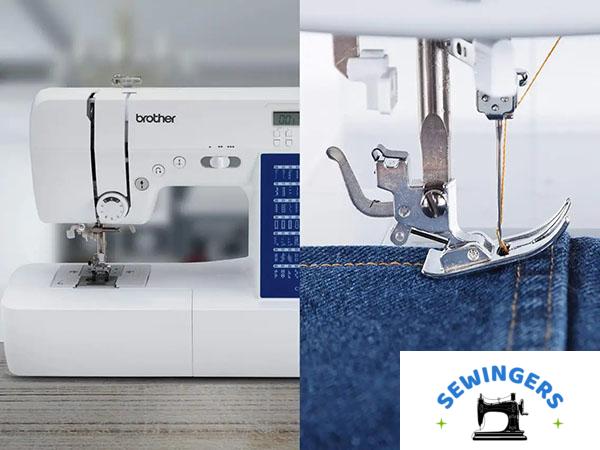
If you’ve ever watched two people sew the same fabric and end up with completely different results, the difference often comes down to one surprisingly small part: the presser foot.
A presser foot is the attachment that holds fabric against the feed dogs and needle plate while the machine stitches. That pressure keeps fabric moving evenly, improves stitch formation, and helps control everything from delicate cotton to thick quilt sandwiches.
Different types of sewing machine presser feet exist because fabrics, stitch patterns, and sewing tasks vary dramatically. A zipper installation requires a different approach than quilting a blanket. A buttonhole needs more precision than a simple seam. One foot simply can’t do every job well.
In American home sewing, presser feet have become increasingly important as DIY fashion, quilting, home décor projects, and clothing repairs continue to grow in popularity. Retailers such as Joann regularly stock specialized sewing machine attachments because many sewists want professional-looking results without investing in industrial equipment.
Most modern machines from Singer, Brother USA, Janome America, and Baby Lock USA use either a snap-on system or screw-on attachment design. Before purchasing new feet, checking the machine’s shank type, supported stitch width, and compatibility requirements saves time and frustration.
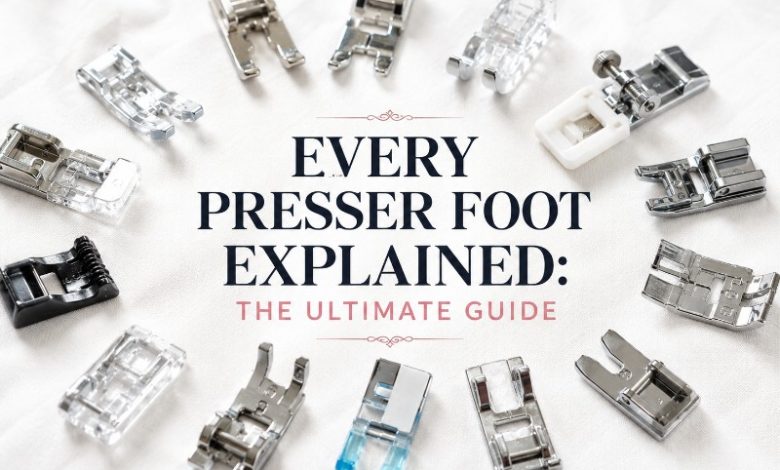
This sewing foot guide breaks down the most useful presser foot types and explains where each one shines.
Contents
Standard Presser Foot (All-Purpose Foot)
The standard presser foot is the most commonly used foot on American sewing machines.
Often called an all-purpose sewing foot, this attachment handles both straight stitch and zigzag stitch applications. Machines such as the Singer Heavy Duty 4452, Brother CS7000X, and Janome HD3000 typically include this foot right out of the box.
Best Uses
- Everyday garment sewing
- Basic alterations
- Home décor projects
- Cotton fabrics
- Polyester blends
- Lightweight woven fabrics
The design includes a wide opening that accommodates various stitch patterns while maintaining consistent fabric control.
For beginners, the standard presser foot offers the easiest learning curve. Most sewing projects sold through Walmart and Michaels pattern departments can be completed with this single attachment.
A practical benefit often overlooked is seam accuracy. The edges of the foot help guide a consistent seam allowance, while proper stitch length settings improve stitch quality. Pairing it with a universal needle creates a reliable setup for most household sewing.
Zipper Foot
A zipper foot is designed for stitching close to zipper components where a standard foot cannot fit.
Unlike wider feet, this narrow presser foot allows sewing near zipper teeth, zipper tape, piping, and other raised edges.
Best Uses
- Centered zippers
- Invisible zippers
- Decorative piping
- Handbags
- Pillow covers
- Cushion projects
Brands such as YKK dominate the U.S. zipper market, and installing those zippers becomes much easier with the correct attachment.
For back-to-school projects, zipper feet often appear on supply lists for lunch bags, pencil pouches, and backpacks. Home décor enthusiasts also rely on them when creating removable pillow covers.
Good zipper installation often depends on accurate edge stitching, clean topstitching, and a neat seam finish. The zipper foot helps all three happen more consistently.
Materials and supplies from Coats & Clark, Hobby Lobby, Amazon, and Etsy sellers frequently include zipper-focused project kits that assume this foot is available.
Buttonhole Foot
A buttonhole foot creates uniform buttonholes with far greater consistency than freehand stitching.
Many modern machines support a one-step buttonhole foot, while older models often use a four-step process.
One-Step vs. Four-Step
| Type | Speed | Consistency | Best For |
|---|---|---|---|
| One-step buttonhole | Fast | Excellent | Frequent garment sewing |
| Four-step buttonhole | Slower | Good | Basic machines and occasional use |
Machines from Brother USA, the Singer Quantum Stylist series, and the Janome Magnolia line commonly feature automated buttonhole systems.
Best Uses
- Shirts
- Blouses
- Dresses
- Children’s clothing
- Holiday garments
Projects from McCall’s Patterns and Simplicity Patterns frequently incorporate button closures, making a buttonhole foot one of the most valuable sewing machine attachments for garment makers.
Several details influence results:
- Proper fabric marking
- Correct placement of interfacing
- Adequate stabilizer support
- Machine calibration
- Accurate buttonhole stitch formation
The bar tack sections at each end of the buttonhole receive heavy stress, so stabilization matters more than many beginners expect.
Walking Foot (Even Feed Foot)
A walking foot, also known as an even feed foot, solves one of sewing’s most common problems: fabric layers shifting out of alignment.
Unlike standard feet, a walking foot includes an additional feed mechanism that helps move the top fabric layer at the same rate as the bottom layer.
Best Uses
- Quilting
- Denim
- Fleece
- Plaids
- Layered fabrics
- Heavy projects
American quilters frequently consider this attachment indispensable. Events such as QuiltCon regularly showcase techniques that benefit from walking foot construction.
Popular quilting fabrics from Moda Fabrics and Robert Kaufman Fabrics perform particularly well when paired with an even-feed system.
Why It Works
Without a walking foot, fabric drag can cause uneven feeding. The result is puckering, stretching, or mismatched seams.
When sewing through batting and multiple layers, maintaining stitch consistency becomes much easier because the top layer receives active feeding assistance.
Brands such as Baby Lock USA and Bernina of America offer highly regarded walking foot systems that appeal to serious quilters.
For holiday quilts and large blankets, this foot often becomes the difference between frustration and smooth progress.
Overcasting (Overlock) Foot
An overcasting foot helps finish raw fabric edges without requiring a separate serger.
For sewists who don’t want to spend $400 or more on a dedicated machine, this attachment offers a practical alternative.
Best Uses
- Knit fabrics
- T-shirts
- Casual garments
- Stretch fabrics
- Seam finishing
The foot works alongside an overcast stitch built into many modern machines.
As stitches wrap around the raw edge, fraying decreases and seams appear cleaner.
Key Benefits
- Reduces unraveling
- Improves garment durability
- Creates a more professional appearance
- Extends fabric life
Machines from Brother USA and the Singer ProFinish lineup often include suitable stitch programs for this technique.
Educational resources from Craftsy, YouTube, and classes offered through Joann frequently teach overcasting as an entry-level finishing method.
Proper thread tension remains important. Excessive tension can distort knit fabric, while insufficient tension can create loose loops.
Blind Hem Foot
A blind hem foot creates hems that are nearly invisible from the outside of a garment.
For dress pants, skirts, and office wear, that subtle finish can significantly improve appearance.
Best Uses
- Dress trousers
- Uniforms
- Skirts
- Curtains
- Formal garments
The average hemming service in the United States often costs between $15 and $30, making this attachment attractive for frequent alterations.
How It Works
A blind hem foot uses an adjustable guide plate to position the folded fabric accurately.
The machine forms a blind hem stitch that catches only a tiny portion of the garment’s exterior.
Important elements include:
- Correct hem allowance
- Precise folded edge placement
- Controlled stitch bite
- Consistent feeding
Machines from Janome America and Brother USA commonly support blind hem stitches.
Retailers and brands such as Macy’s, Nordstrom Alterations, and Levi Strauss & Co. have helped popularize clean hem finishes that many home sewists try to replicate.
Button Sewing Foot
A button sewing foot automates one of the most repetitive sewing tasks.
Instead of attaching buttons by hand, this foot secures them quickly and consistently.
Best Uses
- School uniforms
- Children’s clothing
- Scout uniforms
- Shirt repairs
- Routine mending
Organizations such as Girl Scouts of the USA and Boy Scouts of America often require uniform maintenance, making this attachment surprisingly useful.
How It Works
The button sewing foot holds the button firmly while the machine stitches through the holes.
Success depends on:
- Correct stitch width setting
- Proper feed dog drop
- Secure thread lock
- Consistent securing stitch formation
The foot works with both two-hole and four-hole buttons.
When creating a button shank, additional spacing can be added to accommodate thicker fabrics and jacket fronts.
Machines from Singer and Brother USA frequently include button-sewing functionality in their stitch menus.
Specialty Presser Feet
Specialty presser feet expand sewing possibilities beyond basic construction.
These attachments often appeal to advanced hobbyists who enjoy experimenting with techniques and decorative finishes.
Rolled Hem Foot
A rolled hem foot creates narrow, clean hems on lightweight fabrics.
The foot curls the fabric edge before stitching, producing a refined rolled hem edge often seen on scarves and delicate garments.
Teflon Foot
A Teflon foot features a nonstick coating that glides over materials that tend to stick.
Common examples include:
- Vinyl
- Leather
- Faux leather
- Laminated fabrics
Darning and Free-Motion Foot
This foot enables free motion quilting and creative thread work.
The fabric moves freely under the needle, allowing intricate designs and custom quilting motifs.
Ruffler Foot
A ruffler attachment automatically creates gathers and pleats.
Adjustable settings control the gathering ratio, making repetitive decorative work dramatically faster.
Cording Foot
A cording foot helps attach decorative trim, cords, and embellishments with greater precision.
Manufacturers such as Bernina of America, Baby Lock USA, Singer, Janome America, and Brother USA all offer extensive specialty-foot collections.
How to Choose the Right Presser Foot
The best presser foot depends on your machine, project, and sewing goals.
Presser Foot Comparison Guide
| Presser Foot | Primary Use | Difficulty Level | Typical Value |
|---|---|---|---|
| Standard Foot | Everyday sewing | Beginner | Highest overall versatility |
| Zipper Foot | Zippers and piping | Beginner | Excellent project-specific tool |
| Buttonhole Foot | Buttonholes | Beginner to Intermediate | Major time saver |
| Walking Foot | Quilting and layers | Intermediate | Outstanding fabric control |
| Overcasting Foot | Edge finishing | Beginner | Budget serger alternative |
| Blind Hem Foot | Invisible hems | Intermediate | Strong money-saving option |
| Button Sewing Foot | Attaching buttons | Beginner | Great for repairs |
| Specialty Feet | Decorative techniques | Intermediate to Advanced | Expands creative options |
One interesting difference becomes obvious after a few projects. The standard foot handles the widest range of tasks, but specialized feet often produce dramatically better results for their intended purpose. A walking foot, for example, can make layered quilt construction feel surprisingly effortless compared with an all-purpose foot.
Buying Tips
-
Check your machine’s shank type.
- Low shank
- High shank
- Slant shank
- Verify machine compatibility using the exact model number.
- Confirm whether a snap-on adapter is required.
- Match the foot to the machine’s available stitch function options.
- Inspect the presser bar specifications before purchasing.
- Read U.S.-based reviews on Amazon and similar marketplaces.
Many quality presser foot sets cost less than $50 and include several of the most commonly used attachments.
Consumer testing organizations such as Consumer Reports occasionally evaluate sewing machines, but project-specific user reviews often provide better insight into foot compatibility and real-world performance.
Conclusion
Presser feet may be small, but they influence nearly every aspect of sewing performance. The right foot improves fabric control, enhances stitch quality, and helps produce cleaner, more professional results.
For most sewists, a practical collection includes a standard presser foot, zipper foot, buttonhole foot, walking foot, and overcasting foot. Those five attachments cover a large percentage of garment sewing, quilting, home décor, and repair projects.
As sewing skills expand, specialty feet unlock new techniques and creative possibilities. The result isn’t simply faster sewing. It’s better sewing, with fewer frustrations and more consistent results from fabric edge to finished seam.