You can buy a beautiful pattern, trace it neatly, cut expensive fabric, and still end up with a garment that feels just a little… off. I’ve done it. Plenty of times. And usually the problem wasn’t my sewing at all. It was the fit, or more accurately, the assumption that the pattern already knew my body. It didn’t.
Commercial sewing patterns are helpful, but they aren’t personal. They’re drafted for a standard shape, and most bodies wander away from that standard in at least one direction. Yours probably does. Mine definitely does. The good news is that pattern fitting is far less mysterious than it sounds once you break it into parts.
Contents
- 1 Understand How Commercial Sewing Patterns Are Designed
- 2 Take Accurate Body Measurements the Right Way
- 3 Choose the Correct Starting Size
- 4 Make a Full Bust Adjustment
- 5 Adjust Length in the Right Places
- 6 Fix Common Fit Issues Without Overcorrecting
- 7 Sew a Muslin Before You Commit
- 8 Blend Adjustments for Your Real Body
- 9 Understand Ease and Fabric Choice
- 10 Keep a Personal Fit Record
- 11 Tools That Make Pattern Adjustments Easier
- 12 Conclusion
Understand How Commercial Sewing Patterns Are Designed
Most U.S. pattern companies, including Simplicity, McCall’s, Butterick, and Vogue Patterns, draft misses patterns for a B-cup bust and average body proportions. That usually means average torso length, balanced shoulder width, and a fairly standard relationship between bust, waist, and hip.
Here’s the thing: patterns are templates, not verdicts.
When you know the built-in assumptions, you stop taking fit issues personally. If the neckline gapes or the bodice strains across your bust, that doesn’t mean you picked the “wrong” pattern. It means the pattern was drafted for a different body map. That difference matters more than people realize.
In my experience, this one shift in thinking changes everything. You stop chasing random fixes and start making targeted ones.
Take Accurate Body Measurements the Right Way
You can’t adjust a pattern well if your measurements are fuzzy. And yes, “close enough” measurements usually come back to haunt you around the side seams.
The key measurements for most garments are:
- Full bust
- High bust
- Waist
- Full hip
- Shoulder width
- Back waist length
- Inseam for pants
Use a flexible tape measure and stand naturally. Don’t suck in your waist, don’t lift your shoulders, and don’t pull the tape tight like you’re trying to win an argument with it. What tends to happen is people measure the body they wish they had at 8 a.m., not the one they’re actually sewing for at 6 p.m.
And one very practical U.S. note: sewing pattern sizes do not match ready-to-wear sizes. If you buy a size 8 at Gap or Old Navy, your sewing pattern size may land at 12 or 14. That’s normal. Annoying, yes, but normal.
Choose the Correct Starting Size
For tops and dresses, your high bust measurement usually gives you the best starting size. That surprises a lot of newer sewists, but it makes sense once you know most commercial patterns are drafted for a B-cup. Starting with the full bust too early often creates extra room in the shoulders, neckline, and upper chest, which is a mess to clean up later.
For skirts and pants, your hip measurement is usually the anchor.
And if your body falls across multiple sizes? Welcome to sewing. That’s incredibly common.
You might find yourself in:
- Size 14 at the bust
- Size 16 at the waist
- Size 18 at the hip
In practice, you’d blend between sizes with a smooth line rather than forcing the whole garment into one number. I do this constantly, and honestly, I trust a blended line more than a single-size cut on most fitted garments.
Make a Full Bust Adjustment
A full bust adjustment, or FBA, is one of the most useful pattern changes you can learn. If your garment pulls across the bust, rides up in front, or feels tight near the armhole even when the rest seems close, this is often the fix.
The slash-and-spread method is the version many sewists start with because it’s visual and reliable. You draw adjustment lines from the bust point toward the hem and armhole, cut along those lines, spread the pattern to add width, tape paper underneath, and redraw the seam lines and darts.
What I like about an FBA is that it adds room where you need it without making the shoulders and neckline oversized. That distinction matters. A lot.
Quick signs you may need an FBA
- The front hem lifts higher than the back
- Horizontal pulling shows across the fullest part of the bust
- The armhole feels smaller than it should
- The side seam swings toward the front
The first time you do one, it can feel dramatic because the pattern literally opens up on the table. But the logic is simple once you see it.
Adjust Length in the Right Places
Length issues are sneaky. People often think a pattern is too big or too small when it’s actually too long or too short between key points.
Most patterns include “Lengthen or Shorten Here” lines, and they’re there for a reason. You cut on that line, then overlap the pattern to shorten or spread it apart to lengthen. After that, you true the seam lines and keep the grainline straight.
Common length changes include:
- Shortening or lengthening the bodice above the waist
- Adjusting sleeve length
- Shortening or lengthening pant legs
I’ve found torso adjustments matter more than many sewists expect. A bodice that’s off by even 1 inch at the waist can throw off darts, side seams, and the whole feel of the garment. It’s a small-looking change with a big personality.
Fix Common Fit Issues Without Overcorrecting
Some fit issues show up so often that they’re almost routine.
Narrow or broad shoulders
You adjust at the shoulder seam, adding or removing width while keeping the sleeve cap shape as intact as possible. This helps the garment sit correctly without dragging everything else off balance.
Sway back
If fabric pools at the lower back, remove a small wedge from the center back. Not a huge chunk. Just enough to remove the fold. This is one of those adjustments that looks minor on paper but can make the back view dramatically cleaner.
Full hip
Add width at the hip area without changing the waist. You want the side seams to release where the body needs space, not everywhere.
Large upper arm
Slash vertically through the sleeve and spread slightly to add ease. I’ve had to do this on fitted woven sleeves more times than I can count, especially with patterns that look elegant on the envelope and suspiciously tight in real life.
Here’s a comparison table that shows how these common fixes differ in practice.
| Fit issue code | What you see in the garment | Adjustment area | What changes | My honest note |
|---|---|---|---|---|
| FBA | Pulling across bust, front hem lifts | Front bodice | Adds bust room and dart shaping | This solves more “mystery tightness” than people think |
| NSA | Shoulder seam falls off or feels too wide | Shoulder line | Removes width at shoulder | I use this a lot when the neckline starts drifting outward |
| SBA | Fabric pools at lower back | Center back | Removes horizontal excess | Tiny adjustment, big visual payoff |
| FHA | Side seams pull at fullest hip | Hip area | Adds width below waist | Especially helpful in skirts and straight dresses |
| LUA | Sleeve feels tight at bicep | Sleeve body | Adds upper-arm ease | Very common in woven blouses, less obvious on the pattern tissue |
Those short codes aren’t universal across every sewing book, by the way, but they’re handy for your own notes. I use little shorthand like this in my fitting notebook because writing “large upper arm adjustment” six times gets old fast.
Sew a Muslin Before You Commit
For fitted garments, a muslin is worth the effort. Really. It doesn’t need to be pretty. It needs to be honest.
A test garment made from muslin, cotton broadcloth, or even an old sheet lets you check seam placement, drag lines, length, and balance before you touch your final fabric. In the U.S., where garment fabric often runs about $10 to $25 per yard, that test round can save a painful mistake.
What I’ve found is that a muslin catches the problems your flat pattern work can’t predict completely. You may think you only need an FBA, then discover the shoulder is wide too, or the torso is long by three-quarters of an inch. Bodies are layered puzzles. Patterns are flat. That tension never fully goes away.
Blend Adjustments for Your Real Body
Most people need more than one adjustment, and that’s where fitting gets more realistic and, honestly, more interesting.
A common combo might look like this:
- Full bust adjustment
- Narrow shoulder adjustment
- Shorten torso by 1 inch
The order matters a bit. Length changes tend to come first, then width changes like FBA or full hip adjustments, then smaller refinements such as shoulder or sway back fixes. After each step, recheck grainlines and seam allowances because one small shift can knock another line slightly out of place.
This part takes patience. There’s no glamorous way around that.
Understand Ease and Fabric Choice
Ease is the extra room built into a pattern, and it changes how your adjustments behave. Wearing ease gives you room to move. Design ease gives the garment its style.
A fitted sheath dress usually has less ease than a relaxed summer dress. So the same 1-inch adjustment won’t “feel” the same across both patterns. And then fabric enters the conversation and makes things even more lively.
Knits usually need less ease. Wovens often need more shaping. Stretch percentage can change the size you cut and the amount you adjust. I think this is where a lot of sewists get tripped up, because a fit method that worked beautifully on stable cotton won’t always translate to rayon knit. Fabric has opinions.
Keep a Personal Fit Record
This sounds boring until it saves you hours.
Keep a notebook or digital file with your measurements, the pattern brand, the size you cut, the adjustments you made, the fabric you used, and what happened after you wore the garment. Not just after you tried it on. After you wore it, sat in it, reached for a shelf in it.
You’ll start spotting patterns in your patterns, which is satisfying in a very nerdy way. Maybe you always shorten sleeves by 1 inch. Maybe Vogue bodices fit your shoulders better, but Butterick pants need a full hip adjustment. That kind of record turns fitting from guesswork into a system.
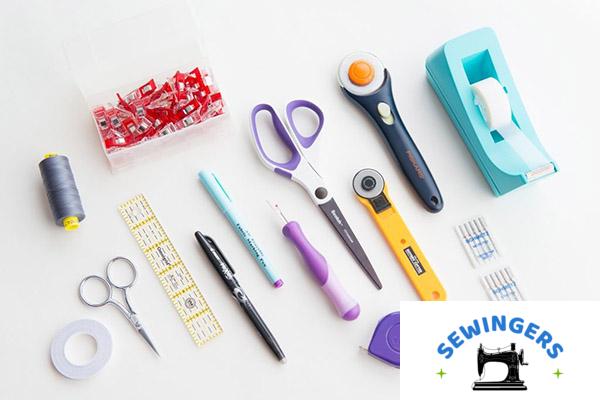
Tools That Make Pattern Adjustments Easier
You don’t need a fancy studio setup. A few basic tools make a real difference:
- Clear ruler
- French curve
- Pattern paper
- Tape
- Pencil
- Measuring tape
A lot of U.S. sewists grab these at Joann or order them online from Amazon, and that’s usually enough to get going. Personally, I reach for a clear ruler and a mechanical pencil first. Clean lines make cleaner adjustments, and clean adjustments are easier to sew accurately. Not thrilling, maybe, but true.
Conclusion
Learning how to adjust a sewing pattern to fit changes the whole sewing experience. You stop trying to force your body into a printed size chart and start shaping the garment around the person who’ll actually wear it. You.
The process usually comes down to a repeatable rhythm: measure, choose a starting size, adjust length, adjust width, test in muslin, and refine from there. It’s not instant, and some projects still fight back a little. That part never fully disappears, at least not in my sewing room.
But when the fit clicks, you know it. The shoulder sits where it belongs. The waist lands in the right place. The fabric stops pulling and starts hanging the way you hoped. And suddenly the garment doesn’t feel homemade in the apologetic sense. It feels made for you, which is a very different thing