You know that moment—you’re holding a tiny thread, squinting at an even tinier needle eye, and suddenly your confidence in sewing just… evaporates. I’ve been there more times than I’d like to admit, usually late at night when the lighting isn’t great and patience is even worse.
Here’s the good news: a sewing machine needle threader lets you thread the needle in under 5 seconds with almost no eye strain. Once it clicks (mentally and mechanically), you stop dreading threading altogether.
Let’s walk through it in a way that actually sticks.
Contents
- 1 What Is a Sewing Machine Needle Threader?
- 2 Prepare Your Sewing Machine Before Threading
- 3 How to Use a Built-In Automatic Needle Threader
- 4 How to Use a Manual Needle Threader Tool
- 5 Common Problems and Troubleshooting
- 6 Best Needles and Thread for Easy Threading
- 7 Safety Tips When Using a Needle Threader
- 8 When Should You Replace Your Needle?
- 9 Final Thoughts: Mastering Your Needle Threader
What Is a Sewing Machine Needle Threader?
A sewing machine needle threader is a small built-in mechanism that pulls thread through the needle eye using a fine hook or wire loop.
In real use, it doesn’t feel “mechanical” or technical. It feels like cheating—in a good way. You lower a lever, hook your thread, release it… and suddenly the thread is through. No squinting. No licking the thread end (you know you’ve done it).
Types of Needle Threaders
You’ll run into three main types:
| Type | How It Works | Where You See It |
|---|---|---|
| Automatic needle threader | Lever activates a hook through the needle eye | Brother, Singer, Janome machines |
| Manual threader tool | Handheld wire loop pulls thread through | Travel kits, beginner kits |
| Push-button systems | Motorized threading action | Higher-end computerized machines |
Most modern machines—even entry-level ones from places like Joann or Walmart—include automatic threaders. And honestly, once you get used to it, going back feels… primitive.
Prepare Your Sewing Machine Before Threading
Correct setup determines whether the threader works smoothly or fails completely.
This is where most beginners get tripped up. Not because it’s hard—but because it’s easy to skip steps.
Step 1: Turn Off the Machine
You might be tempted to leave it on. I used to. Then one accidental foot pedal press later… yeah, not worth it.
Powering down removes that risk entirely.
Step 2: Raise the Needle to the Highest Position
Turn the handwheel toward you until the needle reaches its peak.
Here’s what I’ve noticed: if the needle is even slightly too low, the threader hook misses the eye completely. It doesn’t “almost work.” It just fails.
Step 3: Lift the Presser Foot
Lifting the presser foot releases tension in the thread path.
If you skip this, the thread feels tight and uncooperative—like it’s resisting you for no clear reason. That’s tension at work.
Step 4: Follow the Upper Thread Path
Guide the thread through:
- Thread guides
- Tension discs
- Take-up lever
Every machine labels this slightly differently, but the path matters more than people expect. A missed guide throws everything off later.
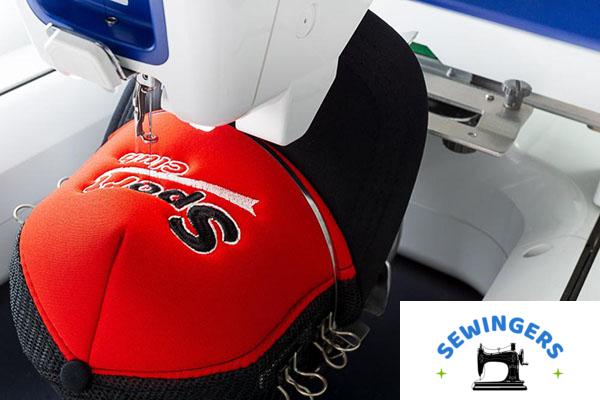
How to Use a Built-In Automatic Needle Threader
Using the automatic needle threader involves lowering a lever, catching the thread with a hook, and pulling a loop through the needle eye.
Now, this is the part people overcomplicate. It’s actually a small sequence of movements—once your hands learn it, you stop thinking about it.
Step-by-Step Instructions
- Lower the needle threader lever slowly
- Watch for the small hook passing through the needle eye
- Pull your thread across and hook it onto the guide (usually on the right)
- Gently release the lever
- A loop forms through the needle
- Pull the thread tail fully through
That’s it.
Well… most of the time.
What It Feels Like When It’s Working
There’s a subtle “click” or resistance when the hook catches correctly. If you don’t feel that, something’s off.
In my experience, beginners often rush the lever. Slowing down—just slightly—makes a huge difference.
When It Doesn’t Work
If the hook misses the thread, check:
- Needle height (too low = failure)
- Needle direction (flat side usually faces back)
- Thread placement (not fully in guide)
And honestly? Sometimes it just takes a second attempt. Even experienced sewists redo it occasionally.
How to Use a Manual Needle Threader Tool
A manual needle threader pulls thread through the needle using a thin wire loop inserted manually.
These little tools look fragile—and they are—but they work surprisingly well.
Instructions
- Insert the wire loop through the needle eye
- Place your thread through the loop
- Pull the threader back out
- Remove the tool and adjust the thread
That’s all.
Why You Might Prefer It
Even if your machine has an automatic threader, manual tools come in handy when:
- The built-in threader breaks
- You’re using very fine needles (like size 70/10)
- You’re threading by hand away from your machine
They cost under $5 in most US craft stores, which makes them one of the highest-value sewing tools out there.
Common Problems and Troubleshooting
Most needle threader problems come from incorrect needle position, poor thread quality, or a bent mechanism.
This section—if I’m honest—is where you save the most frustration.
Problem: Threader Won’t Go Through Needle
Common causes:
- Needle too low
- Needle inserted backward
- Needle too small
Very small needles (like 70/10 or finer) often don’t cooperate with automatic threaders. The hook simply doesn’t fit.
Problem: Thread Breaks During Threading
This usually points to:
- High tension settings
- Low-quality thread
- Damaged needle
Switching to a reliable brand like Coats & Clark noticeably reduces breakage. I resisted this for years (cheap thread is tempting), but the difference is real.
Problem: Threader Hook Is Bent
This one… hurts.
If the hook is bent:
- Avoid forcing the lever
- Stop using the threader immediately
Replacement parts are sometimes available through manufacturer service centers, but depending on the machine, repair costs can approach the price of a basic new model.
Best Needles and Thread for Easy Threading
Using the correct needle size and high-quality thread reduces threading time and prevents mechanical issues.
This part gets overlooked because it sounds minor. It’s not.
Recommended Needle Sizes
| Needle Size | Use Case |
|---|---|
| 80/12 | General sewing (most fabrics) |
| 90/14 | Medium-weight fabrics like denim |
| 100/16 | Heavy fabrics like canvas |
Larger needle eyes (like 90/14 and above) make threading noticeably easier.
Popular Needle Brands in the US
- Schmetz
- Singer
- Organ
I’ve personally had the most consistent results with Schmetz—fewer skipped stitches, smoother threading—but preferences vary.
Thread Quality Matters More Than You Think
High-quality thread:
- Produces less lint
- Moves smoothly through guides
- Reduces tension issues
Cheap thread tends to fray, snag, or break at the worst possible time. Usually mid-project.
Safety Tips When Using a Needle Threader
Safe threading prevents injuries and protects your sewing machine components.
This part isn’t glamorous, but it matters.
- Turn off the machine before threading
- Keep fingers clear of the needle area
- Replace bent or damaged needles immediately
- Use adequate lighting
Most modern machines include LED lights, which—honestly—make a bigger difference than expected. Poor lighting is one of those silent frustrations that builds up over time.
When Should You Replace Your Needle?
Replacing your sewing machine needle every 6–8 hours of use maintains threading performance and stitch quality.
This is one of those habits people delay. I did for years.
Replace Your Needle When:
- You’ve sewn for 6–8 hours
- You switch fabric types
- Stitches begin skipping
- Thread starts fraying
A dull needle doesn’t just affect stitching—it actually makes threading harder. The eye can develop tiny imperfections that catch the thread.
Final Thoughts: Mastering Your Needle Threader
Learning to use a sewing machine needle threader transforms threading from a frustrating task into a quick, repeatable step.
At first, it feels like one more thing to learn. Another lever, another sequence. But after a few tries, your hands remember what to do before your brain catches up.
You’ll notice it most when you’re in the middle of a real project—hemming jeans before a dinner, fixing a seam five minutes before leaving, or working through a stack of quilt pieces late at night. The threading step stops interrupting your flow.
And that’s really the shift.
With the right needle size, a properly set machine, and decent thread, the process becomes almost automatic. Not perfect every time—but close enough that you stop thinking about it.