You probably don’t think much about cleaning your sewing machine—at least not until something weird happens. Maybe the thread suddenly starts bunching underneath your fabric. Maybe the stitches look uneven. Or the machine starts making that faint grinding sound that makes you pause mid-seam.
I’ve been there more than once.
What I’ve learned after years of sewing quilts, hemming jeans, and fixing things friends bring over in grocery bags is simple: a clean sewing machine simply sews better. The stitches tighten up, the motor sounds calmer, and you spend far less time fighting tension problems.
And considering that sewing machines in the U.S. range anywhere from about $150 for a basic starter model to well over $1,500 for computerized quilting machines, a little maintenance goes a long way.
Cleaning usually takes about 15–20 minutes. Nothing complicated. Just a few small habits that keep the machine running the way it’s supposed to.
Contents
- 1 Why Cleaning Your Sewing Machine Matters
- 2 Tools You Need to Clean a Sewing Machine
- 3 How to Clean the Bobbin Area
- 4 Cleaning the Feed Dogs and Throat Plate
- 5 Should You Oil Your Sewing Machine?
- 6 Cleaning the Exterior and Tension Discs
- 7 How Often Should You Clean Your Sewing Machine?
- 8 Signs Your Sewing Machine Needs Immediate Cleaning
- 9 Storage Tips to Keep Your Machine Clean Longer
- 10 Final Thoughts
Why Cleaning Your Sewing Machine Matters
Here’s the part many people underestimate: sewing machines create lint constantly.
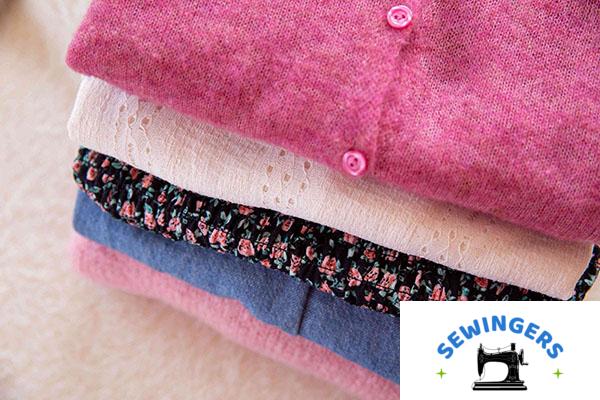
Cotton quilting fabric sheds tiny fibers. Fleece is even worse. Denim throws off dust that settles everywhere inside the machine. And over time that debris packs into the bobbin case, feed dogs, and hook race.
What happens next tends to look random at first.
You might notice things like:
- Skipped stitches
- Thread breaking mid-seam
- Uneven tension
- A machine that suddenly sounds louder than usual
- Fabric that stops feeding smoothly
Most of the time, lint buildup is the culprit.
Manufacturers like Brother, Singer, and Janome all emphasize routine cleaning for a reason: it protects the motor, keeps stitches consistent, and helps maintain warranty coverage. The mechanical parts—like the needle bar and tension assembly—work best when dust isn’t interfering.
And honestly? Once you open the machine and see how much lint collects in there after a few projects, it makes perfect sense.
Tools You Need to Clean a Sewing Machine
Cleaning a sewing machine doesn’t require a big toolkit. In fact, most machines include the essentials when you buy them.
Your basic cleaning kit usually includes:
- Small lint brush
- Soft microfiber cloth
- Sewing machine oil (if your machine requires it)
- Small screwdriver
- Tweezers
Craft stores across the U.S.—Joann, Michaels, Hobby Lobby—sell sewing maintenance kits for around $10–$15, but many sewists already have these tools tucked in their machine’s accessory tray.
There are also a couple things I personally avoid.
- Compressed air cans
- Household oils like WD-40
Compressed air feels helpful, but it often pushes lint deeper inside the machine instead of removing it. I learned that the hard way years ago while servicing an older Singer. What looked clean on the surface ended up hiding lint around the hook mechanism.
A simple brush works better almost every time.
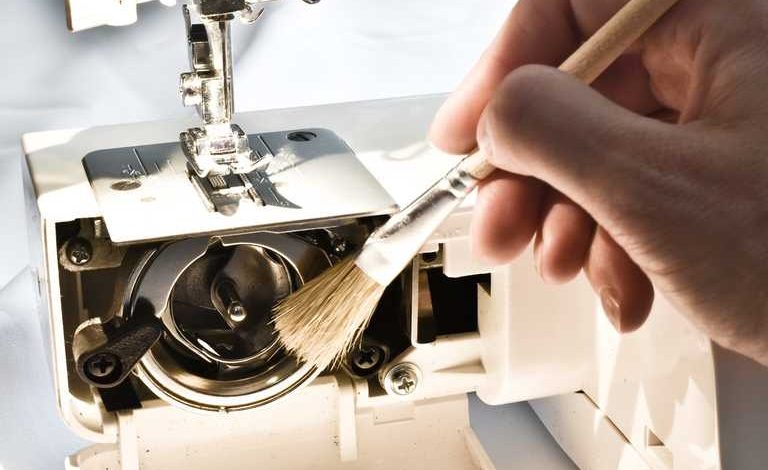
How to Clean the Bobbin Area
If you clean only one part of your sewing machine, make it the bobbin area. That’s where most lint ends up.
The process is straightforward.
- Unplug the machine.
- Remove the presser foot and needle.
- Open the bobbin cover.
- Take out the bobbin and bobbin case.
- Brush away lint gently.
- Wipe the area with a dry cloth.
Modern American machines often use drop-in bobbins, which makes access easy. While you’re there, look closely for small threads wrapped around the hook race. They like to hide there.
One small habit that helps a lot: change your needle roughly every 8 hours of sewing time. Dull needles shred thread slightly, which creates extra lint inside the machine.
It’s a tiny detail, but it reduces buildup more than people expect.
Cleaning the Feed Dogs and Throat Plate
The feed dogs—those little metal teeth that move fabric forward—collect dust quickly, especially when sewing thicker materials like denim or canvas.
Every now and then it’s worth removing the throat plate to clean underneath.
Here’s the usual routine:
- Remove the throat plate with a screwdriver
- Brush lint from between the feed dog teeth
- Use tweezers to remove packed debris
Now, I’ll be honest—this is the step many sewists skip. Mostly because removing screws feels like “real maintenance.” But the difference afterward is noticeable. Fabric feeds more evenly, and stitch consistency improves.
Particularly when you’re sewing heavier fabrics.
Should You Oil Your Sewing Machine?
Oiling is one of those topics where the answer depends heavily on your machine.
Older mechanical models—especially vintage Singer machines—often require occasional oiling. Many modern machines from Brother or Janome, however, are factory-lubricated and sealed.
So the rule that works best in practice:
Check your user manual first.
If oiling is recommended, follow these basics:
- Use only sewing machine oil
- Apply 1–2 drops to designated points
- Wipe away excess oil immediately
Over-oiling causes more trouble than skipping it.
And if the manual doesn’t mention oiling at all, it’s usually safer to leave that step to a technician during annual servicing.
Cleaning the Exterior and Tension Discs
Lint doesn’t stay only inside the machine. Dust also settles around the thread tension system, which can quietly affect stitch balance.
A quick routine helps:
- Wipe the machine body with a microfiber cloth
- Raise the presser foot
- Slide thick thread or unwaxed dental floss between the tension discs
This simple trick clears tiny fibers stuck in the tension assembly.
If you’ve ever experienced thread shredding or inconsistent tension, this small step sometimes fixes it immediately. It’s surprisingly effective.
How Often Should You Clean Your Sewing Machine?
Cleaning frequency usually depends on how much you sew.
Here’s a simple guideline many technicians suggest:
| Sewing Frequency | Cleaning Recommendation |
|---|---|
| Occasional sewing | Every 2–3 months |
| Weekly sewing | Once a month |
| Daily or business use | Weekly cleaning |
If you sew heavily during seasonal projects—Halloween costumes, Christmas quilts, or back-to-school alterations—lint tends to build up faster.
Professional servicing in the U.S. usually costs $75 to $150 per year, which includes internal inspection, belt adjustments, and timing calibration.
Think of it like a yearly tune-up for your machine.
Signs Your Sewing Machine Needs Immediate Cleaning
Sometimes the machine tells you something isn’t right.
Watch for signs like:
- Grinding or unusual noises
- Thread bunching under the fabric
- Skipped stitches
- A faint burning smell
When that happens, it’s usually worth stopping for a quick inspection. Continuing to sew while lint jams the mechanism can strain the motor.
And that repair tends to cost more than a simple cleaning.
Storage Tips to Keep Your Machine Clean Longer
Prevention helps reduce how often you need to clean the machine.
A few habits make a noticeable difference:
- Use a dust cover when the machine isn’t in use
- Store it in a dry space
- Avoid damp basements
- Remove thread before long storage
If you live in humid regions—Florida, Louisiana, parts of the Southeast—moisture absorbers or silica packs help prevent rust on internal components.
Humidity and metal parts don’t get along very well.
Final Thoughts
Cleaning your sewing machine isn’t complicated, but it does make a real difference.
Fifteen minutes with a brush and cloth keeps lint from building up in the bobbin area, protects the motor, and improves stitch quality. Whether you’re sewing a quick hem on a pair of jeans or running a small Etsy shop from your home studio, that small routine helps your machine last longer.
And honestly… sewing becomes a lot more enjoyable when the machine runs quietly and smoothly