A sewing machine rarely fails all at once. The decline usually starts quietly. A faint grinding sound during a late-night quilting session. Slightly uneven stitch tension on denim hems. A handwheel that feels heavier than it did three months earlier. Most home sewists notice the symptoms long before realizing the real issue comes down to metal friction inside the machine.
That friction matters more than many people expect.
Brands like Singer, Brother, Janome, and Bernina build machines with tight-moving assemblies that rely on smooth contact between internal parts. When lubrication dries out, the sewing motor works harder. Heat builds slowly. Tiny bits of lint combine with old oil residue and create drag around the bobbin hook or needle bar. Stitch consistency starts drifting, especially during longer projects.
In American homes, sewing machines often pull double duty. One week involves Halloween costumes. The next week turns into Etsy inventory production or quilting cotton stacks spread across the dining table. Machines that operate several hours a week experience wear much faster than occasional users realize.
And the money side gets surprisingly practical.
| Maintenance Task | Average Cost in USD | What Usually Happens |
|---|---|---|
| Sewing machine oil + cleaning tools | $5–$20 | Prevents premature wear on moving parts |
| DIY sewing machine maintenance | Under $30 yearly | Keeps stitch quality stable |
| Professional tune-up | $75–$150 | Often needed after neglected maintenance |
| Motor or gear repair | $150–$400 | Common after prolonged friction damage |
Most repair technicians see the same pattern repeatedly: neglected lubrication leads to expensive repairs that could’ve been avoided with a simple maintenance schedule.
Proper sewing machine care also affects how fabric behaves under the needle. Cotton quilts, canvas tote bags, stretch knits—they all reveal tension problems differently. Quilting communities especially notice this because long seams expose every inconsistency in sewing machine performance.
Contents
- 1 How to Properly Lubricate Your Sewing Machine: Step-by-Step Overview
- 2 Tools and Supplies You Need for Sewing Machine Lubrication
- 3 Where to Apply Sewing Machine Oil Safely
- 4 How Often Should You Lubricate Your Sewing Machine?
- 5 Common Mistakes When Lubricating a Sewing Machine
- 6 Cleaning Before Lubricating: Why It Matters
- 7 Mechanical vs. Computerized Sewing Machines: Lubrication Differences
- 8 Signs Your Sewing Machine Needs Immediate Lubrication
- 9 Professional Servicing vs DIY Lubrication
- 10 Long-Term Sewing Machine Care for Optimal Performance
How to Properly Lubricate Your Sewing Machine: Step-by-Step Overview
The process sounds intimidating until the machine is actually open on the table. Then it starts feeling mechanical in a reassuring way. Small parts. Clear motion paths. Nothing mystical about it.
Start With Safety and Basic Prep
Disconnect power first. Remove thread from the machine completely, including the bobbin. Leaving thread inside tends to hide lint buildup around the feed dogs and bobbin case.
For machines like the Singer Heavy Duty 4452 or Brother CS7000X, opening the needle plate reveals how much debris collects during normal sewing. Quilting projects create especially dense fabric dust.
A typical preparation sequence looks like this:
- Remove presser foot and needle
- Open bobbin compartment
- Brush lint from feed dogs
- Wipe exterior surfaces with microfiber cloth
- Rotate handwheel manually to inspect movement
That last step matters more than expected. Resistance often shows up before visible damage does.
Clean Before Applying Oil
Fresh oil over packed lint creates sludge. Unfortunately, many people discover this after the machine starts throwing black residue onto white fabric.
A small lint brush works better than compressed air most of the time. Compressed air pushes thread fragments deeper into the machine cavity, especially near the shuttle race. Vacuum attachments designed for electronics tend to pull debris outward instead of redistributing it internally.
Apply Oil Carefully
Use sewing machine oil only. Clear, non-detergent oil designed for sewing equipment protects moving parts without creating sticky buildup.
Common lubrication points include:
- Needle bar joints
- Bobbin hook assembly
- Rotary hook contact areas
- Handwheel mechanism
- Metal pivot connections
For machines like the Janome HD3000, the sewing machine manual usually marks exact oiling points with small diagrams. That manual often saves people from lubricating sealed bearings accidentally.
One drop per lubrication point usually handles the job. More oil doesn’t improve performance. Over-lubrication creates residue that attracts lint faster.
Test Stitch Quality After Oiling
Run scrap fabric through the machine for roughly one minute after oiling. This distributes fresh lubricant through moving assemblies and removes excess oil before real sewing begins.
Skipped stitches or inconsistent stitch tension after lubrication typically point toward another issue—often a dull needle or thread buildup hidden deeper inside.
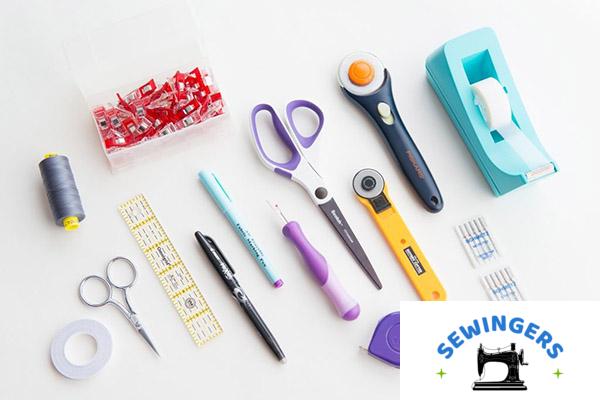
Tools and Supplies You Need for Sewing Machine Lubrication
The supplies list stays refreshingly inexpensive compared to most hobbies.
| Tool or Product | Typical Price | Why It Matters |
|---|---|---|
| Singer All Purpose Machine Oil | $4–$8 | Clear non-detergent lubrication |
| Brother Sewing Machine Oil | $5–$10 | Precision applicator helps avoid spills |
| Lint brush | $3–$7 | Removes lint buildup safely |
| Microfiber cloth | $5–$12 | Prevents residue smearing |
| Small screwdriver set | $6–$15 | Opens needle plates and covers |
| Maintenance kit | $10–$20 | Bundles common cleaning tools |
Stores like Joann and Michaels usually stock maintenance kits near replacement needles and bobbins.
One mistake shows up constantly in sewing forums: using WD-40 as sewing machine oil.
WD-40 displaces moisture. It does not function as proper long-term lubricant for sewing machine mechanisms. The residue dries differently, and over time it tends to attract more grime inside precision assemblies.
That misunderstanding has damaged plenty of nylon gears in modern machines.
Where to Apply Sewing Machine Oil Safely
Older mechanical machines practically advertise their lubrication points. Metal hinges, exposed moving assemblies, visible shuttle race systems. The oiling path feels obvious after opening the side panel.
Modern computerized machines complicate things.
Common Oiling Areas
Most traditional sewing machines benefit from lubrication around:
- Bobbin hook
- Rotary hook
- Needle bar assembly
- Oscillating hook joints
- Metal-on-metal contact points
Drop-in bobbin systems usually collect the most lint, especially during heavy quilting sessions.
Areas That Often Don’t Need Oil
Many computerized sewing machines contain sealed bearings and internal lubrication systems. Applying oil randomly inside electronic compartments creates expensive problems quickly.
Machines like the Brother SE1900 or newer Bernina models often require selective lubrication only at manufacturer-approved points.
The sewing machine manual matters here more than people expect. Some machines genuinely need less oil than older sewists remember from vintage Singer models.
How Often Should You Lubricate Your Sewing Machine?
Usage frequency changes everything.
A casual hobbyist sewing pillow covers twice a month experiences different wear patterns than an Etsy seller producing canvas bags daily.
Typical Maintenance Intervals
| Usage Pattern | Recommended Oiling Frequency |
|---|---|
| Light hobby sewing | Every 4–6 months |
| Weekly garment sewing | Every 2–3 months |
| Daily small business use | Weekly inspection, monthly oiling |
| Heavy quilting projects | After major projects |
Climate also affects lubrication schedules.
Dry climate conditions in Arizona tend to evaporate oil faster. High humidity exposure in Florida creates different problems, especially internal corrosion if machines stay stored in garages or basements.
Signs of performance decline usually appear gradually:
- Increased vibration
- Friction noise
- Sluggish handwheel movement
- Uneven stitch formation
- Motor strain during thick fabrics
Machines communicate discomfort pretty clearly once attention shifts toward the sound and feel of operation.
Common Mistakes When Lubricating a Sewing Machine
The biggest lubrication errors often come from trying too hard.
Frequent Problems
- Using household oils instead of sewing machine oil
- Over oiling sewing machine mechanisms
- Ignoring thread buildup before lubrication
- Oiling nylon gears unnecessarily
- Skipping the sewing machine manual entirely
Over-lubrication causes more mess than many beginners expect. Excess oil migrates toward fabric paths and eventually stains projects. White quilting cotton reveals this immediately. Dark denim hides it for weeks.
Another issue involves oil residue mixing with lint near the bobbin mechanism. That paste-like buildup increases friction instead of reducing it.
Bernina and Brother repair technicians frequently mention improper lubrication as a major contributor to gear damage in modern machines.
Cleaning Before Lubricating: Why It Matters
Cleaning feels boring right up until stitch quality improves dramatically afterward.
Lint accumulates everywhere. Around the bobbin case. Beneath feed dogs. Inside machine cavities where fabric dust settles quietly for months.
Quilting cotton creates especially fine debris. Long-arm quilters talk about this constantly because heavy piecing projects generate astonishing amounts of thread fragments.
Better Cleaning Methods
A soft brush handles most debris removal effectively.
Compressed air sounds convenient, but airflow pressure often pushes lint deeper into tension systems and internal mechanisms. Small vacuum attachments designed for keyboards or electronics usually perform better for home maintenance.
Cleaning before oiling helps prevent:
- Internal residue buildup
- Reduced airflow around the motor
- Sticky thread accumulation
- Uneven mechanical resistance
That sequence matters. Oil first, clean later—things usually get worse.
Mechanical vs. Computerized Sewing Machines: Lubrication Differences
Older mechanical machines operate differently from modern computerized models in almost every maintenance category.
Singer Featherweight machines, for example, rely heavily on regular oiling because their metal-frame mechanical assembly contains numerous exposed lubrication points. Those machines often run beautifully for decades with consistent care.
Computerized machines tell another story.
Key Differences
| Mechanical Machines | Computerized Machines |
|---|---|
| Require regular manual oiling | Often partially self-lubricating |
| More exposed moving parts | More sealed bearings |
| Easier DIY maintenance | Greater electronic sensitivity |
| Simpler internal access | Complex gear housing layouts |
A Bernina 770 QE typically benefits more from scheduled professional servicing than frequent home disassembly. Electronic components complicate maintenance, and warranty coverage sometimes depends on authorized service records.
Professional servicing costs roughly $75–$150 in most American repair shops. High-end embroidery machines occasionally exceed that range because calibration takes longer.
Signs Your Sewing Machine Needs Immediate Lubrication
Machines rarely become silent when lubrication disappears. Noise usually arrives first.
Common Warning Signs
- Sewing machine making noise during stitching
- Handwheel feels hard to turn
- Increased vibration near high speeds
- Burning smell from motor strain
- Skipped stitches or stitch irregularity
That burning smell deserves attention quickly. Heat buildup around the sewing motor often signals excessive friction inside moving assemblies.
Mechanical resistance also tends to increase gradually. Many sewists adapt without noticing at first because the change happens slowly over months.
Then a freshly serviced machine suddenly feels smoother than remembered. Faster too.
Professional Servicing vs DIY Lubrication
Routine sewing machine maintenance works well as a DIY task for most households. Cleaning lint, applying oil correctly, changing needles—those jobs stay manageable with patience and a decent manual.
But some situations lean toward professional inspection.
When Professional Service Makes Sense
- Computerized machine error codes
- Timing issues
- Persistent tension problems
- Internal corrosion signs
- Warranty-related repairs
Authorized Singer repair centers and Brother support technicians often perform diagnostic testing that home maintenance can’t replicate.
For small business owners using machines daily, annual maintenance inspections usually cost less than emergency repairs during peak holiday production seasons.
And repair delays happen. Especially in November.
Long-Term Sewing Machine Care for Optimal Performance
Lubrication helps, but long-term machine health depends on smaller habits that barely seem important in the moment.
Dust covers reduce debris accumulation dramatically. Climate-controlled storage protects internal metal parts from humidity swings. Regular replacement needle changes improve stitch consistency more than many people realize.
A basic sewing machine care routine often includes:
- Replacing needles every 8–10 project hours
- Covering machine after use
- Cleaning feed dogs monthly
- Tracking maintenance intervals
- Storing oil away from heat
Singer, Brother, and Janome machines all benefit from preventive maintenance because friction damage compounds slowly over time.
And honestly, the difference becomes obvious once a freshly cleaned and lubricated machine starts sewing again. Fabric feeds smoothly. The handwheel rotates without resistance. Stitch lines look balanced instead of slightly strained.
Not perfect every single time. Sewing machines still have moods occasionally. But the mechanical tension eases in a way that feels noticeable almost immediately.