A tablet holder doesn’t need to be expensive to protect your device well. In fact, one detail surprises many beginners: the fabric matters less than the structure. A simple quilting cotton sleeve with the right padding and careful stitching often protects a tablet better than thick fabric sewn without reinforcement. That’s why a little planning before cutting fabric pays off.
If you’re wondering how to sew a tablet holder, this guide walks through every step, from measuring your device to adding padding, closures, and finishing touches that make the project look professionally made.
Quick Answer
To sew a tablet holder, measure your tablet, cut matching outer fabric, lining, and padding, sew the layers together with a consistent seam allowance, leave an opening for turning, press the seams flat, close the opening with topstitching, and add an optional closure such as Velcro, a zipper, or a magnetic snap for extra security.
Contents
- 1 Key Takeaways
- 2 How to Sew a Tablet Holder: Materials and Tools You’ll Need
- 3 Measure Your Tablet for the Perfect Fit
- 4 Cut Your Fabric and Prepare the Pattern
- 5 Sew the Outer Fabric and Lining Together
- 6 Add Padding for Better Device Protection
- 7 Turn, Press, and Finish the Tablet Holder
- 8 Customize Your Tablet Holder
- 9 Common Sewing Mistakes to Avoid
- 10 Care, Cleaning, and Long-Term Maintenance
- 11 Frequently Asked Questions About Sewing a Tablet Holder
- 12 DIY vs. Buying a Tablet Holder
Key Takeaways
- Accurate measurements produce a snug fit without making the holder difficult to use.
- Fusible fleece, batting, or foam stabilizer provide better protection than fabric alone.
- Pressing every seam creates a cleaner finish than simply sewing more carefully.
- Simple customization, such as a pocket or embroidery, turns a practical sleeve into a thoughtful gift.
How to Sew a Tablet Holder: Materials and Tools You’ll Need
Choosing suitable materials at the beginning makes every later step easier.
A basic project requires:
- Sewing machine
- Cotton fabric, quilting cotton, or canvas fabric
- Lining fabric
- Fusible interfacing
- Batting, fusible fleece, or foam stabilizer
- Thread
- Rotary cutter or fabric scissors
- Cutting mat
- Acrylic ruler
- Measuring tape
- Fabric marker
- Pins or sewing clips
- Iron
Choosing the Right Fabric
Cotton fabric remains one of the easiest options for beginners because it cuts cleanly, presses well, and feeds smoothly through most sewing machines.
Quilting cotton works well for everyday tablet sleeves. Canvas fabric offers greater abrasion resistance, although it adds bulk and can be harder to sew through multiple layers.
One common misconception is that thicker fabric automatically creates better protection. It doesn’t. Padding absorbs impact far better than simply stacking heavy fabric.
Picking Batting and Interfacing
Each stabilizer serves a different purpose.
| Material | Best For | Trade-Off |
|---|---|---|
| Cotton batting | Lightweight cushioning | Less impact protection |
| Fusible fleece | Soft padded sleeves | Slightly thicker seams |
| Foam stabilizer | Maximum protection | More difficult to turn and topstitch |
| Fusible interfacing | Structure and shape | Adds stability rather than cushioning |
For everyday use, quilting cotton paired with fusible fleece creates a balanced combination of softness, protection, and manageable thickness.
Beginner-Friendly Sewing Machines
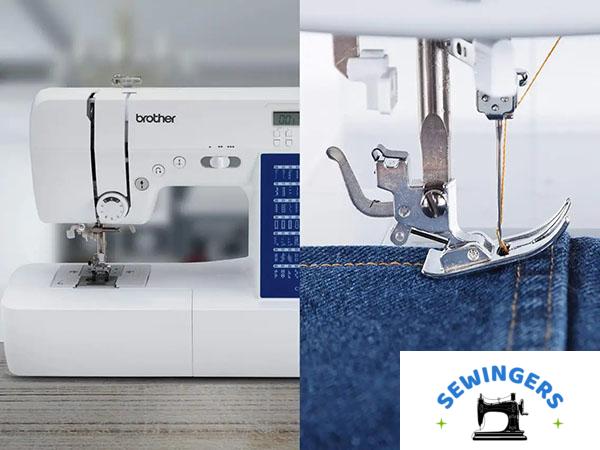
Reliable entry-level machines from Brother, Singer, and Janome handle this project comfortably. Even basic models with a straight stitch produce excellent results because decorative stitches aren’t necessary.
Once the supplies are ready, the next job is making the holder fit the tablet instead of forcing the tablet to fit the holder.
Measure Your Tablet for the Perfect Fit
A well-fitted sleeve protects better because the tablet stays in place rather than sliding around.
Measure three dimensions:
- Width
- Height
- Thickness
Whether the device is an Apple iPad, Samsung Galaxy Tab, Amazon Fire Tablet, or another model, avoid relying solely on manufacturer specifications. Cases, screen protectors, and accessories often change the actual size.
Add:
- Seam allowance on all sewn edges.
- Extra room for batting or foam stabilizer.
- A little ease so the tablet slides in smoothly without becoming loose.
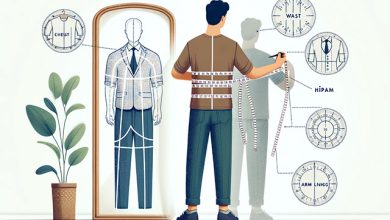
Here’s a practical test. Wrap the measuring tape around the tablet while it’s inside any protective case you plan to keep on it. Those few extra millimeters often make the difference between a sleeve that feels custom-made and one that’s frustrating to use.
Pay attention to the fabric grain as well. Stable grain lines help the sleeve maintain its shape over time instead of stretching unevenly.
Those measurements become the pattern in the next step.
Cut Your Fabric and Prepare the Pattern
Accurate cutting prevents problems that become obvious only after sewing.
Calculate the finished dimensions using the tablet measurements plus seam allowance and padding. Then transfer those measurements onto the fabric with a fabric marker.
Cut:
- One outer fabric piece
- One lining fabric piece
- One batting or stabilizer piece
- Additional pieces for optional pockets or flaps
A rotary cutter, acrylic ruler, and cutting mat usually produce straighter edges than fabric scissors, especially on larger pieces.
Mark fold lines before removing the ruler. Skipping this step often leads to slight shifts during assembly.
Many beginners blame sewing when seams don’t line up. The real issue usually started during cutting. Even a small difference between the outer fabric and lining can create twisting that becomes impossible to press away later.
With matching pieces prepared, assembly becomes much more predictable.
Sew the Outer Fabric and Lining Together
Correct layering matters as much as accurate stitching.
Stack the materials in this order:
- Outer fabric right side up
- Padding or batting
- Lining fabric right side down
Secure everything with sewing clips or pins.
Sew around the perimeter using a straight stitch and consistent seam allowance. Use the presser foot as a visual guide rather than watching the needle. Most experienced sewists focus on keeping the fabric aligned with the presser foot edge because the machine naturally forms the stitch.
Backstitch at the beginning and end to reinforce the seam.
Leave an opening wide enough to turn the holder right side out.
Corners deserve extra attention. Stop with the needle down, lift the presser foot, rotate the fabric, then continue sewing. That simple sequence produces cleaner corners than trying to pivot while the needle is raised.
Once the basic sleeve is assembled, padding becomes the feature that separates a decorative cover from a protective one.
Add Padding for Better Device Protection
Padding controls how well the finished sleeve absorbs bumps during everyday use.
Cotton batting creates a soft, flexible holder. Fusible fleece adds more body while remaining beginner-friendly. Foam stabilizer provides stronger protection for commuters or students who carry a tablet in a backpack every day.
Another overlooked detail is quilting.
Adding quilting lines through the layers prevents batting from shifting after months of use. Parallel lines, simple grids, or diagonal stitching all work well.
There’s a trade-off, though. More quilting increases stability but also stiffens the finished sleeve.
A practical test helps here. Fold the quilted panel before final assembly. If it bends comfortably without feeling rigid, you’ve found a good balance between protection and flexibility.
Now the holder is ready for its final shape.
Turn, Press, and Finish the Tablet Holder
Turning the sleeve right side out reveals how accurately everything came together.
Push the corners out gently using a blunt turning tool or similar object that won’t damage the fabric.
Press the seams flat with an iron. Steam helps remove small wrinkles while encouraging crisp edges.
Many beginners underestimate pressing. Sewing alone cannot flatten bulky seams. Ironing after each major step often creates a more professional appearance than sewing more slowly.
Close the turning opening with edge stitching or hand sewing using a sewing needle.
Finish by sewing a topstitch around the outside edge.
Topstitching does more than improve appearance. It reinforces the opening, stabilizes the layers, and helps the sleeve keep its shape through repeated use.
Once construction is complete, personalization becomes the fun part.
Customize Your Tablet Holder
Small additions often make the holder more useful than commercial alternatives.
Consider adding:
- A front pocket for charging cables or earbuds.
- Velcro for quick access.
- A magnetic snap for a cleaner appearance.
- A zipper for maximum security.
- Embroidery with initials or decorative designs.
- A fabric label for a handmade finish.
Holiday-themed quilting cotton turns the project into a thoughtful Christmas gift. Personalized embroidery also works well for Mother’s Day, Father’s Day, or Back-to-School season.
One design choice deserves careful thought. Zippers provide excellent protection but increase sewing difficulty. Velcro is simpler for beginners, although it can wear over time and may catch lint.
Choose the closure that matches how the holder will actually be used.
Even well-designed projects can run into problems if a few common mistakes slip in.
Common Sewing Mistakes to Avoid
Most sewing mistakes happen long before the final stitch.
Incorrect Measurements
Measure twice before cutting.
Replacing fabric costs less than replacing a tablet, but accurate measuring avoids wasting either.
Wrong Needle Size
Use a sewing needle appropriate for the fabric weight.
Heavy canvas sewn with a fine needle may lead to skipped stitches. Lightweight quilting cotton paired with a heavy needle can leave visible holes.
Uneven Seams
Maintain a consistent seam allowance throughout the project.
Watching the fabric edge instead of the needle usually improves accuracy.
Thread Tension Problems
Test thread tension on scrap fabric using the same layers planned for the sleeve.
Adjustments become much harder after construction begins.
Skipping Reinforcement
Backstitch stress points such as openings, pockets, and closures.
Those small stitches prevent seams from separating after repeated use.
Forgetting to Press
Press each seam before moving to the next step.
Many puckering problems disappear with proper pressing instead of additional stitching.
A well-made holder lasts longer when it’s cared for correctly.
Care, Cleaning, and Long-Term Maintenance
Regular maintenance keeps the tablet holder looking good while preserving its shape.
Spot clean small marks with mild detergent and a damp cloth whenever possible.
If washing becomes necessary, check whether any stabilizer or closure requires special care. Air drying generally helps cotton fabric maintain its shape better than exposing it to high dryer heat.
Applying a fabric protector may help reduce staining, although compatibility depends on the fabric type. Follow the manufacturer’s instructions before treating the finished project.
Store the sleeve flat or with the tablet inside. Folding it sharply for long periods can create permanent creases, particularly when foam stabilizer is used.
A few minutes of care after months of use often keeps a handmade sleeve looking fresh for years.
Frequently Asked Questions About Sewing a Tablet Holder
Can beginners sew a tablet holder?
Yes. Straight seams, basic measuring, and simple construction make this an approachable first or second sewing project.
What is the best fabric for a tablet sleeve?
Quilting cotton paired with fusible fleece offers a good balance of ease, appearance, and protection. Canvas fabric works well when greater durability is needed.
How much fabric do you need?
The exact amount depends on your tablet’s dimensions and the chosen pattern. Measure the finished pieces before purchasing fabric rather than estimating.
Can you sew one without a sewing machine?
Yes. Hand sewing is possible using strong thread and small, even stitches. The project simply takes longer.
How long does the project take?
The time varies with sewing experience, quilting, and added features such as pockets or zippers. A simple sleeve finishes much faster than a fully customized padded case.
How can you make the holder more protective?
Add fusible fleece, cotton batting, or foam stabilizer, reinforce the seams with backstitching, quilt the layers to prevent shifting, and choose a secure closure such as a zipper or magnetic snap.
DIY vs. Buying a Tablet Holder
Making your own holder offers customization that ready-made cases often cannot match.
| Option | Advantages | Considerations |
|---|---|---|
| DIY tablet holder | Custom fit, personalized fabric, choice of padding and closures | Requires sewing time and basic tools |
| Store-bought holder | Ready to use immediately | Limited fabric choices and sizing options |
Craft stores such as JOANN, Michaels, and Walmart commonly stock quilting cotton, canvas fabric, batting, thread, and sewing notions needed for this project. Online retailers like Amazon also carry these supplies. Prices change regularly, so check current listings before purchasing.
A handmade tablet holder combines practical protection with personal style. More importantly, it builds sewing skills that transfer directly to projects such as zippered pouches, laptop sleeves, and quilted bags. Once the first sleeve comes together cleanly, the next version becomes an opportunity to refine the fit, experiment with fabrics, and create a holder that feels tailor-made for everyday use