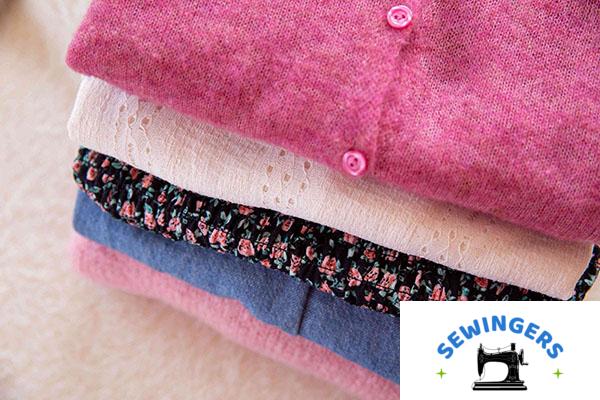
A closet usually tells a quiet story. Cotton tees tossed in with heavy towels, a wool sweater that came out two sizes smaller, a silky blouse that lost its sheen after one careless cycle. Nothing dramatic—just slow damage over time.
Fabric determines how clothing feels, wears, and survives repeated washing—and improper care shortens garment life by 30–50% in many households (American Cleaning Institute data trends). In the United States, annual apparel spending exceeds $1,700 per household, yet much of that value fades early through avoidable mistakes.
You see it most with heat, actually. Too much of it, too often. Fibers tighten, stretch, or break—quietly, then all at once.
Understanding fabric types changes how you treat clothing. And once that shift happens, fewer surprises show up in the laundry basket.
Contents
- 1 1. Natural Fabrics: Breathable and Classic
- 2 2. Synthetic Fabrics: Durable and Affordable
- 3 3. Fabric Blends: Performance Meets Comfort
- 4 4. Delicate Fabrics: Extra Care Required
- 5 5. Activewear and Performance Fabrics
- 6 6. Washing Guidelines: Temperature, Detergent, and Cycles
- 7 7. Drying and Ironing: Preventing Heat Damage
- 8 8. Stain Removal by Fabric Type
- 9 9. Storage and Seasonal Fabric Care
- 10 10. How to Read Fabric Care Labels
- 11 Conclusion
Key Takeaways
- Fabrics fall into 3 groups: natural, synthetic, and blends
- Heat, moisture, and friction cause most damage—not dirt itself
- Cold water washing reduces shrinkage by up to 80% compared to hot cycles
- Care labels prevent common issues like fading, warping, and fiber breakdown
- Detergent choice and drying method directly impact lifespan
1. Natural Fabrics: Breathable and Classic
Natural fibers behave in ways that feel intuitive—until they don’t. They breathe well, they feel comfortable, but they react quickly to heat and movement.
Cotton
Cotton dominates everyday clothing in the U.S., appearing in over 60% of casual garments, including T-shirts, denim, and bedding.
Brands like Levi Strauss & Co. rely heavily on cotton denim because of durability and comfort. But that durability has limits.
What tends to happen: cotton shrinks when exposed to high heat because the fibers contract after washing. It doesn’t always happen immediately—sometimes after the third or fourth cycle, which throws people off.
Care approach:
- Wash in cold or warm water (60–90°F)
- Dry on low heat or air dry
- Separate light and dark colors
A small observation—overdrying cotton feels efficient in the moment, but that stiff, slightly crunchy texture afterward usually signals fiber stress.
Wool
Wool fibers insulate effectively due to their crimped structure, making them standard in winter coats and sweaters across colder U.S. regions.
But wool reacts strongly to agitation. Not just heat—movement.
That’s where people get caught off guard.
Care approach:
- Use cold water only
- Avoid agitation (hand wash or gentle cycle)
- Lay flat to dry to maintain shape
When wool felts (that dense, shrunken texture), it’s usually not one mistake—it’s a mix of heat, motion, and time. A perfect storm, really.
Silk
Silk offers a smooth, protein-based fiber structure that gives it a natural sheen and softness, commonly used in formalwear and luxury bedding.
It looks resilient. It isn’t.
Care approach:
- Hand wash with mild detergent
- Avoid wringing
- Air dry away from sunlight
Sunlight fades silk faster than most expect. A few hours on a bright windowsill can dull the color noticeably—especially lighter shades.
2. Synthetic Fabrics: Durable and Affordable
Synthetic fibers are engineered. That’s the key difference. They’re built for consistency, not sensitivity.
Polyester
Polyester accounts for nearly 55% of global fiber production due to its durability and low cost (Textile Exchange data).
It resists wrinkles, holds shape, and dries quickly.
Care approach:
- Wash in warm water
- Use low dryer heat
- Iron on low setting if needed
Interestingly, polyester holds onto oil-based stains more than cotton. That’s why workout shirts sometimes smell “clean but not fresh.”
Nylon
Nylon provides high elasticity and strength, commonly used in hosiery, swimwear, and outerwear.
It stretches well—but heat weakens that elasticity over time.
Care approach:
- Wash cold
- Air dry when possible
Repeated high-heat drying doesn’t ruin nylon immediately. It just slowly reduces stretch recovery—until it doesn’t bounce back at all.
Acrylic
Acrylic mimics wool but consists of plastic-based fibers, often used in sweaters and blankets.
It feels cozy. It behaves… less predictably under heat.
Care approach:
- Machine wash cold
- Avoid high heat drying (melting risk starts around 320°F)
That slightly “plasticky” smell after drying acrylic? Usually a sign the temperature went too high.
3. Fabric Blends: Performance Meets Comfort
Blended fabrics solve problems. That’s their whole purpose.
Cotton-polyester blends combine breathability with wrinkle resistance, while spandex blends add stretch to structured garments like athleisure and uniforms.
But care gets tricky.
Care approach:
- Follow instructions for the most delicate fiber
- Avoid high heat drying
A cotton-poly blend might feel sturdy, but if cotton makes up 60%, it will still shrink under heat. That mismatch causes uneven wear—one fiber holding shape while the other shifts.
4. Delicate Fabrics: Extra Care Required
Some fabrics don’t tolerate shortcuts. Lace, chiffon, rayon—they look light because they are.
These materials lose structure quickly under friction and high-speed cycles.
Care approach:
- Use mesh laundry bags
- Select delicate or hand-wash cycle
- Air dry only
Brands like The Laundress design detergents specifically for these fibers, focusing on low-residue formulas.
One detail that often gets missed: even zippers from other garments can damage delicate fabrics during a wash. Not obvious—until small tears appear.
5. Activewear and Performance Fabrics
Performance fabrics are built for sweat, movement, and repetition.
Moisture-wicking synthetics pull sweat away from skin using capillary action (fiber structure-driven movement of liquid).
Brands like Patagonia engineer blends for durability and odor resistance.
Care approach:
- Wash inside out
- Avoid fabric softeners (they block moisture-wicking)
- Use sport-specific detergents
Detergents from Procter & Gamble target odor molecules directly, which matters because standard detergents don’t always break them down fully.
That lingering gym smell? It’s often trapped oils, not leftover sweat.
6. Washing Guidelines: Temperature, Detergent, and Cycles
Water temperature changes everything.
Cold water (below 80°F) preserves color and reduces shrinkage, while hot water (above 120°F) accelerates fiber breakdown and fading.
| Temperature | Effect on Fabric | Best Use Cases |
|---|---|---|
| Cold | Preserves fibers, prevents shrinkage | Cotton, delicates, dark colors |
| Warm | Removes oils effectively | Everyday wear, synthetics |
| Hot | Deep cleans but weakens fibers | Towels, heavily soiled items |
The U.S. Environmental Protection Agency notes that 90% of washing machine energy use comes from heating water—so cold cycles save both fabric and electricity.
Detergent matters just as much:
- Enzyme detergents break down protein stains (sweat, food)
- Oxygen-based cleaners handle stains without harsh bleaching
Products from The Clorox Company often combine both, but overuse—especially on delicate fabrics—can fade colors faster than expected.
7. Drying and Ironing: Preventing Heat Damage
Dryers cause more damage than washing machines. Not immediately—but gradually.
High heat increases shrinkage risk by up to 20% in cotton and wool garments.
Best practices:
- Air dry when possible
- Use low heat for synthetics
- Steam instead of pressing delicate items
Steam works differently. It relaxes fibers without compressing them, which avoids that flattened, slightly shiny look on fabrics like wool.
8. Stain Removal by Fabric Type
Stains behave differently depending on fiber structure.
Oil binds to synthetic fibers, while protein stains (like sweat or blood) respond best to cold water.
Common patterns:
- Oil stains → dish soap or enzyme detergent
- Protein stains → cold water rinse first
- Tannin stains (wine, coffee) → quick blotting + mild detergent
Always test on a hidden area.
That step gets skipped more often than expected—and that’s usually when discoloration becomes permanent.
9. Storage and Seasonal Fabric Care
Storage shapes fabric just as much as washing.
Improper storage leads to stretching, fading, and pest damage—especially in natural fibers like wool and silk.
Best practices:
- Use cedar blocks for wool (repels moths)
- Store silk in breathable garment bags
- Fold heavy sweaters instead of hanging
Seasonal rotation matters more in places with temperature swings—think New York winters or Midwest climates.
Around late November, heavier fabrics come out. If they’ve been stored poorly, that’s when issues show up—creases, odors, sometimes even tiny holes.
10. How to Read Fabric Care Labels
Care labels look cryptic at first. But they follow a consistent system.
Understanding care symbols reduces garment damage by over 40% (industry laundry care estimates).
Look for:
- Water symbols → washing temperature
- Square with circle → dryer settings
- Triangle → bleach guidelines
When symbols feel unclear, choosing the gentlest option usually avoids the worst outcomes.
Not perfect—but safer.
Conclusion
Fabric care doesn’t hinge on one big rule. It’s a collection of small decisions—temperature choices, drying habits, even how items get stored between seasons.
Most damage builds slowly. A slightly too-hot cycle here, an extra 20 minutes in the dryer there. Nothing dramatic in the moment.
Then one day, a favorite shirt fits differently. Or a sweater feels thinner than it used to.
Understanding fabric types—and adjusting care accordingly—extends garment life, reduces replacement costs, and preserves how clothing looks and feels over time.
And once that awareness settles in, laundry stops being routine. It becomes deliberate.