A seam can look flawless from the outside and still fall apart after three trips through the wash. That’s the part nobody warns you about. The stitching looks straight, the fabric sits pressed and tidy, the thread blends in so well you’d never notice it — and then the whole thing opens up right where it gets the most handling.
Backstitching is what stops that from happening. Whether you’re sewing Halloween costumes, hemming denim, finishing Thanksgiving table runners, building Etsy inventory, or just patching school uniforms, those few reverse stitches at the start and end of a seam are what keep everything from unraveling during wear, washing, or everyday use.
On most U.S. home machines — Singer, Brother, Janome — it’s one of those small habits that separates a seam that holds from one that just looks like it will.
Contents
- 1 What Is Backstitching and Why It Matters
- 2 Tools You Need to Backstitch Properly
- 3 How to Backstitch on a Sewing Machine
- 4 How to Backstitch by Hand
- 5 When to Use Backstitching in Real-Life U.S. Sewing
- 6 Alternative Ways to Secure Seams
- 7 Common Backstitch Mistakes and How to Avoid Them
- 8 Pro Tips for Strong and Clean Seams
- 9 Final Thoughts: Mastering Backstitching for Long-Lasting Projects
What Is Backstitching and Why It Matters
Backstitching means sewing backward over a few stitches at the start or end of a seam to lock the thread in place. On a machine, you do it with a reverse lever or button. By hand, you insert the needle behind the previous stitch, overlapping the thread path as you go.
It sounds minor. It is minor. But it genuinely changes what happens to a seam over time.
Without it, the thread just sits in the fabric with no real anchor at either end. The first and last stitches rely entirely on friction. Once the garment stretches, rubs, or runs through a wash cycle, those edge stitches start to loosen. With backstitching, the overlapping stitches resist that pull in a way that friction alone can’t.
Here’s how the options compare in plain terms:
| Seam type | What happens in use | Practical commentary |
|---|---|---|
| No backstitch | Thread can loosen at the seam ends | Acceptable for temporary basting, frustrating for anything real |
| Machine backstitch | 3 to 5 reverse stitches lock the seam | Quick, clean, and reliable for most woven fabrics |
| Hand backstitch | Overlapping hand stitches build a strong line | Slower, but excellent for repairs and tight spots |
| Serged edge | Thread wraps around the raw edge | Great for finishing, not always a replacement for locking the seam ends |
| Fabric glue | Adhesive bonds the layers | Useful for décor and costumes, unreliable for washable clothing |
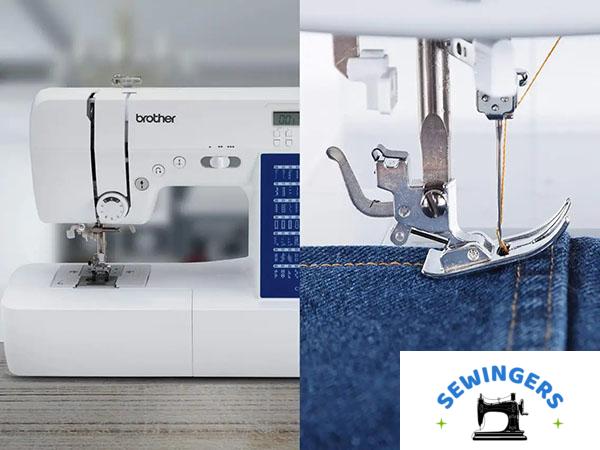
On Singer and Brother machines, the reverse control usually lives near the front of the machine body — though exact placement varies by model. Most manuals describe it specifically as a way to reinforce seams at the beginning and end of sewing [1][2].
One way to think about it: the seam is a zipper made of thread, and backstitching adds a small barricade at each end so nothing slides open.
Tools You Need to Backstitch Properly
The basic setup is straightforward — sewing machine, matching needle, quality thread, scissors, fabric, and a correctly wound bobbin. A seam ripper belongs in the kit too, not because disasters are common, but because thread bunching happens to everyone, and it’s much easier to deal with a small snag than to yank fabric out of the machine.
For most beginners in the U.S., an entry-level Brother, Singer, or Janome machine under roughly $200 handles backstitching without issue. Fancy features aren’t the priority. Consistent fabric feed, steady tension control, and a functional reverse stitch mechanism — that’s the list.
- Sewing machine: Brother, Singer, and Janome beginner models almost universally include reverse stitching.
- Needles: Universal size 80/12 covers most cotton fabrics; denim usually calls for a dedicated jeans needle.
- Thread: Polyester thread suits everyday garments well — it holds up and has just enough give.
- Bobbin: A poorly wound bobbin tends to show up as loose loops on the underside of the fabric.
- Scissors or snips: Clean thread tails make it much easier to inspect the finished seam.
- Seam ripper: Useful when backstitching stacks into an accidental knot or the thread jams.
- Presser foot: The standard foot handles most seams; specialty feet help with denim, zippers, and topstitching.
Here’s the part people underestimate: presser foot pressure and feed dogs matter more than they look. When the fabric doesn’t move evenly under the needle, backstitches pile into one lumpy mass instead of forming a neat lock. That lump isn’t a sign of bad sewing — it’s usually just uneven fabric feed.
How to Backstitch on a Sewing Machine
The basic sequence is this: sew 3 to 5 stitches forward, press the reverse control, sew 3 to 5 stitches backward, release, and continue forward along the seam. At the far end, repeat that short reverse sequence before lifting the presser foot.
This works on most Brother and Singer machines with a reverse lever or button. Some computerized models also offer a lock stitch setting, which ties off thread in place rather than sewing backward — useful when you want less visible bulk at the seam ends.
Step-by-step machine backstitching
- Place the fabric under the presser foot and align the edge with the seam allowance guide on the stitch plate.
- Lower the needle into the fabric before starting — this keeps the first stitch from shifting sideways.
- Sew forward 3 to 5 stitches, keeping stitch length around 2.5 mm for general seams.
- Press the reverse lever or button and sew backward over those same stitches.
- Release reverse and continue forward along the seam at a steady pace.
- Stop near the end of the seam and backstitch 3 to 5 stitches again.
- Trim the thread tails and leave the seam flat — resist the urge to pick at the locked section.
For beginners, the tricky part isn’t usually finding the reverse button. It’s keeping the fabric from drifting while the machine switches direction. A light hand helps. Gripping the fabric too firmly works against the feed dogs, and then the needle lands in slightly awkward places, which makes the backstitch look off.
A few things that tend to make the result cleaner:
- Short reverse sections look neater — 3 to 5 stitches is usually enough.
- Matching thread hides beginner wobble far better than contrast thread does.
- Thin cotton can pucker from too much backstitching, even when the stitching itself is technically correct.
- Stretch fabric often does better with a narrow zigzag or stretch stitch rather than a dense straight-stitch lock.
How to Backstitch by Hand
Hand backstitching works by sending each new stitch backward into the previous stitch line before moving forward again. It’s slower than a running stitch, but it holds repairs, embroidery outlines, and small garment seams in ways that a running stitch just won’t.
You’ll need a hand sewing needle, thread, the fabric itself, and a thimble if the fabric is thick. Embroidery floss works for decorative work; regular sewing thread is better for repairs you don’t want to see.
Hand backstitch method
Start with a small knot on the wrong side. Bring the needle up through the fabric where the seam begins, then insert it slightly behind that point and bring it up a stitch-length ahead. Pull the thread snug — not tight. Tight tension puckers the fabric into small ridges. Loose tension leaves visible loops.
The motion feels counterintuitive at first because the needle keeps stepping backward before moving forward. After a few inches, the rhythm settles in.
What usually determines how clean the result looks:
- Stitch spacing: Smaller, more even stitches make a stronger and smoother seam line.
- Stitch overlap: Each stitch should meet or slightly overlap the one before it.
- Thread tension: Snug but not gathered — the fabric should lie flat.
- Knotting technique: The knot belongs on the wrong side where it won’t show through.
- Seam end: Two tiny stitches in place at the finish is enough to secure the thread.
Hand backstitching is genuinely useful for split seams in jeans pockets, loose linings, stuffed toys, and small repairs where pulling out the sewing machine feels like more work than the fix deserves.
When to Use Backstitching in Real-Life U.S. Sewing
Backstitching belongs anywhere a seam end will face pulling, washing, stretching, or repeated handling — which is most garment sewing and a good portion of home décor work too.
Halloween costumes are a useful example to think through. The seams don’t need couture finishing, but they do get tugged over other clothing, stepped on, danced in, shoved into school bags, and worn by kids moving fast who aren’t thinking about seam integrity. Backstitching at the start and end of each seam is what prevents that one dramatic split five minutes before leaving the house.
- Jeans repair: Denim stress points — near pockets, hems, and inner thighs — need reinforced seams to last.
- School uniforms: Hems and waistbands take repeated washing hard; backstitching helps them hold up longer.
- Holiday costumes: Halloween capes, Thanksgiving pageant outfits, and themed aprons all need locked seam ends.
- Home décor: Pillows, curtains, cushion covers, and table runners need secure seams at corners and openings especially.
- Etsy products: Tote bags, scrunchies, zipper pouches, and baby items need seam durability that holds up across many uses.
Cotton is a good fabric to practice on because it feeds evenly and shows stitch length clearly. Denim is less forgiving, but it teaches something useful quickly: seam strength depends on thread weight, needle size, stitch density, and fabric thickness working together. Backstitching alone won’t save a weak thread or the wrong needle — it secures the seam ends, not the materials themselves.
Alternative Ways to Secure Seams
Backstitching is the most common approach, but it’s not the only one. Lock stitch functions, hand knots, serging, overlock stitches, edge binding, and fabric glue all have their place depending on the fabric, the project, and whether the item will be washed.
A Brother machine with a lock stitch function ties off thread in place with several tiny stitches — this creates less visible bulk than reverse stitching, which matters on delicate or sheer fabrics. A serger trims the raw edge and wraps it with thread simultaneously, which gives knit garments and woven seams a very clean finish. That said, a serger isn’t interchangeable with a regular sewing machine. It finishes edges beautifully, but construction seams often still need thoughtful securing at both ends.
| Method | Best for | Weak spot |
|---|---|---|
| Backstitch | Garments, crafts, home décor | Can create bulk on thin or delicate fabrics |
| Lock stitch function | Delicate fabrics, neat finishes | Depends on what the machine supports |
| Hand knotting | Hand repairs, hidden seams | Bulky knots can show through lighter fabrics |
| Serging or overlocking | Knitwear, raw edges, seam finishing | Thread tails at the start and end still need securing |
| Fabric glue | Costumes, crafts, no-sew décor | Not reliable for clothing that gets washed regularly |
Fabric glue has its place — quick Halloween costume trims, felt decorations, craft seams that won’t take much strain. For clothing that gets worn and washed, thread locking tends to hold longer than adhesive bonding.
Common Backstitch Mistakes and How to Avoid Them
The most common issues are: sewing too many reverse stitches, skipping seam end locking entirely, using uneven stitch length, choosing the wrong needle, and ignoring tension problems. Most of these are easy to fix once you know what you’re looking at.
The classic beginner mistake is holding the reverse lever too long. Ten or twelve backward stitches create a thick thread bar that feels stiff and looks rough, especially on quilting cotton or lightweight material. On the other end, skipping backstitching entirely means a clean-looking seam that opens like a loose shoelace after a few wears.
- Thread bunching underneath the fabric: Check the bobbin, rethread the upper thread, and make sure the presser foot is fully lowered before sewing.
- Skipped stitches: Try switching to a different needle size or needle type for the fabric.
- Seam puckering: Reduce tension slightly or lengthen the stitch a bit.
- Inconsistent stitches: Let the feed dogs move the fabric — don’t pull or push it through.
- Thread jams: Stop early, lift the presser foot, remove the fabric carefully, and use a seam ripper if needed rather than forcing anything.
Singer manuals commonly note that correct upper threading and bobbin placement affect stitch formation [1]. Brother manuals also emphasize matching needle and thread type to the fabric being sewn [2]. Those reminders sound obvious until the machine starts leaving tangled nests of thread under the fabric — then they make a lot more sense.
A slightly dull needle causes more problems than most people expect. It still sews, but it punches the fabric unevenly, skips stitches, or drags thread into small loops — and none of those issues fix themselves.
Pro Tips for Strong and Clean Seams
Strong seams come from matching thread to fabric weight, adjusting stitch length at stress points, reinforcing high-tension areas, and testing on scrap fabric before cutting into the real project. Backstitching is part of the system, not the whole thing.
Thread compatibility matters more than it sounds. Polyester thread works well for most everyday projects — it resists breakage and has mild flexibility. Cotton thread suits cotton fabric, quilting, and situations where you’ll be pressing with heat. Denim calls for a stronger needle and often a slightly longer stitch length. Stretch fabric usually needs a stitch that can move with the fabric rather than a dense straight-stitch lock.
- Shorter stitches at stress points — pocket corners, straps, crotch seams, and waistband ends take more strain than the rest of the seam.
- On sheer or delicate fabric, a lock stitch or hand knot may look cleaner than reverse stitching.
- Test on a scrap from the same fabric before sewing the real piece — scrap cotton and actual garment cotton can behave differently, especially after washing.
- Match needle size to fabric weight — lightweight cotton doesn’t need a denim needle, and denim doesn’t do well with a small universal.
- Press seams after sewing — even simple stitching looks calmer and sits flatter after a pass with heat and steam.
On Janome, Brother, and Singer machines, stitch length control gives you more influence than most beginners expect. A 2.5 mm length works for many woven seams. Shorter adds density at stress zones. Longer helps thicker fabrics move without perforating.
There’s a balance, though. Dense stitching can actually weaken delicate fabric by punching too many holes too close together. Seam strength isn’t just more thread — it’s thread, fabric durability, needle choice, stitch density, and seam stress all working together.
Final Thoughts: Mastering Backstitching for Long-Lasting Projects
Learning to backstitch well means learning how to lock seam ends cleanly, consistently, and in a way that suits whatever fabric is in front of you. It’s one of those foundational habits that follows you from first projects into garments you’re actually proud of — and into sellable work if that’s where you’re headed.
A Singer or Brother machine makes the mechanical part simple. The fabric and thread make the judgment part more interesting. Cotton asks for one approach. Denim asks for another. Stretch fabric sometimes refuses the straight-stitch plan entirely and needs something that moves with it.
That’s the part that starts to feel less like following rules and more like reading the material in front of you.
Those 3 to 5 reverse stitches don’t show off. They don’t add anything visible. They just keep the seam from giving up in the places where unraveling usually starts — and for DIY clothing, repairs, holiday sewing, home décor, and small-batch handmade goods, that quiet work is what makes the difference between something that lasts and something that looked finished.
Sources:
[1] Singer sewing machine instruction manuals commonly describe reverse stitching for securing seam ends.
[2] Brother sewing machine operation manuals commonly describe reverse/reinforcement stitching and recommend matching needle and thread to fabric type.