A sewing space changes the way you sew. That sounds dramatic, but it’s true. Projects move faster, fabric stays cleaner, tools stop disappearing into random kitchen drawers, and those late-night “just one more seam” sessions feel a lot less chaotic.
Across the United States, sewing has shifted far beyond a niche hobby. More than 30 million Americans sew regularly, whether that means piecing quilts in Minnesota, hemming dance costumes in Texas, or running a small Etsy shop from a California apartment. And eventually, almost every sewist reaches the same point: the dining table setup starts getting old.
You notice it after a few months. Folding everything away after every project drains momentum. Rotary cutters end up beside coffee mugs. Fabric stacks slowly take over closets. Then one day, a dedicated sewing corner suddenly sounds less like a luxury and more like survival.
The good news is that a functional sewing space doesn’t require a giant craft studio or a magazine-perfect renovation. Most effective setups evolve slowly. A folding table becomes a cutting station. A spare bookshelf turns into fabric storage. Over time, the room starts working with you instead of against you.
And honestly, that’s the difference that matters.
Contents
- 1 Choose the Right Location in Your Home
- 2 Invest in Essential Sewing Furniture
- 3 Select the Right Sewing Machine and Tools
- 4 Plan Smart Storage Solutions
- 5 Optimize Layout for Workflow Efficiency
- 6 Create a Dedicated Cutting and Pressing Station
- 7 Manage Electrical and Safety Considerations
- 8 Personalize Your Sewing Space
- 9 Budget Planning for American Sewists
- 10 Maintain and Upgrade Your Sewing Space Over Time
- 11 Conclusion
Choose the Right Location in Your Home
Assess Available Space First
Your sewing room doesn’t need to look like a professional quilting studio on day one. In practice, most American sewists work with whatever space already exists.
Common setups include:
- Spare bedrooms
- Finished basements
- Living room corners
- Guest room hybrids
- Garage workshops
- Apartment nooks
Apartment sewists in cities like New York or Chicago often rely on vertical storage because floor space disappears quickly. Tall shelving units, pegboards, and fold-down tables become lifesavers there.
Suburban homes usually offer more flexibility. Basements tend to work especially well because fabric stays out of direct sunlight and larger cutting tables fit comfortably. The tradeoff? Basements often need better lighting and moisture control.
Now, here’s the part many people underestimate: proximity matters. If your machine sits three rooms away in a cold basement, sewing sessions tend to happen less often. Spaces that feel accessible get used more consistently.
Think Carefully About Lighting and Ventilation
Bad lighting makes sewing feel exhausting fast.
Natural light reduces eye strain and helps with accurate color matching, especially when working with navy fabrics, black thread, or subtle quilting prints that all start blending together under dim bulbs.
A setup near a window usually works best. North-facing windows provide steady light throughout the day, while west-facing windows can create harsh afternoon glare that gets annoying after an hour or two.
For evening sewing, layered lighting tends to work better than one bright overhead fixture. Many sewists combine:
- LED task lamps
- Overhead daylight bulbs
- Clip-on machine lights
- Floor lamps near cutting stations
Ventilation matters too, particularly in smaller sewing rooms. Irons create heat quickly. Steam builds up. Fabric dust collects quietly over time.
Ceiling fans, HVAC vents, or even a small air purifier can make a surprising difference during long quilting sessions.
Invest in Essential Sewing Furniture
Your Sewing Table Matters More Than Expected
A shaky card table works temporarily. Temporarily usually lasts about six weeks.
After that, vibration from the sewing machine becomes irritating, shoulders start tightening, and cutting fabric accurately feels harder than it should.
A practical sewing table typically includes:
| Feature | Recommended Measurement | Why It Matters |
|---|---|---|
| Width | 36–40 inches minimum | Supports fabric flow |
| Height | Elbow-level while seated | Reduces shoulder strain |
| Surface stability | Heavy-duty frame | Prevents machine vibration |
| Leg clearance | 24 inches or more | Improves comfort |
IKEA desks remain popular because they’re affordable and modular. Wayfair and Arrow Sewing Furniture offer purpose-built sewing cabinets with machine lifts and storage compartments.
Here’s the interesting difference, though. Budget tables often prioritize storage, while premium sewing cabinets prioritize ergonomics. After several months of regular sewing, ergonomics usually become more important than extra drawers.
That realization tends to happen right around the first large quilt project.
Don’t Ignore the Chair
Most beginners focus entirely on the machine and barely think about seating. Then lower back pain enters the conversation.
An ergonomic chair with lumbar support helps during long sessions. Adjustable height matters because machine tables vary dramatically.
Armrests often get in the way, especially during garment sewing where movement needs to stay fluid.
A few hours of sewing with poor posture can create neck tension that lasts longer than the project itself. And honestly, fatigue affects stitching accuracy more than people realize.
Select the Right Sewing Machine and Tools
Sewing Machine Choices in the U.S.
The American sewing market has no shortage of machine options. Three brands dominate most conversations:
| Brand | Strengths | Typical Price Range | Best For |
|---|---|---|---|
| Brother | Affordable computerized features | $200–$800 | Beginners and hobbyists |
| Singer | Widely available, simple operation | $150–$600 | Casual sewing |
| Janome | Durability and precision | $500–$2,000 | Quilters and advanced sewists |
Brother machines tend to offer the most features at lower prices. Janome machines generally feel smoother and quieter during heavy use. Singer remains accessible because replacement parts and accessories are easy to find almost everywhere in the U.S.
And yes, machine noise becomes a real factor eventually. Especially during midnight sewing sessions while the rest of the house is trying to sleep.
Keep Core Tools Within Reach
A sewing setup becomes frustrating when basic tools constantly disappear.
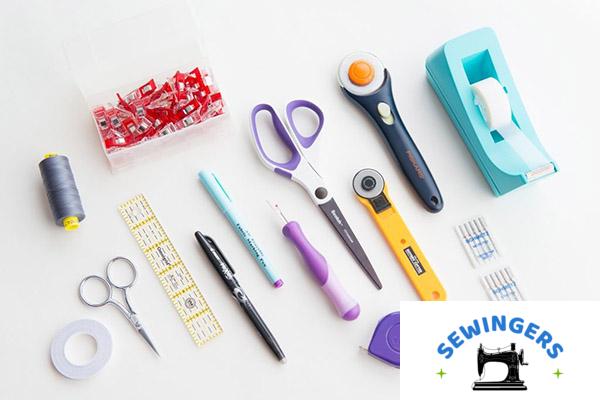
Daily-use essentials include:
- Rotary cutter
- Self-healing cutting mat
- Acrylic rulers
- Fabric scissors
- Seam ripper
- Pins or clips
- Measuring tape
Quality cutting tools reduce fabric waste noticeably over time. Cheap scissors often chew fabric edges instead of slicing cleanly. That sounds minor until slippery rayon starts shifting all over the place.
One overlooked detail: duplicate frequently used tools when possible. Keeping scissors at both the cutting station and sewing machine saves more time than expected.
Plan Smart Storage Solutions
Fabric Storage Gets Out of Control Quickly
Fabric accumulation happens fast. Really fast.
One trip to Joann during a holiday sale and suddenly there are six yards of flannel with no obvious destination.
Clear plastic bins remain popular because they protect fabric from dust and moisture while keeping colors visible. Many sewists organize fabric by:
- Color
- Fiber type
- Season
- Project category
Holiday fabric deserves separate storage. Otherwise Christmas prints somehow migrate into summer quilting stacks by July.
For smaller spaces, cube shelving systems work particularly well because folded fabric resembles books visually. The room stays cleaner-looking even when storage is full.
Organize Thread and Notions Efficiently
Thread organization feels optional until duplicate purchases start piling up.
Wall-mounted racks work well for visibility. Pegboards create flexibility for tools, rulers, and scissors. Drawer dividers help contain tiny notions that otherwise vanish into chaos.
Labeling matters more than aesthetics here. The goal is reducing friction during projects.
Because eventually, every sewist experiences the strange phenomenon of owning fourteen black zippers while somehow never finding the correct one.
Optimize Layout for Workflow Efficiency
Use a Sewing Work Triangle
Professional kitchens use workflow zones. Sewing spaces benefit from the same principle.
Your setup generally functions best with three distinct areas:
- Cutting station
- Sewing station
- Pressing station
The transition between those zones needs to feel smooth. Constantly walking across the room carrying half-finished blocks interrupts concentration and wastes energy.
Quilters especially benefit from larger cutting surfaces because fabric manipulation takes space. Garment sewists often prioritize pressing access instead.
In practice, the best layout depends on the type of sewing happening most often.
Keep Frequently Used Supplies Close
Daily tools belong at arm level.
Seasonal or rarely used supplies can move higher onto shelves or into closets. This sounds obvious, yet many sewing rooms accidentally bury the most-used items behind decorative storage.
Efficiency isn’t about perfection. It’s about reducing tiny annoyances that add up over time.
A well-arranged room quietly removes friction from the creative process.
Create a Dedicated Cutting and Pressing Station
Cutting Tables Need Proper Height
Cutting fabric on the floor becomes miserable eventually.
Waist-height cutting surfaces reduce back strain dramatically, especially during large quilting projects or pattern tracing sessions.
A practical cutting station usually includes:
- Minimum size: 36 x 60 inches
- Stable surface
- Standing height
- Good overhead lighting
Some sewists repurpose kitchen islands or adjustable workbenches. Others combine IKEA cabinets with a custom tabletop.
And honestly, standing while cutting simply feels more accurate for most people.
Build a Functional Pressing Area
Pressing shapes the final quality of a project more than many beginners expect.
Flat seams, crisp hems, and smooth quilt blocks all depend heavily on proper pressing technique.
Popular iron brands among American sewists include:
- Rowenta
- Oliso
- Reliable
Steam consistency matters. Cheap irons often leak or lose heat unevenly, which becomes frustrating fast during garment construction.
Helpful pressing accessories include:
- Pressing ham
- Sleeve board
- Heat-resistant mat
- Spray bottle
- Wool pressing mat
A dedicated pressing station keeps momentum moving during projects instead of turning ironing into a separate chore.
Manage Electrical and Safety Considerations
Plan Electrical Access Carefully
Modern sewing rooms use more electricity than expected.
Machines, irons, cutting lights, charging stations, and pressing equipment all compete for outlet space.
A safe setup typically includes:
- Surge protectors
- Indoor-rated extension cords
- Accessible outlets
- Cord management clips
Older American homes sometimes struggle with overloaded circuits, especially in converted basement sewing rooms.
If lights flicker when the iron heats up, the room likely needs electrical attention sooner rather than later.
Prioritize Safety
Sewing tools are sharp. Irons get extremely hot. Pins somehow end up everywhere.
Basic safety practices matter, especially in homes with children or pets.
Helpful precautions include:
- Magnetic pin holders
- Covered rotary blades
- Smoke detectors
- Fire-resistant ironing surfaces
- Closed scissor storage
Most accidents happen during cleanup, oddly enough. Fatigue tends to lower attention after long sewing sessions.
Personalize Your Sewing Space
Add Visual Inspiration
Creative rooms benefit from personality.
Finished quilts, framed pattern envelopes, vintage advertisements, or seasonal decorations all help the space feel energizing rather than purely functional.
Many American sewists decorate seasonally:
- Autumn quilts for Thanksgiving
- Red, white, and blue decor for Independence Day
- Christmas sewing displays in winter
The emotional side of sewing matters too. A welcoming room encourages consistency.
And some days, consistency matters more than motivation.
Focus on Comfort
Comfort extends sewing sessions naturally.
A cozy rug softens hard flooring. Bluetooth speakers add background music or podcasts. Climate control matters more than expected because sewing rooms heat up quickly under task lighting and irons.
Tiny details shape the overall experience.
That’s usually the point where a sewing room stops feeling temporary and starts feeling genuinely personal.
Budget Planning for American Sewists
Typical Setup Costs
Here’s a realistic breakdown for a mid-range sewing space in the United States:
| Item | Estimated Cost |
|---|---|
| Sewing machine | $300–$1,000 |
| Furniture | $400–$1,200 |
| Storage | $150–$500 |
| Tools and accessories | $200–$600 |
Total estimated range: roughly $1,050–$3,300 USD.
That number climbs quickly with embroidery equipment or quilting upgrades. Still, most experienced sewists build their spaces gradually over several years rather than purchasing everything at once.
And frankly, gradual upgrades tend to produce smarter setups because your habits become clearer over time.
Maintain and Upgrade Your Sewing Space Over Time
Seasonal Maintenance Helps
Before holiday crafting seasons or back-to-school sewing projects, a quick reset keeps the room functional.
Helpful maintenance tasks include:
- Replacing needles
- Sharpening rotary blades
- Cleaning lint buildup
- Servicing machines annually
- Reorganizing fabric inventory
Machine maintenance matters more than aesthetics long term. A neglected machine eventually starts skipping stitches, shredding thread, or sounding oddly aggressive during straight seams.
Certified annual servicing keeps most quality machines running smoothly for years.
Let the Space Evolve With Your Skills
Sewing rooms rarely stay static.
As skills improve, many sewists eventually add:
- Serger machines
- Embroidery modules
- Quilting frames
- Dress forms
- Additional lighting
What starts as a simple hobby corner can slowly become a highly specialized creative workspace.
That evolution feels natural. Sewing tends to expand into the space available for it. Sometimes beyond it.
Conclusion
A well-designed sewing space supports creativity in practical, everyday ways. Better lighting improves accuracy. Smarter storage reduces frustration. Comfortable furniture protects your body during long sessions. Small adjustments compound over time until the entire process feels smoother.
And that’s really the goal.
Not perfection. Not a Pinterest-worthy studio with color-coded fabric walls and custom cabinetry worth more than the sewing machine itself.
A sewing space succeeds when it makes you want to sit down and create something.
Most of the time, the best setups grow gradually. One shelf gets added. Then better lighting. Then maybe a larger cutting table after wrestling with fabric on the dining room floor for the hundredth time.
Eventually, the room starts working with your habits instead of against them.
That’s when sewing becomes easier, faster, and honestly… a lot more enjoyable