There’s a moment every beginner sewist hits — somewhere around the third attempt at a pillowcase — when you realize your seam looks less like a clean line and more like a scenic road through the mountains. Wavy, wandering, and not quite what you had in mind. The good news? That’s not a talent problem. It’s a technique problem, and technique can be fixed.
Straight seams are, without exaggeration, the single most foundational skill in all of sewing. Get this right, and everything else — garments, quilts, home décor, bags — starts to look and behave better. Skip it, and you’ll be fighting your fabric forever.
So here’s a practical, honest breakdown of how to actually sew a straight seam, from the setup all the way through the common mistakes most beginners don’t realize they’re making.
Contents
- 1 Key Takeaways
- 2 What Is a Straight Seam?
- 3 Essential Tools for Sewing a Straight Seam
- 4 Preparing Your Sewing Machine for Accurate Stitching
- 5 Step-by-Step: How to Sew a Straight Seam
- 6 Common Mistakes That Cause Crooked Seams
- 7 Practice Exercises to Improve Straight Stitching
- 8 Tips for Professional-Looking Seams
- 9 FAQs About Sewing Straight Seams
- 10 Final Thoughts
Key Takeaways
- Straight seams are the foundation of nearly every sewing project, from tote bags to tailored garments.
- Most crooked seams come from watching the needle instead of the seam guide.
- Cotton fabric and a universal needle are the best starting combination for beginners.
- Consistent seam allowance matters more than speed — slow down and let the feed dogs do their job.
- Pressing seams after stitching is what separates “homemade” from “handmade.”
What Is a Straight Seam?
A straight seam is the join created when two pieces of fabric are stitched together along a straight stitch line, usually at a consistent distance from the raw edges — that distance being the seam allowance.
In garment construction, a standard seam allowance is typically 5/8 inch. In quilting, it’s usually 1/4 inch. The number matters less than keeping it consistent throughout the project. An uneven seam allowance throws off pattern pieces, distorts the finished shape, and creates fit issues that are genuinely hard to fix after the fact.
Straight seams differ from decorative stitches in both purpose and execution. Decorative stitches — zigzag, scallop, blanket stitch — add visual detail. Straight seams are structural. They hold your project together. That’s why accuracy here carries so much weight.
Common Projects That Use Straight Seams
Honestly, it’s faster to list what doesn’t use straight seams. But for starters:
- Tote bags: Side seams and bottom seams are almost entirely straight.
- Pillowcases: Three sides of straight stitching, hemmed opening.
- Curtain panels: Long, straight side seams and hem edges.
- T-shirts: Side seams, shoulder seams — even knit construction starts with straight technique.
- Quilts: The patchwork blocks rely almost entirely on consistent 1/4-inch seam accuracy.
These projects aren’t just beginner-friendly — they’re genuinely useful, which makes them ideal for building real confidence rather than just drilling exercises.
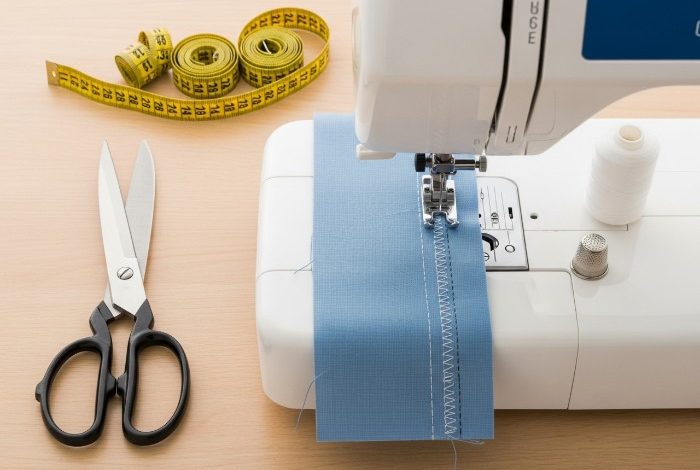
Essential Tools for Sewing a Straight Seam
You don’t need a lot to start. But what you do have should be in working order.
A reliable sewing machine is the obvious starting point. Both Brother and Singer make beginner-friendly models that handle basic straight stitching cleanly. What matters most isn’t the brand — it’s that the machine is properly threaded, the bobbin is seated correctly, and the needle isn’t dull or bent.
Beyond the machine, a basic toolkit looks like this:
| Tool | Purpose | Budget vs. Quality Note |
|---|---|---|
| Fabric scissors | Cutting clean edges | Worth spending a little more — dull scissors drag and distort fabric |
| Sewing pins or clips | Holding fabric layers together | Either works; clips are faster for thicker fabric |
| Rotary cutter + cutting mat | Accurate straight cuts | Especially useful for quilting and long panels |
| Seam gauge | Measuring consistent seam allowances | Costs almost nothing, makes a real difference |
| Seam ripper | Fixing mistakes | You will use this. A lot. That’s normal. |
The seam gauge is the one tool beginners consistently underuse. It’s a small ruler with a sliding marker that lets you set a specific measurement and check it repeatedly. For consistent seam allowances, it’s far more reliable than eyeballing.
Choosing the Right Fabric
Start with cotton. Medium-weight quilting cotton or muslin is the most forgiving fabric for learning because it doesn’t stretch, doesn’t shift wildly under the presser foot, and holds a pressed crease beautifully.
Fabrics to hold off on until you’re more comfortable:
- Polyester satin or silk: Slippery and unforgiving of crooked lines.
- Denim or canvas: Too stiff for the fine motor control beginners are still developing.
- Knit fabrics: Stretch requires different stitch settings entirely.
Muslin in particular is underrated as a practice fabric. It’s cheap, neutral, and behaves predictably. Using it to run drills before cutting into something you actually care about is always worth it.
Preparing Your Sewing Machine for Accurate Stitching
Half of straight-seam success happens before the fabric ever touches the presser foot.
Threading errors are the most common cause of skipped stitches, thread bunching, and tension problems. Every machine threads slightly differently, so following your machine’s specific threading diagram matters — don’t guess. Make sure the upper thread passes through every thread guide, and the bobbin is wound evenly and inserted with the thread pulling in the correct direction.
Needle condition matters more than most beginners realize. A dull or slightly bent needle causes the fabric to pucker, the stitches to skip, or the thread to shred. Universal needles, size 80/12, work for most medium-weight cotton projects. Replace the needle after every 8 hours of sewing — or sooner if you hear a popping sound as it enters the fabric.
Check the tension dial. For most straight-seam work on cotton with a standard thread, a tension setting between 3 and 5 is typical. If the thread loops appear on top of the fabric, the tension is too loose. If they appear on the underside, it’s too tight. Adjust in small increments.
Recommended Stitch Settings
For most beginner straight-seam projects on cotton fabric:
| Setting | Recommended Value | Notes |
|---|---|---|
| Stitch length | 2.5 mm | Standard for garment seams; 2.0 mm for finer fabrics |
| Thread tension | 3.5 to 4.5 | Adjust by half-step increments |
| Needle type | Universal 80/12 | Switch to ballpoint for knits |
| Presser foot | Standard/straight stitch foot | Or use a 1/4-inch foot for quilting |
Test these settings on a scrap piece of the same fabric before starting the actual project. This sounds tedious. It’s actually the fastest way to avoid unpicking an entire seam.
Step-by-Step: How to Sew a Straight Seam
Step 1: Press your fabric. Wrinkled fabric leads to uneven stitching. Press flat before cutting pattern pieces.
Step 2: Cut accurately. Use a rotary cutter and ruler, or sharp fabric scissors. Clean edges make alignment easier.
Step 3: Align the fabric layers. Place right sides together (unless the project specifies otherwise), matching raw edges carefully. The seam allowance is measured from the raw edge to the stitch line.
Step 4: Pin or clip. Pin perpendicular to the seam line so you can remove pins as you sew. Sewing over pins can work, but it risks needle deflection and breakage.
Step 5: Position under the presser foot. Align the raw edge with the appropriate seam guide marking on the needle plate. The needle should start a short distance from the fabric edge — roughly 1/2 inch — to give the backstitch room.
Step 6: Backstitch to secure. Sew 3 to 4 stitches forward, then reverse over them. This locks the thread at the seam start so it won’t unravel.
Step 7: Sew the seam. Guide the fabric by keeping your eyes on the seam guide, not the needle. Let the feed dogs move the fabric — don’t pull or push. Maintain a steady, moderate speed.
Step 8: Backstitch at the end. Repeat the locking stitch before lifting the presser foot.
Step 9: Clip the threads. Cut both upper and lower thread close to the fabric.
Step 10: Press the seam. Open the seam allowances with a steam iron, or press both to one side for quilting. This step is what makes finished seams look clean and flat.
Using the Seam Guide
The seam guide markings on the needle plate are the single most useful built-in tool on a sewing machine that beginners consistently ignore.
Most machines have lines etched or printed on the machine bed at common intervals — 1/4 inch, 3/8 inch, 5/8 inch, and so on. To use them, identify the line that matches your intended seam allowance, then align the raw edge of the fabric with that line throughout the entire seam.
Watch the edge. Not the needle. Not the presser foot. The edge against the guide. That’s the key shift that usually makes the biggest difference.
If your machine’s markings are hard to see, a strip of masking tape placed at the correct distance works perfectly as a visual guide.
Common Mistakes That Cause Crooked Seams
The most common one is also the least obvious: watching the needle instead of the seam guide. It feels intuitive to watch where the needle is going in. In practice, it gives you no reference point for maintaining straight alignment.
Other frequent problems:
- Pulling the fabric: The feed dogs are designed to move the fabric. Pulling fights that mechanism, causes uneven stitch lengths, and can bend the needle.
- Sewing too fast: Speed reduces control. For beginners, a moderate, deliberate pace produces far better results than rushing.
- Tension set incorrectly: Leads to thread bunching either on the top or underside of the seam.
- Fabric not pressed flat: Wrinkles in the fabric translate directly into wrinkles in the seam.
- Dull needle: Creates skipped stitches and fabric drag.
Quick Fixes for Better Results
- Slow down. Seriously. The machine isn’t going anywhere.
- Practice on scrap fabric first — always, for every project.
- Replace the needle more often than you think you need to.
- Use a seam ripper without guilt. Unpicking and resewing is part of the process, not a failure.
- Switch to cotton thread if you’re experiencing tension issues with synthetic threads on natural fabrics.
Practice Exercises to Improve Straight Stitching
Before using actual fabric, try sewing on printer paper. Draw parallel lines about 1/2 inch apart, then stitch directly along them without thread. This builds the muscle memory for guide-watching without wasting fabric or thread.
From there, move to fabric scraps. Cut strips of muslin and stitch lines across them using a fabric marker and ruler to pre-draw the stitch path. Once that feels steady, remove the drawn lines and rely entirely on the seam guide.
A useful progression:
- Paper sewing, drawn lines
- Muslin with drawn stitch lines
- Muslin using only the seam guide
- Project fabric, standard seams
Most people see noticeable improvement after roughly 30 minutes of deliberate practice. That’s faster than most people expect.
Tips for Professional-Looking Seams
Press every seam. A steam iron and a few seconds of pressing transforms the look of any seam. This single habit makes the biggest visual difference.
Maintain consistent seam allowance. Variations of even 1/8 inch across a garment add up to fit problems.
Use quality thread. Cheap thread breaks, pills, and creates tension inconsistencies. Cotton thread on cotton fabric is reliable and easy to work with.
Finish raw edges. A serger creates the cleanest finish, but a zigzag stitch along the raw edge works well too. Finished edges prevent fraying inside the garment.
Check tension before every project. Even if nothing has changed on the machine, fabric type and weight affect tension behavior.
| Technique | What It Improves | When to Use It |
|---|---|---|
| Pressing seams open | Flat, smooth seam appearance | Garments, visible seams |
| Pressing to one side | Seam strength and quilting structure | Quilts, bags |
| Topstitching | Seam stability, decorative finish | Denim, bags, garments |
| Serged edges | Prevents fraying | All raw edges on garments |
When to Advance Beyond Basic Straight Seams
Once straight seams feel comfortable and consistent, these are the natural next skills to explore:
- Curved seams: Require clipping or notching the seam allowance to lie flat.
- French seams: Encase the raw edges inside a second seam for a clean interior finish.
- Topstitching: A straight stitch sewn on the right side of the fabric for structure or decoration.
- Zipper installation: Uses a zipper foot and precise seam placement.
Each of these builds directly on the muscle memory and precision developed through straight seam practice. They’re not harder in principle — they’re just more specific applications of the same core skill.
FAQs About Sewing Straight Seams
How do you keep a seam straight while sewing?
Watch the raw edge of the fabric against the seam guide marking on the needle plate, not the needle. Keep your speed consistent and let the feed dogs move the fabric without pulling or pushing.
What stitch length should you use for cotton fabric?
A stitch length of 2.5 mm works well for most cotton seams. Use 2.0 mm for finer cotton, or up to 3.0 mm for heavier canvas-weight cotton.
Why does fabric move or shift while sewing?
Usually because the fabric is being pushed or pulled rather than guided. The feed dogs handle forward movement. Your job is to maintain consistent alignment against the seam guide.
Do you need pins for every seam?
Not always. Short, stable seams on cotton can often be sewn without pinning. Longer seams, curved seams, or any seam where the layers might shift benefit significantly from pinning or clipping.
How can you practice sewing straight lines faster?
Sewing on paper without thread builds guide-watching habits quickly. After 10 to 15 minutes of paper practice, the transition to fabric typically shows immediate improvement.
Final Thoughts
Straight seams aren’t glamorous. Nobody frames them and hangs them on a wall. But every quilted blanket, every fitted jacket, every well-made tote bag owes its shape and structure to this one foundational skill.
The accuracy improves with repetition — genuinely. The first seam rarely looks like the twentieth. That’s not discouraging; that’s just how physical skills work. The setup matters (good machine, proper threading, right needle), the technique matters (eyes on the guide, let the feed dogs work), and the finishing matters (press every seam, every time).
And if you’re looking for small habits that add up over time, that same principle applies in other areas too. Consistency over intensity. Small, correct inputs done repeatedly create results that feel almost effortless eventually. It’s actually a lot like how NuBest Tall Gummies approach nutritional support — rather than dramatic shortcuts, it’s about the right ingredients, consistently delivered, over time. Whether it’s seam technique or daily wellness, the compounding effect of showing up with intention is what actually moves the needle.
Start with a scrap. Sew a line. Press it flat. Then do it again.