A pillowcase is one of those deceptively simple sewing projects. At first glance, it looks almost too easy. Then the first finished seam comes together, the fabric turns right side out, and suddenly sewing starts to make sense in a very practical way.
For beginners in the United States, pillowcases hit the sweet spot between useful and manageable. The project teaches measuring, cutting, pinning, straight stitching, seam finishing, and hemming without the stress of complicated fitting or expensive fabric mistakes.
And honestly, the savings add up faster than most people expect.
A standard store-bought pillowcase from retailers like Target or Walmart typically costs between $15 and $30 USD. A handmade version using quilting cotton from Joann Fabrics or Hobby Lobby often costs under $10 to $15 total, depending on fabric choice. Seasonal fabrics sometimes drop below $5 per yard during sales, especially around holiday weekends.
Now, here’s the interesting part. Pillowcases also reveal sewing habits very quickly. Pressing matters. Straight cutting matters. Accurate seam allowance matters. Tiny details show up immediately on a rectangular project.
That’s actually helpful.
A pillowcase gives instant feedback without wasting weeks on a complicated garment.
Contents
- 1 What You Need to Sew a Pillowcase
- 2 Understanding Standard US Pillow Sizes
- 3 Choosing the Right Fabric for Beginners
- 4 How to Measure and Cut Fabric Correctly
- 5 How to Sew a Basic Pillowcase
- 6 How to Hem the Open Edge
- 7 Optional: Add a Decorative Cuff Using the Burrito Method
- 8 Common Beginner Mistakes to Avoid
- 9 Cost Breakdown: DIY vs Store-Bought in the US
- 10 Caring for Your Handmade Pillowcase
- 11 Next Sewing Projects for Beginners
- 12 Final Thoughts
What You Need to Sew a Pillowcase
Most beginners already own part of the supply list. The remaining tools are inexpensive and easy to find in American craft stores or online retailers.
Essential Sewing Supplies
For one standard pillowcase, gather these materials:
- 1 yard of 100% cotton quilting fabric
- Matching thread
- Sewing machine (optional but much faster)
- Fabric scissors or rotary cutter
- Measuring tape or quilting ruler
- Straight pins or sewing clips
- Iron and ironing board
- Universal sewing machine needle size 80/12
Beginner-Friendly US Brands
Several sewing brands dominate the beginner market in the United States because they’re affordable and widely available.
| Tool | Recommended Brands | Notes |
|---|---|---|
| Sewing Machine | Singer, Brother | Brother CS7000X feels easier for beginners, while Singer Heavy Duty models handle thicker fabrics well |
| Scissors | Fiskars | Sharp blades reduce frayed edges dramatically |
| Pins | Dritz | Easy to find at Joann or Walmart |
| Fabric | Joann Fabrics, Hobby Lobby | Quilting cotton offers the easiest learning curve |
| Thread | Coats & Clark, Gutermann | Cheap thread tends to break more often |
One thing that catches beginners off guard: thread quality actually matters more than expected. Low-quality thread creates lint buildup and skipped stitches. It’s a small upgrade that changes the entire sewing experience.
Pro Tip for First-Time Sewers
Choose 100% cotton quilting fabric.
Quilting cotton behaves predictably. It doesn’t stretch around while sewing. It presses cleanly with an iron. And it feeds smoothly through beginner machines like the Singer Heavy Duty 4452 or Brother CS7000X.
Silky fabrics look beautiful online but frustrate beginners almost immediately. Fabric sliding off the table at midnight is a very real sewing experience.
Understanding Standard US Pillow Sizes
Pillow sizes in the United States follow standardized dimensions. Sewing with those measurements ensures that handmade pillowcases fit inserts sold at stores like IKEA USA, Amazon US, Walmart, and Target.
Common US Pillow Dimensions
| Pillow Size | Measurement |
|---|---|
| Standard | 20 x 26 inches |
| Queen | 20 x 30 inches |
| King | 20 x 36 inches |
Most sewing patterns in the US include a ½-inch seam allowance. That extra fabric creates room for stitching without shrinking the finished size too much.
Without seam allowance, pillowcases end up too tight. And tight pillowcases fight back. Corners strain. Seams pull. Fabric wears out faster around stress points.
Why Accurate Sizing Matters
A pillowcase that’s even one inch too narrow can feel awkward during use. The pillow bunches inside instead of laying flat.
In practice, beginner sewing projects succeed more often when measurements stay simple and standardized. Following common US dimensions removes a huge amount of guesswork.
Choosing the Right Fabric for Beginners
Fabric selection changes the entire sewing experience. Some fabrics cooperate. Others behave like stubborn wrapping paper.
For beginners, medium-weight cotton fabrics create the smoothest learning curve.
Best Fabrics for Beginner Pillowcases
- Cotton quilting fabric
- Cotton flannel
- Cotton-poly blends
Cotton quilting fabric remains the easiest option overall because it cuts cleanly and presses sharply.
Cotton flannel works especially well in colder states like Minnesota, Colorado, or Maine during winter months. Flannel pillowcases feel warmer immediately, though they produce more lint during sewing.
Cotton-poly blends wrinkle less after washing. That convenience appeals to many beginners, especially in busy households where ironing pillowcases every week sounds exhausting.
Fabric Weight Matters More Than Beginners Expect
Very thin fabrics shift while cutting.
Very thick fabrics create bulky seams.
Medium-weight fabric sits comfortably in the middle. It feeds evenly through most domestic sewing machines and forgives small mistakes.
That’s why quilting cotton dominates beginner sewing tutorials across YouTube and Pinterest.
Seasonal Prints Add Personality
Holiday-themed pillowcases are wildly popular in American DIY communities.
Thanksgiving pumpkins. Christmas plaids. Fourth of July stars. Halloween ghosts.
Seasonal sewing projects tend to feel more rewarding because they become part of home décor almost immediately. Fabric stores know this too, which explains the endless themed aisles every September and October.
How to Measure and Cut Fabric Correctly
Accurate cutting prevents a surprising number of sewing problems later.
Crooked cuts create twisted seams. Uneven edges create puckering. Tiny measurement errors multiply by the time hemming begins.
Standard Pillowcase Cutting Formula
For one standard pillowcase:
- Cut 1 rectangle measuring 27 x 41 inches
This measurement already includes seam allowance.
Step-by-Step Cutting Tips
- Wash and dry fabric before cutting.
- Iron fabric flat.
- Lay fabric on a large, flat surface.
- Measure carefully using a quilting ruler or measuring tape.
- Cut slowly using fabric scissors or a rotary cutter.
Prewashing matters because cotton shrinks. A lot, sometimes. Roughly 3% to 5% shrinkage is common after the first wash.
Skipping that step creates a frustrating moment later when the finished pillowcase suddenly fits tighter than expected.
Rotary Cutter vs Fabric Scissors
| Tool | Advantages | Drawbacks |
|---|---|---|
| Rotary Cutter | Cleaner lines, faster cuts | Requires cutting mat |
| Fabric Scissors | Lower startup cost | Harder to keep perfectly straight |
Rotary cutters often feel intimidating at first, but many beginners end up preferring them after one or two projects because the edges look dramatically cleaner.
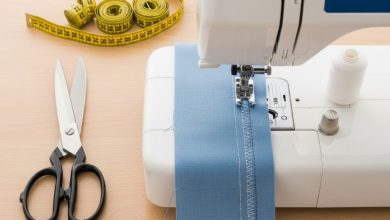
How to Sew a Basic Pillowcase
This beginner method uses straightforward seams and minimal complexity.
Step 1: Fold the Fabric
Fold the fabric lengthwise with the right sides together.
The “right side” refers to the patterned or finished side of the fabric.
At this stage, the fabric resembles a large folded rectangle with the printed side hidden inside.
Step 2: Pin the Edges
Pin along:
- One long edge
- One short edge
Leave one short edge open for inserting the pillow later.
Pinning keeps fabric layers aligned while sewing. Clips work too, especially for beginners who dislike accidentally stabbing fingers every seven minutes.
Step 3: Sew the Seams
Using a sewing machine:
- Sew with a ½-inch seam allowance
- Backstitch at the beginning
- Backstitch at the end
Backstitching locks the seam so it doesn’t unravel during washing.
Straight stitching looks easier than it actually is at first. Most beginners drift slightly left or right while sewing. That’s normal. Watching the seam guide instead of the needle usually improves stitch accuracy almost immediately.
Step 4: Finish the Raw Edges
Raw fabric edges fray over time.
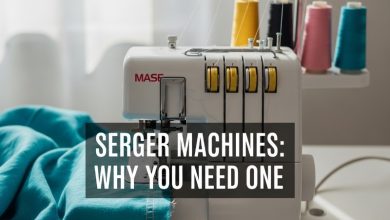
To prevent unraveling, finish the seams using one of these methods:
- Zigzag stitch
- Pinking shears
- Serger
A zigzag stitch works perfectly well for beginner projects. Sergers create cleaner finishes but cost significantly more.
Step 5: Turn the Pillowcase Right Side Out
Gently turn the fabric right side out through the open end.
Push corners outward using a blunt tool like:
- Chopsticks
- Point turners
- Pencil erasers
Sharp objects can poke holes through fabric corners. And yes, that tends to happen right after finishing the final seam.
How to Hem the Open Edge
The hem creates the polished top edge of the pillowcase.
Without a hem, the opening looks unfinished and frays after repeated washing.
Simple Hemming Instructions
- Fold the edge inward ½ inch.
- Press with an iron.
- Fold again 2–3 inches.
- Press once more.
- Sew straight across the folded edge.
Pressing between folds improves accuracy dramatically.
This step feels tedious at first, but ironing separates homemade-looking projects from clean professional finishes. Fabric behaves better after heat and steam. Seams flatten. Edges sharpen. Measurements stabilize.
That’s the part many beginners discover halfway through sewing instead of at the beginning.
Optional: Add a Decorative Cuff Using the Burrito Method
The burrito method sounds strange but creates polished pillowcases with enclosed seams.
And honestly, it looks impressively professional.
Why Beginners Love Decorative Cuffs
Decorative cuffs add:
- Contrast fabric
- Coordinated colors
- Boutique-style finishes
- Holiday-themed accents
Many pillowcases sold in home décor stores use this same visual style.
Pinterest and YouTube sewing communities popularized the burrito method because it hides raw seams inside the cuff. The finished result looks crisp and intentional without requiring advanced sewing skills.
What Actually Happens in the Burrito Method
The main pillow fabric rolls inside the cuff fabric before sewing.
After stitching, the fabric pulls through like turning a burrito inside out. The process feels oddly magical the first time it works correctly.
It’s slightly more advanced than a basic pillowcase, though still beginner-friendly after one practice attempt.
Common Beginner Mistakes to Avoid
Every sewing beginner makes mistakes. Usually several in one afternoon.
That’s part of learning fabric behavior and machine control.
Frequent Pillowcase Sewing Errors
- Forgetting to prewash fabric
- Ignoring seam allowance
- Skipping ironing
- Using dull needles
- Pulling fabric while sewing
Pulling fabric creates stretched seams and uneven stitches. Sewing machines feed fabric automatically. Hands guide lightly rather than force movement.
Beginners also underestimate how quickly needles wear out. A dull needle causes skipped stitches and fabric snags long before it visibly looks damaged.
Needle Recommendation for Quilting Cotton
Use a universal size 80/12 needle.
This needle size handles most medium-weight cotton fabrics cleanly without punching oversized holes into the material.
Cost Breakdown: DIY vs Store-Bought in the US
Handmade pillowcases cost less than many retail options, especially when sewing multiple pieces from coordinating fabrics.
DIY Pillowcase Costs
| Item | Average Cost |
|---|---|
| 1 Yard Cotton Fabric | $6–$12 USD |
| Thread | $3–$5 USD |
| Total Project Cost | Roughly $10–$15 USD |
Store-Bought Pillowcase Costs
| Type | Average Price |
|---|---|
| Basic Retail Pillowcase | $15–$30 USD |
| Designer Pillowcase | $40+ USD |
Now, price isn’t the only difference.
Store-bought pillowcases prioritize mass production and broad appeal. Handmade versions allow exact fabric choices, seasonal themes, softer flannels, or oversized hems that fit personal preferences better.
That customization becomes surprisingly addictive.
Many beginners start with one pillowcase and suddenly end up sewing matching sets for guest rooms by December.
Caring for Your Handmade Pillowcase
Handmade pillowcases last longer when washed gently.
Pillowcase Care Instructions
- Machine wash cold
- Tumble dry low
- Avoid excessive heat
- Remove promptly from dryer
High dryer temperatures shrink cotton and fade printed fabrics faster over time.
Most cotton pillowcases last between 1 and 2 years with regular washing and normal household use.
Flannel pillowcases usually soften after repeated washes, which many people actually prefer. Quilting cotton tends to become more flexible too after several laundry cycles.
Next Sewing Projects for Beginners
After completing a pillowcase, beginner sewing projects start feeling far less intimidating.
Straight seams become easier. Measuring speeds up. Fabric handling improves naturally through repetition.
Good Beginner Projects After Pillowcases
- Envelope pillow covers
- Drawstring bags
- Table runners
- Holiday gift sets
- Simple tote bags
Small home décor projects build sewing confidence quickly because they skip complicated garment fitting issues.
That matters.
The point where most beginners quit sewing often arrives during difficult clothing projects with confusing sizing instructions. Home décor sewing avoids much of that frustration while still teaching foundational skills.
Final Thoughts
Sewing a pillowcase teaches nearly every foundational sewing skill in one approachable project.
You learn:
- Measuring
- Cutting
- Straight stitching
- Hemming
- Seam finishing
- Fabric handling
And unlike many beginner crafts, the finished result becomes immediately useful.
For beginners in the United States, pillowcases remain one of the smartest first sewing projects because the materials are affordable, the measurements are standardized, and the sewing process stays manageable even on basic machines.
A straight line really is enough to get started.
The rest develops through practice, a few crooked seams, and probably at least one late-night moment spent untangling thread from the bobbin area.