A sewing machine rarely complains all at once. First, the sound changes. Then the stitching feels a bit draggy. Then the whole thing starts acting older than it is. That pattern shows up in sewing rooms everywhere, especially when a machine gets used every week for hemming, mending, quilting, or filling Etsy orders late at night.
Oiling is one of those small maintenance jobs that looks optional until friction starts winning. Dust, lint, and dry metal parts create resistance fast, and that resistance turns into noise, heat, skipped stitches, and wear. In many parts of the United States, a standard sewing machine service often lands around $90 to $150, depending on the brand, model, and repair shop [1]. A few drops of proper sewing machine oil can prevent some of that trouble before it starts.
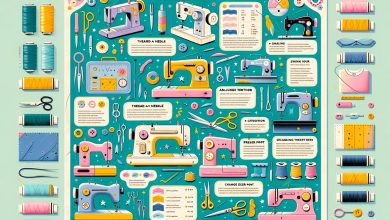
This guide explains how to oil a sewing machine safely and correctly. The process fits many home machines from Singer, Brother, Janome, Juki, and Bernina, although oiling points vary by model. The manual comes first, every time.
Contents
- 1 Why Oiling Your Sewing Machine Matters
- 2 Check Your Manual First
- 3 Tools You Need Before You Start
- 4 Step-by-Step: How to Oil a Sewing Machine
- 5 How Often Should You Oil a Sewing Machine?
- 6 Common Mistakes to Avoid
- 7 Signs Your Sewing Machine Needs Oil
- 8 When to See a Professional Technician
- 9 Conclusion
- 10 References
Why Oiling Your Sewing Machine Matters
Sewing machines run on motion, and motion creates friction. Inside the machine, metal parts move against other metal parts at speed. The hook race rotates or oscillates. The needle bar cycles up and down. The presser foot bar and feed mechanism keep time with everything else. When those parts run dry, the machine doesn’t simply get louder. It gets stressed.
Lubrication reduces friction between moving metal surfaces. That reduction matters because friction creates heat, and heat increases wear on parts that are meant to move smoothly in tight alignment. A well-oiled machine usually runs quieter, forms stitches more consistently, and places less strain on the motor.
For home sewists, the difference often shows up in ordinary moments:
- Denim hems feed more evenly because the machine isn’t fighting dry resistance.
- Cotton quilting lines stay more consistent because the hook race moves cleanly.
- Long sewing sessions feel steadier because the motor doesn’t sound like it’s pushing uphill.
That’s the practical side of sewing machine care. The technical side is just as important. Manufacturers such as Singer, Brother Industries, Janome America, Juki Corporation, and Bernina design domestic machines with specific moving parts that either need periodic lubrication or are sealed and self-lubricating [2]. That distinction changes everything, which leads straight to the manual.
Check Your Manual First
Before a single drop of oil goes anywhere near the machine, check the owner’s manual.
That advice gets repeated for good reason. Some modern machines are self-lubricating. Some have one oiling point. Some have several. Some older mechanical models welcome routine oiling, while many computerized machines need much less user maintenance than people assume. A machine that looks similar on the outside can behave very differently inside.
Models such as the Singer Heavy Duty 4452, Brother CS6000i, Janome HD3000, Juki HZL series, and Bernina 530 each have their own maintenance instructions. The lubrication diagram, cleaning schedule, and warranty notes matter more than any generic article.
In practice, three details deserve attention:
- Oiling points vary by model. The hook race may be the only user-accessible point, or there may be additional metal joints listed in the manual.
- Warranty coverage can depend on proper maintenance. Unapproved oils or incorrect servicing may create problems later.
- Some machines are designed to need less oil, not more. Overdoing it is a common mistake.
Most major brands provide manuals on their official websites, including Singer, Brother, Janome, Juki, and Bernina [2]. That’s worth a few minutes. A vague memory of “all sewing machines need oil” causes more trouble than neglect sometimes does.
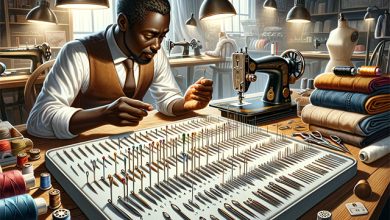
Tools You Need Before You Start
The supply list is short, which is part of the appeal. This is not a full teardown. It’s a focused maintenance job.
You’ll need:
- Clear sewing machine oil
- A small screwdriver, if the needle plate or cover needs removal
- A lint brush
- A soft, clean cloth
- Tweezers for trapped thread or lint
- Scrap fabric for testing afterward
Only use oil made for sewing machines. Products such as Singer Sewing Machine Oil, Dritz Sewing Machine Oil, or a fine applicator like a Zoom Spout Oiler are built for this purpose. WD-40 is not sewing machine oil. Household oils are not sewing machine oil. Cooking oil is an especially grim idea, even though somebody tries it every year.
Here’s where the difference matters.
Clear sewing machine oil is a light mineral oil designed to lubricate metal parts without turning gummy under normal use. General-purpose sprays can leave residue, attract dirt, or break down in ways that create sticky buildup. That sticky film mixes with lint, and then the machine starts collecting grime exactly where smooth movement matters most.
Quick Comparison of Common Products
| Product type | What it does well | Where it goes wrong | Practical difference |
|---|---|---|---|
| Sewing machine oil | Lubricates metal moving parts cleanly | Needs careful, light application | Best choice for routine home maintenance |
| WD-40 or penetrating spray | Loosens rust or stuck hardware in non-sewing contexts | Leaves residue and isn’t designed as long-term sewing lubricant | Causes mess and attracts more buildup |
| Household oil | Easy to find | Can gum up internal parts over time | Looks convenient, ages badly |
| Too much of the right oil | Temporarily makes parts slick | Spreads into unwanted areas and stains fabric | A good product still creates problems when overused |
That’s the annoying truth of machine maintenance: the right product helps only when the amount is right too.
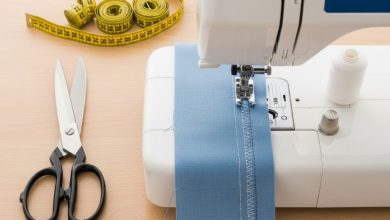
Step-by-Step: How to Oil a Sewing Machine
The safest process is simple, slow, and a little boring. That’s usually a good sign.
Unplug and Clean the Machine
Start by turning the machine off and unplugging it. Remove the needle and presser foot if the manual recommends it or if access is tight. Open the bobbin area, take out the bobbin and bobbin case if your model allows it, and brush out lint from the compartment.
A lint brush works better than blowing into the machine. Blowing tends to push debris deeper into the mechanism. Tweezers help with thread nests caught near the feed mechanism or around the needle plate.
Pay close attention to these spots:
- The bobbin compartment
- The hook area
- The feed dogs
- Under the needle plate
- Around the thread path near the lower mechanism
This cleaning step matters as much as the oil itself. Oiling over lint creates sludge, not maintenance.
Apply Oil to the Hook Race
Once the area is clean, locate the oiling point named in the manual. On many home machines, that point is the hook race, which is the circular metal track where the hook moves around the bobbin area.
Add 1 to 2 drops only. That’s enough for most domestic models.
Focus on metal moving parts. Avoid plastic gears unless the manual specifically tells you otherwise. Many people assume more oil means better protection, but that’s not how sewing machines behave. Excess oil travels. It reaches fabric. It mixes with lint. It creates exactly the sort of residue that later gets blamed on “old machine problems.”
For front-loading and top-loading bobbin systems, the exact placement differs slightly, but the principle stays the same: oil the friction surface where metal moves against metal.
Useful places often include:
- The hook race
- A visible metal shaft or joint listed in the manual
- A designated lubrication point marked by the manufacturer
Useful places do not include random internal parts that merely look dry.
Run the Machine to Distribute Oil
After oiling, turn the handwheel manually a few times. That starts distributing the oil through the moving parts without immediately pushing the machine to full speed.
Then reassemble the machine if needed and run it without thread for 20 to 30 seconds. A few slow starts help. Wipe away any visible excess oil with a soft cloth. After that, stitch on scrap fabric before touching a real project.
That test fabric step catches the two things most likely to show up after oiling:
- Extra oil that could transfer onto fabric
- Temporary stitch irregularity while the machine settles back into motion
A pale scrap of cotton works well because oil spots show clearly. White or cream fabric tells the truth fast.
How Often Should You Oil a Sewing Machine?
Usage matters more than the calendar, although rough timing helps.
For many home machines, this schedule works as a starting point:
- Light use: every 3 to 4 months
- Weekly sewing: about once a month
- Heavy projects: more often, especially with quilting cotton, canvas, denim, or dense seams
- Before major seasonal sewing: a quick check before holiday runs, including Thanksgiving crafts or Christmas gifts
That said, “how often” isn’t perfectly linear. A machine used once a week for light garment sewing may stay cleaner than a machine used twice a month for thick quilt sandwiches and lint-heavy flannel. Fabric type changes the equation. So does project volume.
A small home business also shifts the schedule. Machines used for Etsy orders often rack up more hours than their owners realize because short sewing sessions add up. A machine that gets threaded every day, even for 20 minutes, usually needs more attention than one long Saturday session once a month.
Practical signs that your schedule is too long
- The machine sounds sharper or drier than usual
- Stitching starts to feel less fluid
- The handwheel turns with more resistance
- Lint builds up faster than expected in the bobbin area
Those are not dramatic warnings. That’s part of the problem. Sewing machines tend to decline by inches, not miles.
Common Mistakes to Avoid
Machine damage often starts with good intentions.
Using the wrong oil
This is the big one. Household oils and multi-use sprays leave residue that can gum up internal parts. A clean-looking machine can still develop sticky buildup where metal gears and moving joints need clean motion.
Over-oiling
A domestic machine does not need a bath. One or two drops at the right spot usually does more than a puddle spread around the bobbin area. Over-oiling leads to stains, grime, and wasted cleanup.
Skipping the cleaning step
Oil and lint make a miserable combination. If the bobbin case area is packed with fuzz, adding oil first just creates a paste that collects more debris.
Oiling plastic parts
Most user oiling points involve metal-on-metal contact. Plastic gears often don’t need oil, and applying it anyway can create mess without improving performance.
Ignoring strange noises
A squeak or grinding sound doesn’t always mean “add oil and carry on.” Sometimes it points to timing issues, motor strain, a worn drive belt, or a deeper mechanical problem. Oiling can help dryness. It won’t fix everything.
A few useful observations from regular sewing-room reality:
- Quiet machines can still be dirty.
- Loud machines are not always dry.
- Fresh oil can hide a bigger issue for a little while, which is sometimes worse than no oil at all.
Signs Your Sewing Machine Needs Oil
A machine usually gives clues before it gives up.
The most common signs include squeaking, slower stitching, extra vibration, thread bunching near the bobbin area, and a needle that runs hotter than usual after extended sewing. Those symptoms show up across many domestic lines, including models in the Singer Heavy Duty series, Brother CS series, Janome Magnolia range, Juki TL series, and Bernina Activa family.
None of those signs proves that lubrication failure is the only cause. Thread tension, lint buildup, dull needles, or incorrect threading can create similar symptoms. Still, dryness tends to leave a particular feel behind. The machine sounds harsher. The motion loses that smooth, almost gliding quality.
A simple before-you-panic check
- Clean the bobbin area
- Replace the needle
- Re-thread the machine
- Check the manual for the correct oiling point
- Test on scrap fabric
That sequence solves more problems than people expect. Not every weird stitch needs a repair bench.
When to See a Professional Technician
Some issues are beyond routine home care, and that’s completely normal.
Annual servicing makes sense for many home machines, especially if they’re used heavily or stored in dusty conditions. In the United States, general sewing machine service often falls in the $90 to $150 range, with higher costs for timing adjustments, electrical issues, or vintage restoration work [1]. Authorized service centers from Singer, Brother, Janome America, Juki America, and Bernina of America can also protect warranty coverage for newer machines.
Professional attention is worth it when:
- The machine still squeaks after cleaning and correct oiling
- Stitches remain irregular despite re-threading and needle changes
- The motor sounds strained
- The handwheel feels stiff or catches
- Timing seems off
- A vintage machine needs deep cleaning, restoration, or internal inspection
Vintage machines are their own category. Many older all-metal models tolerate regular oiling beautifully, but age brings other issues too: hardened grease, worn belts, tired wiring, and alignment problems that don’t show from the outside. That kind of machine can go from charming to temperamental fast.
Conclusion
A sewing machine runs better when maintenance stays small and consistent. Oiling helps reduce friction, control heat, protect moving metal parts, and keep stitches more even. The process itself is straightforward: check the manual, clean out the lint, add a drop or two in the correct place, run the machine briefly, and test on scrap fabric.
That rhythm keeps things quieter. It also keeps minor issues from turning into expensive ones. For most home sewists, that’s the real value. Not perfection. Just a machine that starts when needed, sounds right, and keeps sewing without the extra drama.
References
[1] General U.S. sewing machine service pricing commonly listed by local repair shops and maintenance providers.[2] Manufacturer care and maintenance guidance from official owner’s manuals and support pages for Singer, Brother, Janome, Juki, and Bernina.