You know, when I first started sewing—way back when patterns came folded inside thick envelopes and you’d measure everything twice with a chalk wheel—I never imagined it’d become one of my favorite things to teach kids. But here we are. And honestly? Sewing is one of the best activities you can introduce to kids today.
Why? Well, for starters, it gives them something screen-free to do (huge win, right?). But it’s more than that. Sewing helps build fine motor skills, strengthens hand-eye coordination, and taps into that boundless kid creativity that thrives on things like felt fabric, safe scissors, and maybe a little fabric glue when the needle gets tricky.
I’ve seen it over and over—kids lighting up as they finish their first stitch, proudly showing off lopsided hearts or slightly wobbly pillows. Beginner sewing kits are getting better too, designed with little hands in mind, and with the right parental supervision, even threading the needle becomes part of the fun.
So if you’re looking for easy sewing for kids, or just a few fun sewing ideas to keep those hands busy and minds engaged, you’re in the right place. Let’s dive into some of my favorite beginner sewing projects and DIY craft ideas that are equal parts creative, calming, and—yep—kid-approved.
Contents
- 1 Why Kids Should Start Sewing Early
- 2 Sewing Safety 101 for Little Hands
- 3 Project 1: No-Sew Felt Animal Puppets
- 4 Project 2: Simple Hand-Sewn Pencil Case
- 5 Project 3: Stuffed Felt Heart or Star
- 6 Project 4: Mini Fabric Bookmark
- 7 Project 5: Sock Plushies – From Old Socks to Cute Toys
- 8 How to Keep Kids Engaged in Sewing
- 9 Final Tips for Parents and Teachers
Why Kids Should Start Sewing Early
Now, I’ve taught a lot of kids to sew over the years—some eager, some fidgety, a few just there for the snacks (let’s be honest). But every single time, I see something shift when they start stitching: they slow down, focus in, and surprise themselves. That’s the magic of sewing—it builds patience and concentration without them even realizing it.
In today’s world of endless screens and instant everything, giving kids something as tactile and focused as threading a needle through felt? It’s a game changer. I’ve watched kids who “can’t sit still” calmly sew for 40 minutes straight. Not because it’s forced—but because sewing draws them in. It asks for their attention, and gently rewards them for giving it.
More than just a fun craft, sewing develops real soft skills—spatial reasoning, fine motor coordination, and creative problem-solving. It blends art with structure, which is why it’s such a great addition to STEM activities and educational sewing projects. Plus, when they finish something they made with their own hands? You can see the boost in confidence. It’s real.
So if you’re wondering whether it’s “too early” to get your child stitching, I’d say—start simple, keep it safe (think safe craft tools and pre-cut felt), and let them surprise you. You might just catch them teaching you a thing or two.

Sewing Safety 101 for Little Hands
When I first started teaching sewing to kids (probably sometime around the early 2000s, back when puffy paint was still a craft box staple), I’ll admit—I was a little nervous about the sharp stuff. Sewing needles and tiny fingers aren’t always the best combo. But over the years, I’ve picked up a few solid strategies to keep things fun and safe.
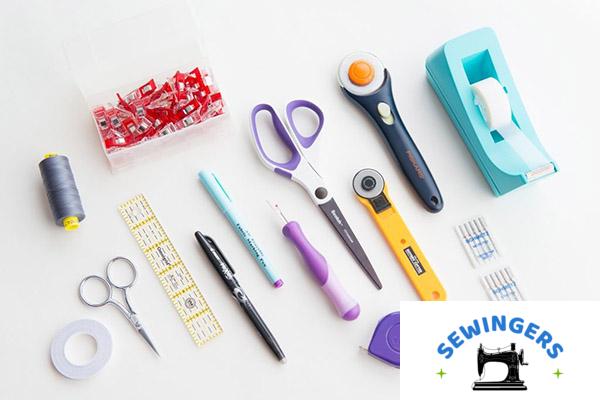
Start with age-appropriate tools. That means blunt needles, plastic safety scissors, and soft, forgiving materials like felt or fleece. Those beginner kits with child-safe sewing supplies? Honestly, they’re a lifesaver. No guessing, no rummaging around for makeshift tools—just open and go.
Now, here’s the thing: supervision is non-negotiable. Even with all the right tools, little hands need guidance—especially when they’re learning how to handle thread tension or use a crafting mat for cutting fabric. I’ve seen more than a few kids try to use sewing needles like pencils. (It never ends well.)
Project 1: No-Sew Felt Animal Puppets
If there’s one project I’ve returned to over the years—especially with the preschool crowd—it’s this one. No-sew felt animal puppets are pure magic. No needles, no fuss, just felt, fabric glue, and a big dose of imagination. And the best part? Kids can actually do most of it themselves.
Start with a few felt pieces—cut two matching hand-sized shapes (I usually go with a rounded oval or simple mitten shape). From there, let the fun begin. Add ears, tails, maybe a tiny tongue if you’re feeling bold. **Cats, dogs, bunnies—**they’re all fair game. The trick is to pre-cut your fabric shapes ahead of time (especially for littler ones), then lay everything out like a little felt buffet.
Glue on googly eyes, fabric scraps for noses, and even pipe cleaners for whiskers if you’ve got ’em. No thread, no pricked fingers—just good old-fashioned glue-on craft joy.
Project 2: Simple Hand-Sewn Pencil Case
Alright, if you’re looking for that aha! moment when a kid realizes, “Hey, I actually made something I can use,” this little project is gold. A simple hand-sewn pencil case teaches structure, introduces the running stitch, and gives kids something practical to show off at school. (And trust me—they will show it off.)
Start with two rectangles of cotton fabric—nothing too slippery. I usually go for 6×9 inches, but honestly, I’ve seen it done on scrap denim, canvas, even old pillowcases (upcycling for the win). Pin the right sides together, and stitch three sides using a basic running stitch—that’s your main lesson here. Keep the stitches spaced evenly if you can, but no stress if they’re a little wonky at first. That’s how they learn.
Now, here’s the thing: closures are optional. You can keep it super simple, or add a button fasten (with some backstitching for durability). Zippers are a bit trickier, but totally doable with older kids—or patient younger ones with help.
Project 3: Stuffed Felt Heart or Star
This one’s always a crowd-pleaser—especially around Valentine’s or Mother’s Day. Stuffed felt hearts (or stars) are a sweet intro to sewing plush shapes, and they make wonderful little DIY gifts. Kids love that they’re soft, squishy, and just the right size for hugging or gifting. And bonus? It’s the perfect project for introducing the blanket stitch.
Start with two identical shape templates—hearts and stars are both great, though I’ve seen some pretty creative versions over the years (one kid once did a dinosaur… not exactly easy, but hey, he was determined). Cut them out of felt fabric, then line the edges up and begin stitching around with needle and thread. I usually demo the blanket stitch, but for younger kids or beginners, a whipstitch does the trick just fine.
Before sealing it up, don’t forget to add your stuffing filler—polyester fiberfill works great, but I’ve also used cotton balls in a pinch. Keep it light and fluffy, just enough to give it that plush toy feel without overstuffing.
Project 4: Mini Fabric Bookmark
You know, for a project that takes maybe 15 minutes (tops), this little fabric bookmark has serious charm—and staying power. I started making these with kids years ago, mostly as a “filler” between bigger projects… but it turned out to be a favorite. Quick, cute, and useful? That’s a rare combo in the kids’ craft world.
Grab some fabric scraps—the brighter, the better. Quilting cotton works great, but I’ve also used old pajama bottoms and leftover ribbon trim (no shame in the scrap pile game). You can go for a simple rectangle, or fold a fabric triangle to make a corner bookmark that hugs the page. Either way, it’s a fun intro to textile crafts without needing perfect seams or fancy tools.
Kids can decorate with buttons, add a ribbon edge, or try a simple decorative stitch if they’re practicing hand sewing. There’s a ton of flexibility here, which I think is part of the appeal.
Project 5: Sock Plushies – From Old Socks to Cute Toys
You know that lonely sock hiding at the back of the drawer—the one whose partner vanished two laundry days ago? Don’t toss it. Turn it into a plushie. This is hands-down one of my favorite upcycled crafts for kids because it’s equal parts thrifty, creative, and a little goofy (in the best way).
Start with a clean, soft old sock—crew-length or ankle both work. Fill it with fabric stuffing or scrap yarn (I’ve even used cut-up T-shirt strips when we were out of filler), then shape it into whatever animal or creature your kid dreams up. A puppy, a monster, a three-eyed alien… it’s all fair game.
Use basic hand stitching to close the bottom and shape the body. Add toy eyes, ears from felt, and a little personality with thread or buttons. Attaching sewing toy limbs is a bit trickier, so I usually keep that part optional, especially with younger crafters.
How to Keep Kids Engaged in Sewing
If you’ve ever seen a kid light up after finishing their first stitched project, you know how rewarding it can be—but keeping that excitement going over weeks (or months) takes a little planning. What I’ve found is, when kids feel ownership over what they’re making, they stay curious longer—and that’s where the real magic happens.
Here are a few simple, hands-on ways to build long-term kids sewing habits:
- Let them raid your fabric stash. Seriously—even your weird scraps. Picking their own materials gives kids a creative spark and makes the project feel personal.
- Rotate themed projects. Try holidays, animals, seasons, or even food—I’ve done taco keychains and pumpkin coasters in the same month. Keeps it fresh.
- Use a “sewing journal.” Just a simple notebook where they sketch ideas, glue fabric swatches, or jot notes. It becomes part memory book, part progress tracker.
- Join an online sewing challenge or club. (With your guidance, of course.) There are safe, kid-friendly sewing communities out there, and the motivation from sharing work is huge.
Now, here’s the thing—consistency beats complexity. A tiny weekly project or even 10 minutes of stitching together goes a long way toward creating lifelong crafters.
Final Tips for Parents and Teachers
Now, here’s the honest truth: the best thing you can do is step back just enough. As someone who’s sat beside hundreds of little hands learning to thread needles (some upside-down, some backwards, all adorable), what I’ve found is—kids grow fastest when we guide, not take over.
Yes, the stitches will be crooked. The thread will knot. The felt might mysteriously end up stuck to someone’s sleeve. But that’s all part of it. Sewing isn’t just about the finished product—it’s about learning through doing. Or as one of my students once said, “I like it better when I mess up first. Then I get it right.”
Here’s what works, in my experience:
- Use “helper hands,” not “taking over hands.”
- Try phrases like “What do you think comes next?” or “Want to figure it out together?”
- And most importantly, celebrate every finished project, even if it’s held together with more glue than thread.
You’re not just teaching a craft—you’re nurturing creative independence, patience, and problem-solving. So take a breath, trust the process, and let their confidence (and their little fabric creations) take shape.