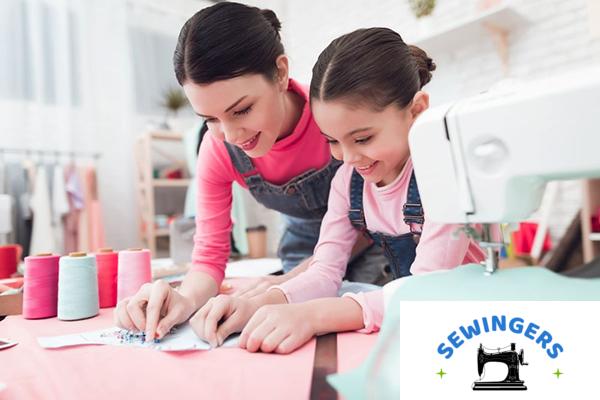
When I first handed my daughter a needle, I wasn’t thinking about childhood development or STEAM education. I just wanted a quiet afternoon together where we weren’t glued to screens. But you know what I discovered? Teaching kids to sew does a lot more than fill time — it quietly strengthens motor coordination, encourages creative problem-solving, and teaches the kind of patience I wish I’d had more of at her age.
You see, in a world so driven by digital everything, something as analog as threading a needle feels almost radical. And yet, more and more families in the U.S. — especially among the homeschooling crowd — are rediscovering sewing as both a life skill and a creative outlet. Platforms like Etsy and Pinterest are flooded with DIY kids crafts, and it’s not just about the end product. It’s the process — the tiny stitches, the mistakes, the sense of ownership — that seems to unlock something in them.
So if you’re wondering how to teach a child to sew without losing your mind (or your good fabric), these are the six tips that have actually worked in my home — often learned the hard way.
Contents
1. Choose the Right Tools and Fabric
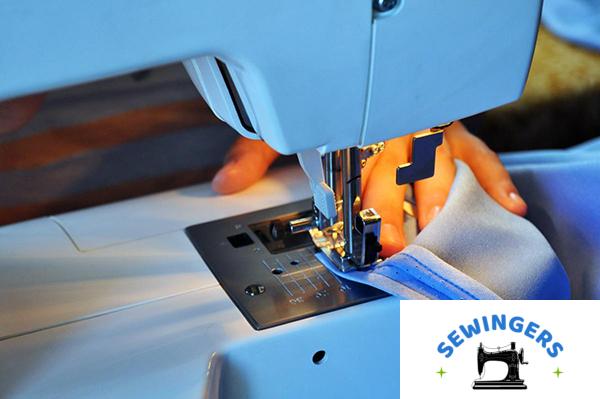
Now, I’ve made the mistake of handing over “real” sewing tools too early — tiny fingers, sharp needles, and grown-up scissors don’t mix well. What helped us was starting with children’s sewing kits designed for safety and simplicity.
Here’s what I keep on hand now:
- Blunt-tip needles (safer, but still effective on cotton)
- Safety scissors or kid-friendly fabric scissors
- Pre-cut cotton squares in fun prints (easy to handle, less slippery)
- A simple needle threader (trust me, it saves time)
I usually pick up fabric and starter supplies from JOANN or Michaels, where they often have bundles made specifically for kids. And we go over a few ground rules every time: needles go back in the pin cushion, scissors stay flat when not in use, and no running with thread (it has happened).
2. Begin with Easy, Fun Projects
The first project my son ever finished was a lopsided beanbag, and you would’ve thought he sewed a quilt for the Queen. The key? It was his idea, and it was simple enough to finish in one sitting.
Projects I come back to:
- Beanbags (great for hand-stitching practice)
- Drawstring bags (useful, giftable, not too fiddly)
- Bookmarks (quick win with felt or scrap fabric)
What I’ve found is that tying projects to real-life events helps. One October, we made Halloween costume accessories—nothing fancy, just felt capes and fabric cuffs. But suddenly, sewing had a purpose. That’s what kept them coming back.
For more beginner-friendly ideas, the American Sewing Guild has a few downloadable patterns for kids.
3. Teach One Skill at a Time
This one took me a while to grasp. I used to throw too much at them — pinning, stitching, turning inside out — all in one go. Not surprisingly, they’d check out halfway through.
Now I break it down:
- Start with threading a needle (it’s like a mini motor skills game)
- Practice straight lines before attempting curves
- Introduce one stitch at a time — usually the running stitch, then backstitch later
We’ll sometimes spend a whole week just stitching along lined paper to mimic fabric. Sounds boring, but it actually becomes a little meditative. (For both of us.)
If you’re not sure where to begin, Threads Magazine has a great visual guide on beginner hand stitches that’s been helpful.
4. Create a Dedicated Sewing Space at Home
I used to clear off the kitchen table each time, but the setup/cleanup killed the momentum. Once we carved out a little sewing corner — nothing fancy, just a desk from IKEA and some storage bins — things clicked.
Here’s what worked:
- Labeled bins for thread, fabric scraps, tools (they love organizing their own stuff)
- A corkboard with finished pieces or project ideas
- Clear containers from Target for visibility (less digging, less mess)
And yes, we’ve got glitter glue stains and threads in the carpet — but it feels like their space, and that changes everything.
5. Make It Visual and Hands-On
My youngest is six, and she learns best when things come alive. I once explained the running stitch for ten minutes with zero results — but the moment I said, “Imagine the needle is a little bunny hopping in and out of a tunnel,” she got it.
Here’s what’s helped:
- Printing out stitch diagrams with bold colors
- Using YouTube sewing tutorials made specifically for kids (like the ones from Made By Mommy)
- Turning mistakes into stories (“Uh-oh, the thread took a wrong turn!”)
For kids under eight, I’ve found story-based teaching really helps it stick — it makes the process feel playful instead of technical.
6. Praise Progress, Not Perfection
This one’s hard, especially if you’re someone who sews regularly. You see the crooked seams, the uneven tension — but they don’t. And they shouldn’t, not yet.
Instead, I try to focus on things like:
- “I love how you finished that without giving up.”
- “That thread color you chose is so creative.”
- “Wow, look how neat your stitches are compared to last week.”
We’ve also started using a little “progress board” — a pinboard with before/after swatches. It gives them a visual sense of how far they’ve come, which builds real, grounded confidence.
If you’re curious about why this matters, Harvard’s Center on the Developing Child has great research on how praising effort supports long-term learning.
Comparison Table: Tools I Used Then vs. What I Use Now
| Item | What I Started With | What I Use Now (and Why) |
|---|---|---|
| Needles | Adult sharps | Blunt-tip embroidery needles — less finger pokes |
| Scissors | My sewing shears | Plastic safety scissors — prevents fabric snags |
| Fabric | Slippery remnants | Pre-washed cotton squares — easier to grip |
| Thread | Whatever was nearby | Thicker embroidery floss — fewer tangles |
| Work Surface | Kitchen table | Dedicated sewing table — no more rushed cleanups |
Final Thoughts
What I’ve learned — sometimes the hard way — is that kids learning to sew don’t need perfection or polish. They need momentum. A sense that this is theirs, not just a grown-up task they’ve been roped into.
And yes, there will be knots. Tangled bobbins. Tears over a misplaced patch. But if you can step back and let the process unfold — with some gentle scaffolding — the result is more than a finished project. It’s a kid who’s learned how to figure things out with their own two hands. That’s worth more than any straight seam, if you ask me.
Sources Referenced:
- Harvard Center on the Developing Child – The Science of Early Learning
- Threads Magazine – Beginner Hand Stitches
- American Sewing Guild – Resources for Young Sewists
Let me know if you’d like me to share the printable stitch templates or the exact supplies I use. I’m happy to dig them up from the bin under my sewing desk.